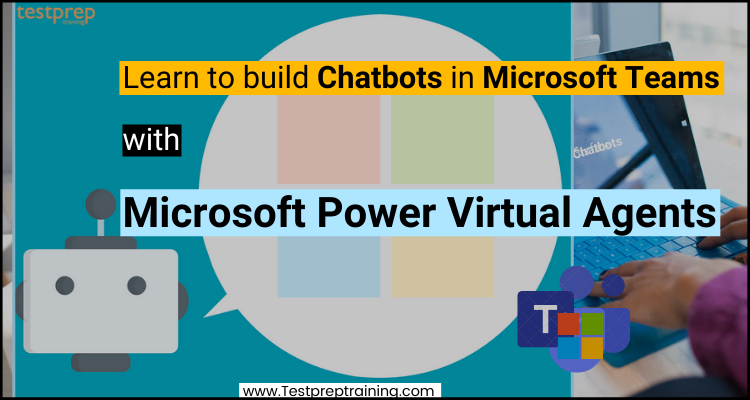
Nowadays Microsoft’s name itself defines the level of technology and the latest solutions that provide to easily perform tasks related to all areas. And, again with empowering everyone, Microsoft came up with Power Virtual Agents. For easily creating intelligent chatbots with having the ability to rapidly respond to customers and employees, Microsoft Power Virtual Agents offers solutions to many top organizations without any need for coding.
You can create complex, AI-powered chatbots that can fix common issues and answer queries around the clock with Microsoft Power Virtual Agents. Further, to get more into this, we will understand the Microsoft Power Agents more accurately by learning the process of creating chatbots in Microsoft teams. But, before that let.s take a quick look at the overview of Power Virtual Agents.
What are Microsoft Power Virtual Agents?
Power Virtual Agents helps in constructing intelligent chatbots that can answer queries from customers, other workers, or website or service visitors. Without the help of big data scientists or engineers, these bots may be constructed quickly. However, Power Virtual Agents bots have been utilized in a variety of ways, including:
- Firstly, in infection rate and monitoring data for COVID-19
- Secondly, sales help and support issues
- Thirdly, for opening hours and store information
- Next, related to employee health and vacation benefits
- Lastly, common employee questions for businesses
Uses for Power Virtual Agents:
Microsoft Teams app
Consider:
- Firstly, you’re an employee or part of a team who wants to build chatbots to answer frequent inquiries presented by coworkers or colleagues.
- Secondly, you want to use complex ideas like entities and variables in your chatbot, but you also want it to be accessible internally.
- Lastly, you want to build and distribute a chatbot as quickly as possible.
Features of Power Virtual Agents
The Microsoft Power Virtual Agents is responsible for providing solutions using its unique features. Some of them are:
1. Easily creating your own chatbots
With an easy-to-use graphical interface, you can create and manage complex chatbots without needing to know any coding or AI.
2. Taking action
Integrate your chatbots with the products and services you use on a daily basis easily. Lookup records, customize chats, pass calls to live agents, and use APIs. Moreover, choose from hundreds of prebuilt connections, use Power Automate to develop customized processes, or use Microsoft Bot Framework to create complicated scenarios.
3. Creating smarter bots
Get recommendations on which subjects to build, use natural language understanding and entity extraction to create rich, customized chats, and use AI and data-driven insights to monitor and optimize your chatbot’s performance.
4. Empowering employees, one chat at a time
Change the way your company interacts with its employees. That is to say, within Microsoft Teams, provide them the tools to simply construct chatbots and swiftly automate frequently asked inquiries and common business procedures.
Moving on, in the next section, we will understand the role of Power Virtual Agents in Microsoft teams and how to create a chatbot in the same.
Power Virtual Agents app in Microsoft Teams: Getting started
Power Virtual Agents is available in the Microsoft Teams app that allows you to simply develop your own chatbots that respond to inquiries provided by other employees or team members. However, you may download the Power Virtual Agents app from the Microsoft Teams app store and use it to design, write, test, and publish your bot straight within Microsoft Teams.
Further, the following are some circumstances in which you might wish to use Microsoft Teams to construct a Power Virtual Agents chatbot:
- Firstly, someone in payroll designs a chatbot to assist coworkers in obtaining tax forms and information.
- Secondly, a bot is created by a human resources (HR) staff to answer queries regarding vacation balance, time off, and benefits.
- Lastly, a finance department employee designs a chatbot to assist their colleagues in the finance department in filling out expenditure reports.
However, taking an example from the above scenarios, let’s create a chatbot in Microsoft teams.
Creating and deploying a Power Virtual Agents bot in Teams
With built-in natural language processing and a no-code graphical interface, anybody in the business can create chatbots with Power Virtual Agents. You can now build, author, test, and publish your bot into Teams directly from the Microsoft Teams interface because of the new Teams integration.
However, when developing chatbots, you must consider a variety of factors, including the kind of questions that may be asked, the many methods in which they may be asked the question, and the appropriate response. Consider whether the person has any follow-up questions or concerns.
Scenario:
- You operate for Contoso HR and need to create a Microsoft Teams human resources (HR) assistance bot.
- Secondly, this bot will provide appropriate information from the company’s internal knowledge base to answer typical HR inquiries, such as those on time off.
- Thirdly, the bot may also call human HR specialists to alert them when an employee requires assistance in unusual circumstances.
- Lastly, Contoso employees will be able to access HR information on Microsoft Teams without having to browse the company’s intranet once this bot is deployed.

Creating and publishing a bot
Installing the Power Virtual Agents app in Microsoft Teams
- To begin, open Microsoft Teams and activate the Power Virtual Agents app:
- Firstly, look for power virtual agents in the Microsoft Teams app store. There you will find Power Virtual Agents app from Microsoft Corporation.
- Secondly, choose the Power Virtual Agents app and then Add for me.
- Lastly, the app has been added to the side navigation bar in Teams, and it directs you to the Power Virtual Agents Home page. Microsoft Teams users may use this site to build bots without leaving the Microsoft Teams interface.
Creating a new bot in a team
- Firstly, choose Start now from the Home page.
- Secondly, select the team you want the bot to be managed by. Since you are a Contoso HR employee, let’s make the bot in the Contoso HR Team. If required, you can form a new team before adding a bot to it.
- Thirdly, in the bot creation box, type the bot’s name and language. For the name, we’ll go with HR Support Bot. The default language is that of the Teams client, however, you may change it if you desire.
- Lastly, select Create.

Now that the bot has been formed, we can begin adding stuff to it.
Creating an employee time-off topic for common time-off queries
A bot comes with a set of topics that dictate how it interacts with customers. In Power Virtual Agents, the foundation of creating a bot is to create subjects that can answer various customer inquiries. Let’s create a topic to address employee concerns regarding vacation time.
- Firstly, on the top menu bar select + New topic for creating a new topic.
- Secondly, choose a topic Employees should take time off and give it a proper description.
- Thirdly, create a list of trigger words. The kind of inquiries people will ask about a topic is defined by the trigger words for that topic. Enter the following sentences as triggers:
- Need information on time off
- I need help with time off
- How many days of paid vacation do I have
- What are the national holidays?
- I need extended leave
- Now, select Save topic.
- Lastly, select Go to authoring canvas for starting creating the conversation flow for this topic.
You may now specify the bot’s interaction with the user when this topic is engaged, now that the trigger words have been set. Power Virtual Agents’ graphical interface allows you to create the topic without writing a single line of code.
Giving employees a message that the bot is here to help:
This comes with the use of a message node for time-off inquiries. As an HR professional, you’re well aware that the most often asked concerns about time off are around paid vacation time and national holidays. To provide the bot a question node to ask employees what kind of time off they want so you can give them better advice. When a question node with user response choices is added to a topic, a forked branch for each response is created automatically.
- Firstly, to add a question node to the discussion, choose + below the message node, then Ask a question.
- Secondly, What kind of data are you looking for? enter the text box labeled “Ask a question” This is the question the employee will be asked.
- Thirdly, Add two choices for paid time off and national holidays: Paid vacation and National Holidays under User Options.

As you can see, the user’s selections are saved in a variable, and the subject is split off depending on whatever option the user selects. To make it easier to track in the discussion, let’s rename the variable.
- Firstly, select the pencil icon to modify the variable attributes on the variable under Save answer as.
- Secondly, you may rename the variable to TimeoffType in the Variable properties pane. When you close the Variable properties window, the changes will be reflected on the writing canvas.
Now, for each choice, you may add alternative replies. We can have the bot direct employees to an internal HR website where they can search up paid vacation policy.
Adding Replies:
- Firstly, create a message node for the Paid vacation branch with the following message to the user.
- Secondly, to finish the chat with a survey, add a node by clicking the +. End the talk, then Finish with the survey. This is the customer satisfaction survey that comes pre-installed in the bot and may be used on any topic.
- Thirdly, add a message node with the following text to the National Holidays path:
text
National holidays for 2020:
– New Year’s Day: January 1st
– Memorial Day: May 25th
– Independence day: July 4th
– Labor Day: September 7th
– Thanksgiving: November 26th – 27th
– Christmas Eve and Christmas Day: December 24th – 25th
- Lastly, add a node by selecting the +, then End the chat and End with a survey to complete this path in the topic.
Testing bot for expected behavior
Power Virtual Agents includes a built-in test bot that allows you to run real-time tests on the bot. Let’s put the bot to the test by running the test bot canvas and entering some data from the employee. The test bot will be updated with the most recent material when you save the subject. You may now put the bot to the test using the most recent content updates.
- Firstly, to open the test bot canvas, click the purple bot icon at the bottom of the screen.
- Secondly, type in I need time off information.
- Despite the fact that the information I require for time off does not immediately match the trigger words, Power Virtual Agents is able to interpret the user’s input and initiate the employee time off subject. However, by following the green highlights in the writing canvas while you communicate with the bot in the test bot canvas, you can see where the bot is in the dialogue in real-time.
- Thirdly, choose Paid vacation.
- You can also access the variable to see that the TimeoffType variable is set to User-paid time off. What happens, though, if the user has previously said that they are looking for national holidays in their search? If the bot asks the user to repeat themselves, the user may become irritated. Let’s see how it goes.
- Now, select Reset above the test bot window to reset the test bot canvas.
- Lastly, type in Need information on national holidays
- As you can see, the bot is able to skip the vacation type query and deliver information about national holidays straight. Because Power Virtual Agents offers entity extraction, it was able to figure out that the user was inquiring about national holidays.
Publishing the bot
Now, we are ready to publish the bot. End users will be able to get the most recent bot content changes after publishing the bot.
- Firstly, in the side navigation pane choose the Publish icon.
- Then, select Publish.
Opening the bot in Teams to chat with it as an employee would
Before making the bot available to your company’s employees, you may add it to Teams for yourself to speak with and experience it like any other employee.
There is an option to Open the bot on the Publish tab in the side navigation pane. However, you’ll be able to add your bot to Teams and talk with it as a result of this.
Making the bot available to other employees
Now we can make the bot discoverable in the Teams app store so that other employees may install it and talk with it.
- Firstly, from the side navigation pane, go to the Publish page.
- Secondly, select share the bot. Then, a window will appear with several customization choices.
Editing bot details
You may update the short and long descriptions for your bot in this window, as well as edit the bot symbol that appears in Teams. These are pre-populated with core elements, but you can easily change them to fit your bot’s needs.
Sharing the bot with your team
This will add the bot to the Teams app store’s Built by Your Colleagues section.
- Firstly, select add to the bot and you’ll notice a checkmark next to Add to Teams, indicating that the bot has been added to Teams. Anyone in your team may now locate the bot in the Teams app store’s Built by your colleague’s section and add it to their chat list.
- This is a workaround for seeing the bot in operation because it does not require admin interaction and prevents spam from being sent to the admin. Following the procedures to share the bot with your organization, which requires admin clearance, if you are completely happy.
Sharing the bot with your organization
When you share your bot with your whole company, it will appear in the Built by Your Organization area of the Teams app store. This is subject to admin approval.
- Firstly, submit for admin approval and follow the procedures.
- Secondly, make sure the bot icon, short description, and long description are correct.
- Then, indicate that you wish to share the bot with the whole company.
- Lastly, send it to the admin for approval. This step cannot be accomplished immediately and must be followed up with the admin for permission.
Final Words
Above we have gone through the Microsoft Power Virtual Agent by understanding its uses and features. Moreover, we have learned the role of Microsoft team apps within the Power Virtual Agent by creating and publishing the bot taking an example of HR. Not only was the chatbot able to deliver answers, but it also took action to tell HR specialists about the employee’s desire for an extended absence. So, start creating chatbots using the power of virtual agents and apply it in your organization.
