Set up your MS 365 sign-in for multi-factor authentication
Once your admin enables your organization with multi-factor authentication (MFA) (also called 2-step verification), you have to set up your user account to use it.
By setting up MFA, you add an extra layer of security to your Microsoft 365 account sign-in. For example, you first specify your password and, when prompted, you also type a verification code sent to your phone.
- Check whether your admin has turned on multi-factor authentication for your account. If they haven’t, when you try to do these steps you won’t see the options in Microsoft 365.
- Sign in to Microsoft 365 with your work or school account with your password like you normally do. After you choose Sign in, you’ll be prompted for more information.
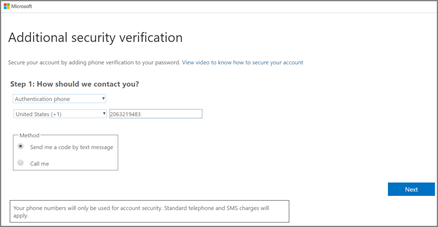
- Choose Next.
- Select your verification method and then follow the prompts on the page
- After you test your additional verification method, choose Next.
- Once you complete the instructions to specify your additional verification method, the next time you sign in to Microsoft 365, you’ll be prompted to provide the additional verification information or action, such as typing the verification code that is sent to you by text message.
- To have a new code sent to you, refresh your browser tab.
For example, if you travel a lot, consider setting up the Microsoft Authenticator app for your additional verification method. It’s the easiest to use and avoids text or call charges.
If you have applications, such as Office 2010 or earlier and Apple Mail before iOS 11, that don’t support an additional verification, you must set up an app password.

Reference Documentation – Set up your Microsoft 365 sign-in for multi-factor authentication