Quickstart : Creating a virtual machine scale set
This tutorial will provide you insights to Creating a virtual machine scale set. A virtual machine scale set allows you to deploy and manage a set of auto-scaling virtual machines. You can scale the number of VMs in the scale set manually, or define rules to autoscale based on resource usage like CPU, memory demand, or network traffic. An Azure load balancer then distributes traffic to the VM instances in the scale set. In this quickstart, you create a virtual machine scale set in the Azure portal.
Follow the given steps –
Firstly, Log in to the Azure portal.
Creating a load balancer
Azure load balancer distributes incoming traffic among healthy virtual machine instances.
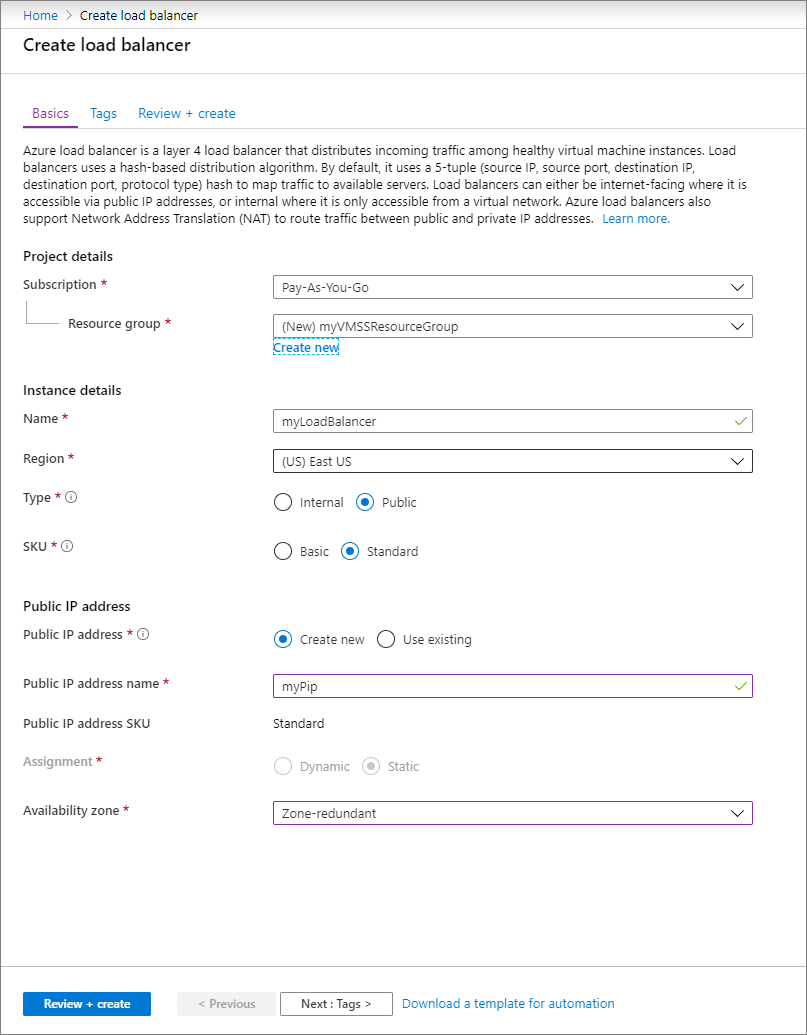
First, create a public Standard Load Balancer by using the portal. The name and public IP address you create are automatically configured as the load balancer’s front end.
- In the search box, type load balancer. Under Marketplace in the search results, pick Load balancer.
- In the Basics tab of the Create load balancer page, enter or select the following information:TABLE 1SettingValueSubscriptionSelect your subscription.Resource groupSelect Create new and type myVMSSResourceGroup in the text box.NamemyLoadBalancerRegionSelect East US.TypeSelect Public.SKUSelect Standard.Public IP addressSelect Create new.Public IP address namemyPipAssignmentStaticAvailability zoneSelect Zone-redundant.
- When you are done, select Review + create
- After it passes validation, select Create.
Creating virtual machine scale set
You can deploy a scale set with a Windows Server image or Linux image such as RHEL, CentOS, Ubuntu, or SLES.
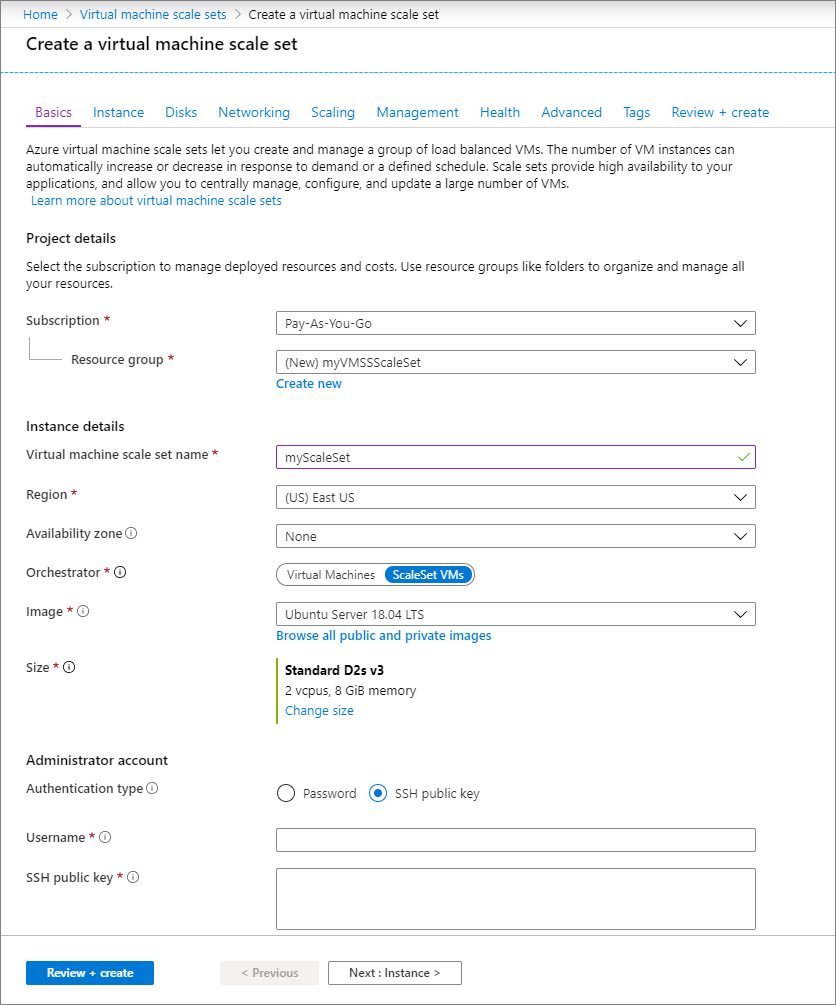
- Type Scale set in the search box. In the results, under Marketplace, select Virtual machine scale sets. Select Create on the Virtual machine scale sets page, which will open the Create a virtual machine scale set page.
- In the Basics tab, under Project details, make sure the correct subscription is selected and then choose to Create new resource group. Type myVMSSResourceGroup for the name and then select OK .
- Type myScaleSet as the name for your scale set.
- In Region, select a region that is close to your area.
- Leave the default value of ScaleSet VMs for Orchestration mode.
- Select a marketplace image for Image. In this example, we have chosen Ubuntu Server 18.04 LTS.
- Enter your desired username, and select which authentication type you prefer.
- A Password must be at least 12 characters long and meet three out of the four following complexity requirements: one lower case character, one upper case character, one number, and one special character. For more information, see username and password requirements.
- If you select a Linux OS disk image, you can instead choose SSH public key. Only provide your public key, such as ~/.ssh/id_rsa.pub. You can use the Azure Cloud Shell from the portal to create and use SSH keys.
Further steps
- Select Next to move the the other pages.
- Leave the defaults for the Instance and Disks pages.
- On the Networking page, under Load balancing, select Yes to put the scale set instances behind a load balancer.
- In Load balancing options, select Azure load balancer.
- In Select a load balancer, select myLoadBalancer that you created earlier.
- For Select a backend pool, select Create new, type myBackendPool, then select Create.
- When you are done, select Review + create.
- After it passes validation, select Create to deploy the scale set.
When no longer needed, delete the resource group, scale set, and all related resources. To do so, select the resource group for the scale set and then select Delete.

Reference documentation – Quickstart: Create a virtual machine scale set in the Azure portal