Manage Power apps and Users Accounts
Being an Environment Admin, Global admin, or Power Platform admin, you will be required to manage the power apps created in the organization. Moreover, as Admins you will be required to perform the following activities from the Power Platform admin center –
- Add or change the users with whom an app is shared
- Delete apps not currently in use
Prerequisites to Manage Power Apps
- Firstly, either a Power Apps plan or Power Automate plan. Else , you can sign up for a free Power Apps trial.
- Secondly, you would require Power Apps Environment Admin, Global admin, or Power Platform admin permissions.
Steps to Manage Power Apps
- To create a new Power App, log in to Power Apps and click on “Create an app” button.
- Follow the prompts to select the type of app you want to create and the data source you want to use.
- Once you have created the app, you can manage its settings by clicking on the “Settings” button on the app’s home page.
- From there, you can manage the data sources and connections used by the app, as well as specify who can access the app and what they can do with it.
Steps for Managing User Accounts
- To create a new user account, log in to the Power Platform Admin Center and click on “Users” in the left-hand navigation menu.
- Click on the “New user” button and follow the prompts to enter the user’s information and assign them to the appropriate security group.
- To manage the permissions of a user, click on the “Roles” button in the left-hand navigation menu and assign the user to a specific role.
- To control user access to specific Power Apps, click on “Apps” in the left-hand navigation menu, select the app you want to manage, and specify who can access the app and what they can do with it.
Create User and Assign Security Roles
The system generates a user ID and temporary password for the user when we create a user account in the Microsoft 365 admin center. Use the following steps for immediate synchronization between the Microsoft 365 admin center and customer engagement apps –
- At first, Sign out of the customer engagement app and the Microsoft 365 admin center.
- Secondly, Close all open browsers used for the customer engagement app and the Microsoft 365 admin center.
- Then Sign back in to the customer engagement app and the Microsoft 365 admin center.
User profile information
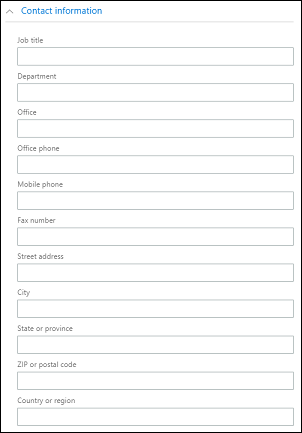
The user profile information is being managed and maintained in the Microsoft 365 admin center. Once you create or update a user, these user profile fields are automatically updated and synchronized in your Microsoft Power Platform environments. Some of the fields that are managed in the Users section of the Microsoft 365 admin center include –
- User Name
- Full Name
- Title
- Primary Email
- Main Phone
- Fax
- Address
We can also license the user when we create the user account, or we can license the user later. Therefore we must assign a license to every user account that we want to access the online service.
How to enable a user account in Environment?
In order to enable a user in an environment with a Dataverse database, we must first enable sign-in, then issue the user a license, and then add the user to a security group. We’ll now go next few steps:
Steps to enable sign-in
- First Step – Sign in to the Microsoft 365 admin center.
- Second Step – Select Users > Active users, and then select the user.
- Third Step – Ensure that under the user’s display name, you see Sign in allowed. If you don’t, select Block this user, and then unblock sign in.
Steps to assign a license
- First Step – Sign in to the Microsoft 365 admin center.
- Second Step – Select Users > Active users, and then select the user.
- Third Step – Select the Licenses and Apps tab, and then select the licenses you want to assign.
- Last Step – Select Save changes.
Steps to add a user to a security group
- Firstly, Sign in to the Microsoft 365 admin center.
- In the second step, Select Groups > Groups.
- Next step, Select the security group that’s associated with your environment.
- Select the Members tab.
- Then, under Members, select View all and manage members >Add members.
- Lastly, choose users from the list or search for users, and then select Save.
How to disable a user account in an environment?
For disabling a user account in an environment that has a Dataverse database, we can either remove the user from the security group or remove the license from the user. We shall now discuss the following steps –
Steps to remove a user from a security group
- First step – Sign in to the Microsoft 365 admin center.
- Second Step – Select Groups > Groups.
- Third Step – Select the security group that’s associated with your environment.
- Fourth Step – Select the Members tab.
- Fifth Step – Under Members, select View all and manage members
- Sixth Step – Select the users in the list to remove them, and then select Save.
Steps to remove a license from a user
- Firstly, Sign in to the Microsoft 365 admin center.
- Secondly, Select Users > Active users, and then select the user.
- Next, Select the Licenses and Apps tab, and then select the licenses you want to remove.
- Lastly, Select Save changes.
Add users to Dataverse
In order for users in a Dataverse environment to have access to apps and data, the SystemUser table in Dataverse must have at least one entry matching to the individual user identity. In Dataverse, there are several ways to add users, both automatically and on demand:
- Every 30 minutes, a system background operation synchronises changes from Azure AD and updates the SystemUser records in Dataverse according to a pre-determined set of criteria. The amount of time it takes to synchronise all changes in Dataverse is determined by the total number of users who need to be added or changed. We propose building security groups connected with each environment for big businesses with thousands of users in Azure AD, so that only the needed subset of users is added to Dataverse.
- Note: The automated synchronisation procedure will not take up all users added to Azure AD. This section explains the eligibility criteria used by the system background process when adding an Azure AD user to Dataverse.
- When users are initially tried to access the Dataverse environment, they are immediately added to the SystemUsers database if they already exist in Azure AD.
- If a user already exists in Dataverse but is disabled, attempting to access the environment will alter the user’s status to “enabled,” if they are entitled at the time of access.
- Users with the appropriate permissions can use the API to quickly create or change users in Dataverse.
- Users may be added to Dataverse on demand using the Power Platform admin centre user management interface.
PL-900 Exam Practice Questions
Question: You want to create a new Power App that connects to an external data source. What is the first step you should take?
A. Click on “Create an app” in Power Apps
B. Connect to the external data source
C. Configure the app’s settings
D. Import an existing app
Answer: b. Connect to the external data source
Explanation: Before creating a new Power App, you should connect to the external data source that you want to use in your app. This will allow you to access and use the data from that source in your app.
Question: You want to give a new user access to a specific Power App. What should you do?
A. Add the user to the appropriate security group
B. Assign the user to a specific role
C. Specify the app’s permissions in the Power Apps admin center
D. Connect the user to the app’s data source
Answer: a. Add the user to the appropriate security group
Explanation: To give a new user access to a specific Power App, you should add them to the appropriate security group. This will allow them to access the app and any other resources that are associated with that group.
Question: You want to control user access to a specific Power App based on their location. What should you do?
A. Set up conditional access policies in the Power Platform Admin Center
B. Specify the app’s permissions in the Power Apps admin center
C. Assign the user to a specific role
D. Add the user to the appropriate security group
Answer: a. Set up conditional access policies in the Power Platform Admin Center
Explanation: To control user access to a specific Power App based on their location, you should set up conditional access policies in the Power Platform Admin Center. This will allow you to specify which users can access the app based on their location or other factors.
Question: You want to manage the data sources and connections used by a specific Power App. What should you do?
A. Click on “Settings” in the app’s home page
B. Add the data sources and connections in the Power Platform Admin Center
C. Assign the app to a specific role
D. Add the app to the appropriate security group
Answer: a. Click on “Settings” in the app’s home page
Explanation: To manage the data sources and connections used by a specific Power App, you should click on “Settings” in the app’s home page. From there, you can manage the app’s data sources and connections, as well as specify who can access the app and what they can do with it.
For More visit – Create Users and Assign Security Roles
