Learn to Enable per-user Azure Multi-Factor Authentication
This tutorial will help to Learn to Enable per-user Azure Multi-Factor Authentication. There are two ways to secure user sign-in events by requiring multi-factor authentication in Azure AD. The first, and preferred, option is to set up a Conditional Access policy that requires multi-factor authentication under certain conditions. The second option is to enable each user for Azure Multi-Factor Authentication.
Azure Multi-Factor Authentication user states
| Status | Description | Non-browser apps affected | Browser apps affected | Modern authentication affected |
|---|---|---|---|---|
| Disabled | The default state for a new user not enrolled in Azure Multi-Factor Authentication. | No | Also, No | No |
| Enabled | Also, The user has been enrolled in Azure Multi-Factor Authentication, but hasn’t registered authentication methods. They receive a prompt to register the next time they sign in. | No. They continue to work until the registration process is completed. | Yes. After the session expires, Azure Multi-Factor Authentication registration is required. | Yes. After the access token expires, Azure Multi-Factor Authentication registration is required. |
| Enforced | The user has been enrolled and has completed the registration process for Azure Multi-Factor Authentication. | Yes. Apps require app passwords. | Also, Yes. Azure Multi-Factor Authentication is required at login. | Also, Yes. Azure Multi-Factor Authentication is required at login. |
View the status for a user
Use the following steps to access the Azure portal page where you can view and manage user states:
- Sign in to the Azure portal as an administrator.
- Then, Search for and select Azure Active Directory, then select Users > All users.
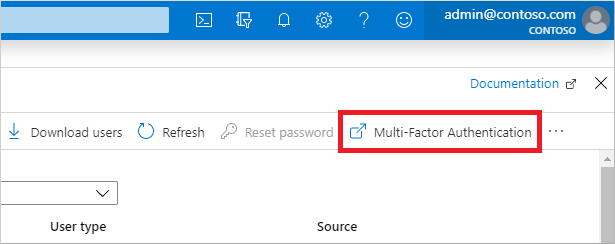
- Also, Select Multi-Factor Authentication. You may need to scroll to the right to see this menu option. Select the example screenshot below to see the full Azure portal window and menu location:
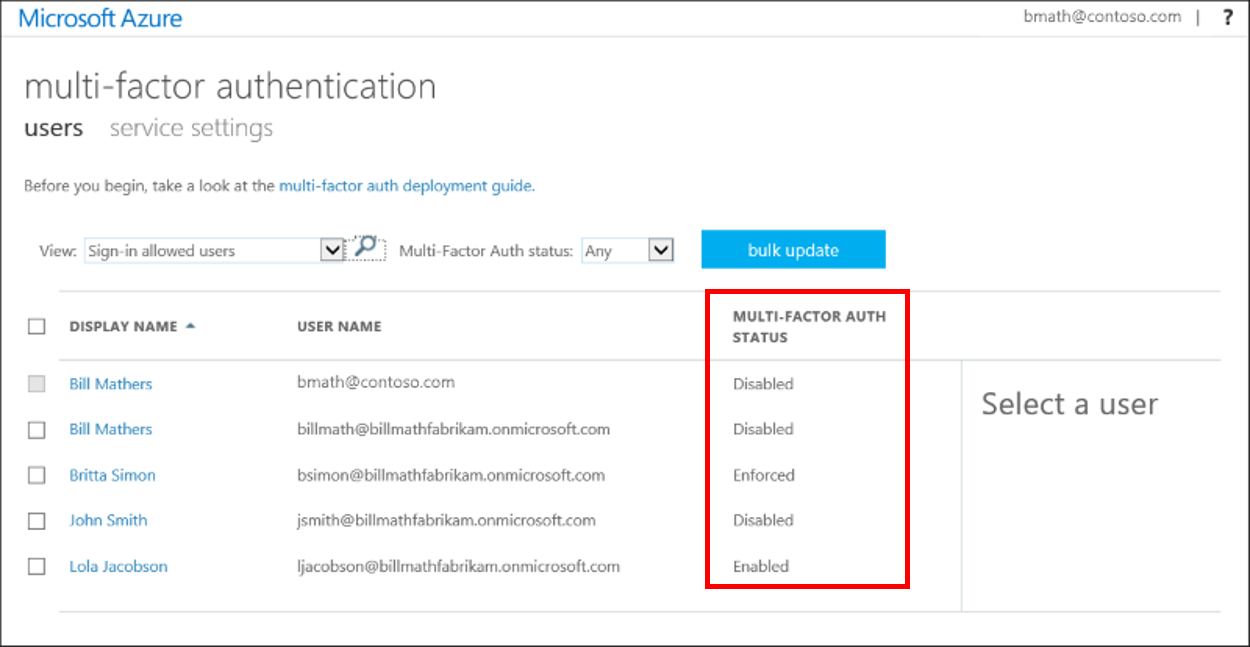
A new page opens that displays the user state, as shown in the following example.
Change the status for a user
To change the Azure Multi-Factor Authentication state for a user, complete the following steps:
- Use the preceding steps to get to the Azure Multi-Factor Authentication users page.
- Find the user you want to enable for Azure Multi-Factor Authentication. You might need to change the view at the top to users.
- Check the box next to the name(s) of the user(s) to change the state for.
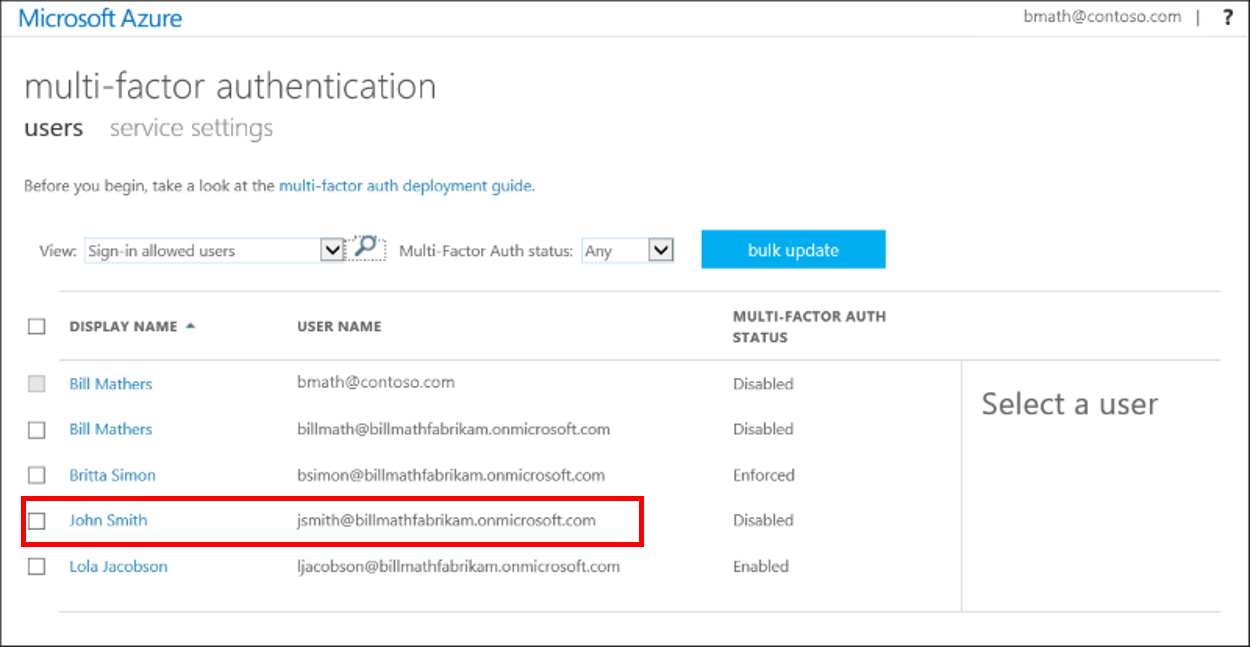
- On the right-hand side, under quick steps, choose Enable or Disable. In the following example, the user John Smith has a check next to their name and is being enabled for use:

Confirm your selection in the pop-up window that opens.
Change state using PowerShell
To change the user state by using Azure AD PowerShell, you change the $st.State parameter for a user account. There are three possible states for a user account:
- Enabled
- Enforced
- Disabled
Don’t move users directly to the Enforced state. If you do so, non-browser-based apps stop working because the user hasn’t gone through Azure Multi-Factor Authentication registration and obtained an app password.

Reference documentation – Enable per-user Azure Multi-Factor Authentication to secure sign-in events