Learn to create and manage action groups
This tutorial will help you to Learn to create and manage action groups. An action group is a collection of notification preferences defined by the owner of an Azure subscription. Azure Monitor and Service Health alerts use action groups to notify users that an alert has been triggered. Various alerts may use the same action group or different action groups depending on the user’s requirements. You may configure up to 2,000 action groups in a subscription.
Each action is made up of the following properties:
- Type: The notification or action performed. Examples include sending a voice call, SMS, email; or triggering various types of automated actions. See types later in this article.
- Name: A unique identifier within the action group.
- Details: The corresponding details that vary by type.
Create an action group by using the Azure portal
In the Azure portal, search for and select Monitor. The Monitor pane consolidates all your monitoring settings and data in one view.
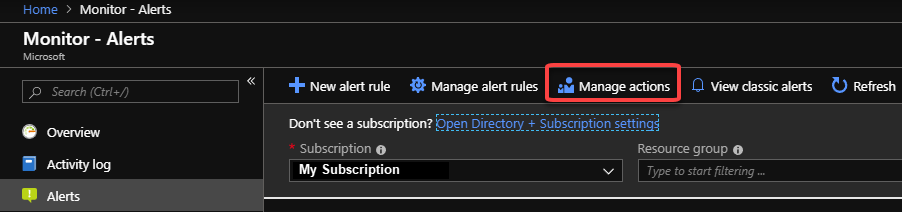
Select Alerts, then select Manage actions.

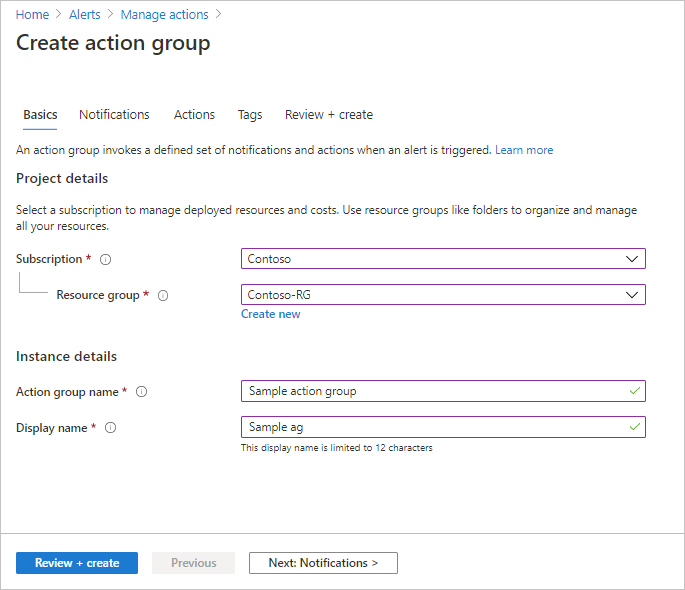
Select Add action group, and fill in the relevant fields in the wizard experience.
Configure basic action group settings
Under Project details:
Select the Subscription and Resource group in which the action group is saved.
Under Instance details:
- Enter an Action group name.
- Enter a Display name. The display name is used in place of a full action group name when notifications are sent using this group.
Create the action group
- You can explore the Tags settings if you like. This lets you associate key/value pairs to the action group for your categorization and is a feature available for any Azure resource.
- Click Review + create to review the settings. This will do a quick validation of your inputs to make sure all the required fields are selected. If there are issues, they’ll be reported here. Once you’ve reviewed the settings, click Create to provision the action group.
Manage your action groups
After you create an action group, you can view Action groups by selecting Manage actions from the Alerts landing page in Monitor pane. Select the action group you want to manage to:
- Add, edit, or remove actions.
- Delete the action group.
You can also know about other functions as Configure notifications, Configure actions, Runbook, ITSM etc.

Reference documentation – Create and manage action groups in the Azure portal