Learn to Configure Azure Multi-Factor Authentication settings
This tutorial will help you to learn To customize the end-user experience for Azure Multi-Factor Authentication, you can configure options for settings like the account lockout thresholds or fraud alerts and notifications. Some options are in the Azure Active Directory (Azure AD) portal, while others are in the Azure Multi-Factor Authentication portal.
The following Azure Multi-Factor Authentication settings are available in the Azure portal:
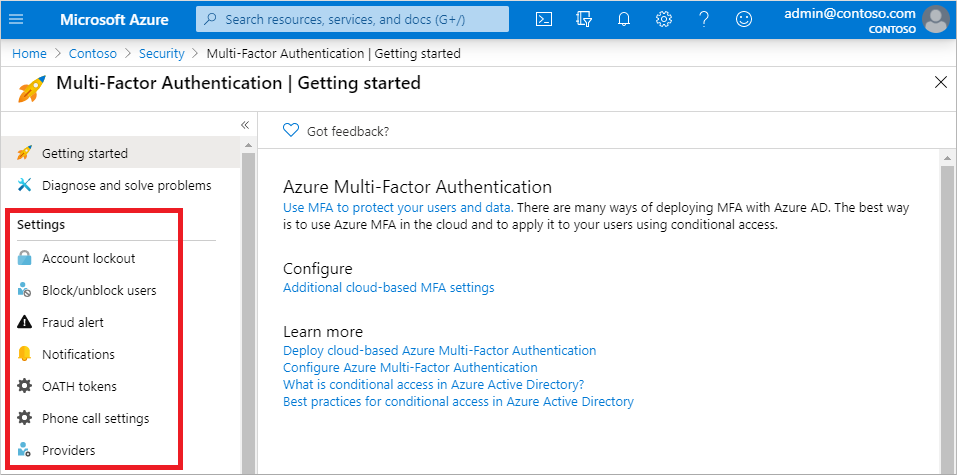
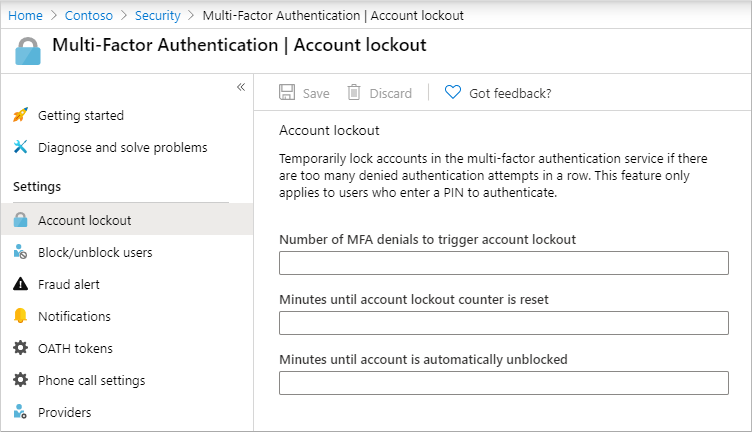
Account lockout
The account lockout settings enable you to select how many unsuccessful MFA attempts to allow before the account is locked out for a period of time to avoid repeated MFA attempts as part of an attack. When a pin code is supplied for the MFA prompt, the account lockout settings are implemented.
The following settings are available:
- Number of MFA denials to trigger account lockout
- Minutes until account lockout counter is reset
- Minutes until account is automatically unblocked
To configure account lockout settings, complete the following settings:
- Sign in to the Azure portal as an administrator.
- Browse to Azure Active Directory > Security > MFA > Account lockout.
- Enter the require values for your environment, then select Save.
Block a user
To block a user, complete the following steps:
- Browse to Azure Active Directory > Security > MFA > Block/unblock users.
- Select Add to block a user.
- Select the Replication Group, then choose Azure Default.Enter the username for the blocked user as
username\@domain.com, then provide a comment in the Reason field. - When ready, select OK to block the user.
Unblock a user
To unblock a user, complete the following steps:
- Browse to Azure Active Directory > Security > MFA > Block/unblock users.
- In the Action column next to the desired user, select Unblock.
- Enter a comment in the Reason for unblocking field.
- When ready, select OK to unblock the user.
Fraud alert
The fraud alert tool allows users to report unauthorized access to their accounts. Users can report a fraud attempt via the Microsoft Authenticator app or their phone when they receive an unfamiliar and suspicious MFA prompt.
To enable and configure fraud alerts, complete the following steps:
- Browse to Azure Active Directory > Security > MFA > Fraud alert.
- Set the Allow users to submit fraud alerts setting to On.
- Configure the Automatically block users who report fraud or Code to report fraud during initial greeting setting as desired.
- When ready, select Save.
View fraud reports
Select Azure Active Directory > Sign-ins > Authentication Details. The fraud report is now part of the normal Azure AD Sign-ins report, and it will appear as MFA rejected, Fraud Code Entered in the “Result Detail.”
Notifications
o configure fraud alert notifications, complete the following settings:
- Browse to Azure Active Directory > Security > Multi-Factor Authentication > Notifications.
- Enter the email address to add into the next box.
- To remove an existing email address, select the … option next to the desired email address, then select Delete.
- When ready, select Save.
OATH tokens
OATH-TOTP SHA-1 tokens that refresh codes every 30 or 60 seconds are supported by Azure AD. Customers can buy these tokens from whatever seller they like.
OATH TOTP hardware tokens usually include a secret key, or seed, that is pre-programmed in the token. These keys must be entered into Azure AD as outlined in the steps below. Secret keys are restricted to 128 characters, therefore not all tokens will work with them. The secret key must be encoded in Base32 and can only contain the letters a-z or A-Z and numerals 1-7.
Phone call settings
You may customise the user’s experience if they receive phone calls for MFA prompts, such as the caller ID or voice greeting they hear.
To configure your own caller ID number, complete the following steps:
- Browse to Azure Active Directory > Security > MFA > Phone call settings.
- Set the MFA caller ID number to the number you wish users to see on their phone. Only US-based numbers are allowed.
- When ready, select Save.
Set up a custom message
To use your own custom messages, complete the following steps:
- Browse to Azure Active Directory > Security > MFA > Phone call settings.
- Select Add greeting.
- Choose the Type of greeting, such as Greeting (standard) or Authentication successful.
- Select the Language, based on the previous section on custom message language behavior.
- Browse for and select an .mp3 or .wav sound file to upload.
- When ready, select Add, then Save.
MFA service settings
In the Azure Multi-Factor Authentication service settings, you may configure app passwords, trusted IPs, verification choices, and remember multi-factor authentication. This is a legacy portal that isn’t part of the Azure Active Directory site.
Service settings can be accessed from the Azure portal by browsing to Azure Active Directory > Security > MFA > Getting started > Configure > Additional cloud-based MFA settings. A new window or tab opens with additional service settings options.
Trusted IPs
For users that login in from a certain IP address range, Azure Multi-Factor Authentication’s Trusted IPs functionality skips multi-factor authentication prompts. You may establish trusted IP ranges for your on-premises installations so that no Azure Multi-Factor Authentication prompt appears when users are in one of those locations.
Enable named locations by using Conditional Access
You can use Conditional Access rules to define named locations using the following steps:
- In the Azure portal, search for and select Azure Active Directory, then browse to Security > Conditional Access > Named locations.
- Select New location.
- Enter a name for the location.
- Select Mark as trusted location.
- Enter the IP Range in CIDR notation for your environment, such as 40.77.182.32/27.
- Select Create.
Enable the Trusted IPs feature by using Conditional Access
To enable trusted IPs using Conditional Access policies, complete the following steps:
- In the Azure portal, search for and select Azure Active Directory, then browse to Security > Conditional Access > Named locations.
- Select Configure MFA trusted IPs.
- On the Service Settings page, under Trusted IPs, choose from any of the following two options:
- For requests from federated users originating from my intranet: To choose this option, select the check box. All federated users who sign in from the corporate network bypass two-step verification by using a claim that is issued by AD FS. Ensure that AD FS has a rule to add the intranet claim to the appropriate traffic. If the rule does not exist, create the following rule in AD FS:
c:[Type== "http://schemas.microsoft.com/ws/2012/01/insidecorporatenetwork"] => issue(claim = c); - For requests from a specific range of public IPs: To choose this option, enter the IP addresses in the text box by using CIDR notation.
- Also, For IP addresses that are in the range xxx.xxx.xxx.1 through xxx.xxx.xxx.254, use notation like xxx.xxx.xxx.0/24.
- Furthermore, For a single IP address, use notation like xxx.xxx.xxx.xxx/32.
- Enter up to 50 IP address ranges. Users who sign in from these IP addresses bypass two-step verification.
- For requests from federated users originating from my intranet: To choose this option, select the check box. All federated users who sign in from the corporate network bypass two-step verification by using a claim that is issued by AD FS. Ensure that AD FS has a rule to add the intranet claim to the appropriate traffic. If the rule does not exist, create the following rule in AD FS:
- Select Save.
Enable the Trusted IPs feature by using service settings
If you don’t want to use Conditional Access policies to enable trusted IPs, you can configure the service settings for Azure Multi-Factor Authentication using the following steps:
- In the Azure portal, search for and select Azure Active Directory, then choose Users.
- Select Multi-Factor Authentication.
- Under Multi-Factor Authentication, select service settings.
- On the Service Settings page, under Trusted IPs, choose one (or both) of the following two options:
- For requests from federated users on my intranet
- For requests from a specified range of IP address subnets
- Select Save.
Enable and disable verification methods
To enable or disable verification methods, complete the following steps:
- In the Azure portal, search for and select Azure Active Directory, then choose Users.
- Select Multi-Factor Authentication.
- Under Multi-Factor Authentication, select service settings.
- On the Service Settings page, under verification options, select/unselect the methods to provide to your users.
- Click Save.
Enable remember Multi-Factor Authentication
To enable and configure the option for users to remember their MFA status and bypass prompts, complete the following steps:
- In the Azure portal, search for and select Azure Active Directory, then choose Users.
- Select Multi-Factor Authentication.
- Under Multi-Factor Authentication, select service settings.
- On the Service Settings page, manage remember multi-factor authentication, select the Allow users to remember multi-factor authentication on devices they trust option.
- Set the number of days to allow trusted devices to bypass two-step verification. The default is 14 days.
- Select Save.

Reference documentation – Configure Azure Multi-Factor Authentication settings