Learn to Back up an Azure VM from the VM settings
This tutorial explains how to back up Azure VM with the Azure Backup service. You can back up Azure VMs using a couple of methods:
- Single Azure VM: The instructions in this article describe how to back up an Azure VM directly from the settings.
- Multiple Azure VMs: You can set up a Recovery Services vault and configure backup for multiple Azure VMs.
Before you start
- Learn how backup works, and verify support requirements.
- Get an overview of Azure VM backup.
Azure VM agent installation
To back up Azure VMs, Azure Backup installs an extension on the VM agent running on the machine. If your VM was created from an Azure Marketplace image, the agent will be running. In some cases, for example if you create a custom VM, or you migrate a machine from on-premises, you might need to install the agent manually.
- If you do need to install the VM agent manually, follow the instructions for Windows or Linux VMs.
- After the agent is installed, when you enable backup, Azure Backup installs the backup extension to the agent. It updates and patches the extension without user intervention.
Back up from Azure VM settings
- Sign in to the Azure portal.
- Select All services and in the Filter, type Virtual machines, and then select Virtual machines.
- From the list of VMs, select the one you want to back up.
- On the menu, select Backup.
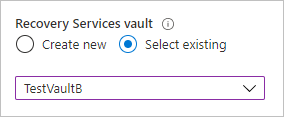
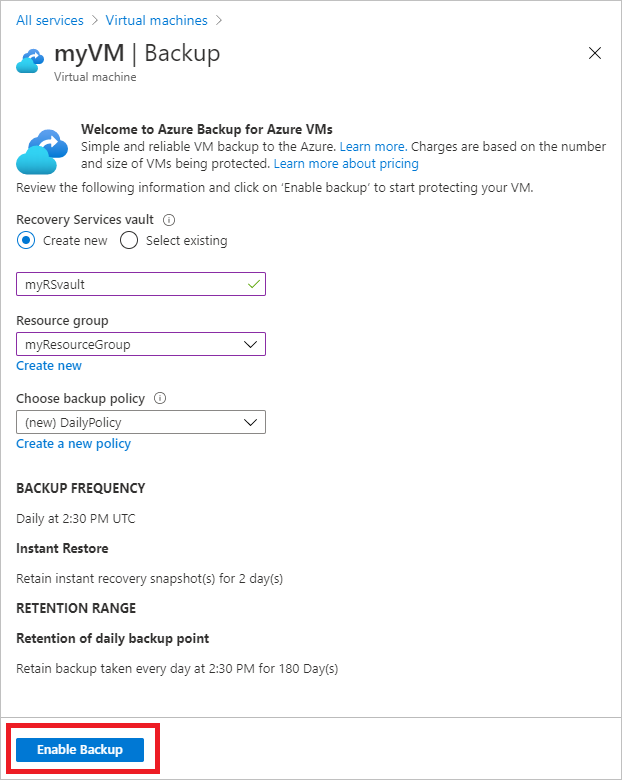
- In Recovery Services vault, do the following:
- If you already have a vault, select Select existing, and select a vault.
- If you don’t have a vault, select Create new. Specify a name for the vault. It’s created in the same region and resource group as the VM. You can’t modify these settings when you enable backup directly from the settings.
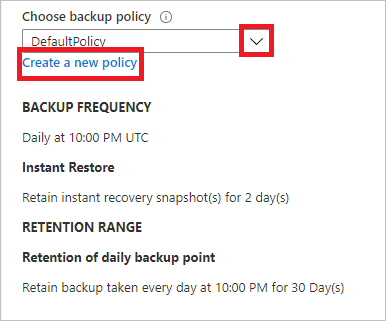
In Choose backup policy, do one of the following:
- Leave the default policy. This backs up the virtual machine once a day at the time specified, and retains backups in the vault for 30 days.
- Select an existing backup policy if you have one.
- Create a new policy, and define the policy settings.
Select Enable Backup. This associates the backup policy with the VM.
- You can track the configuration progress in the portal notifications.
- After the job completes, in the menu, select Backup. The page shows backup status for the VM, information about recovery points, jobs running, and alerts issued.
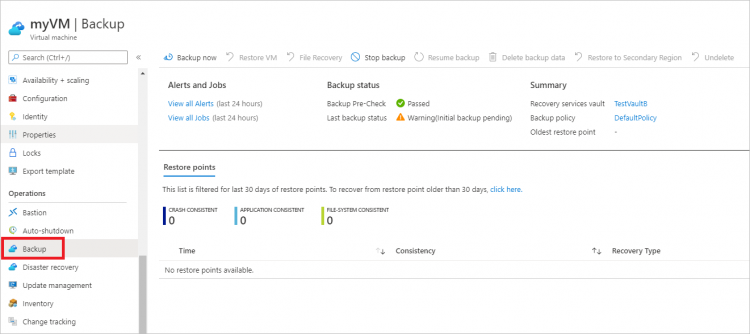
- After enabling backup, an initial backup runs. You can start the initial backup immediately, or wait until it starts in accordance with the backup schedule.
- Until the initial backup completes, the Last backup status shows as Warning (Initial backup pending).
- To see when the next scheduled backup will run, select the backup policy name.
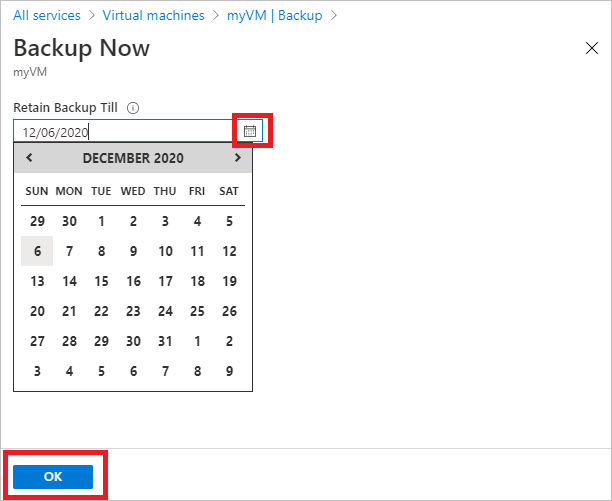
Run a backup immediately
- To run a backup immediately, in the VM menu, select Backup > Backup now.
- In Backup Now, use the calendar control to select until when the recovery point will be retained > and OK.
- Portal notifications let you know the backup job has been triggered. To monitor backup progress, select View all jobs.
Back up from the Recovery Services vault
Follow the instructions in this article to enable backup for Azure VMs by setting up an Azure Backup Recovery Services vault, and enabling backup in the vault.

Reference documentation – Back up an Azure VM from the VM settings