Learn to access Resource Manager and register new application
This tutorial will help you to Learn to access Resource Manager. Managing identities for Azure resources is a feature of Azure Active Directory. Each of the Azure services that supports managed identities for Azure resources are subjected to their own timeline.
Learn to Grant your VM access to a resource group in Resource Manager
Using managed identities for Azure resources, your code can get access tokens to authenticate to resources that support Azure AD authentication. The Azure Resource Manager supports Azure AD authentication. First, we need to grant this VM’s system-assigned managed identity access to a resource in Resource Manager, in this case the Resource Group in which the VM is contained.
- Firstly, Reach out to the tab for Resource Groups.
- Now, choose the specific Resource Group you created for your Windows VM.
- now, visit Access control (IAM) in the left panel.
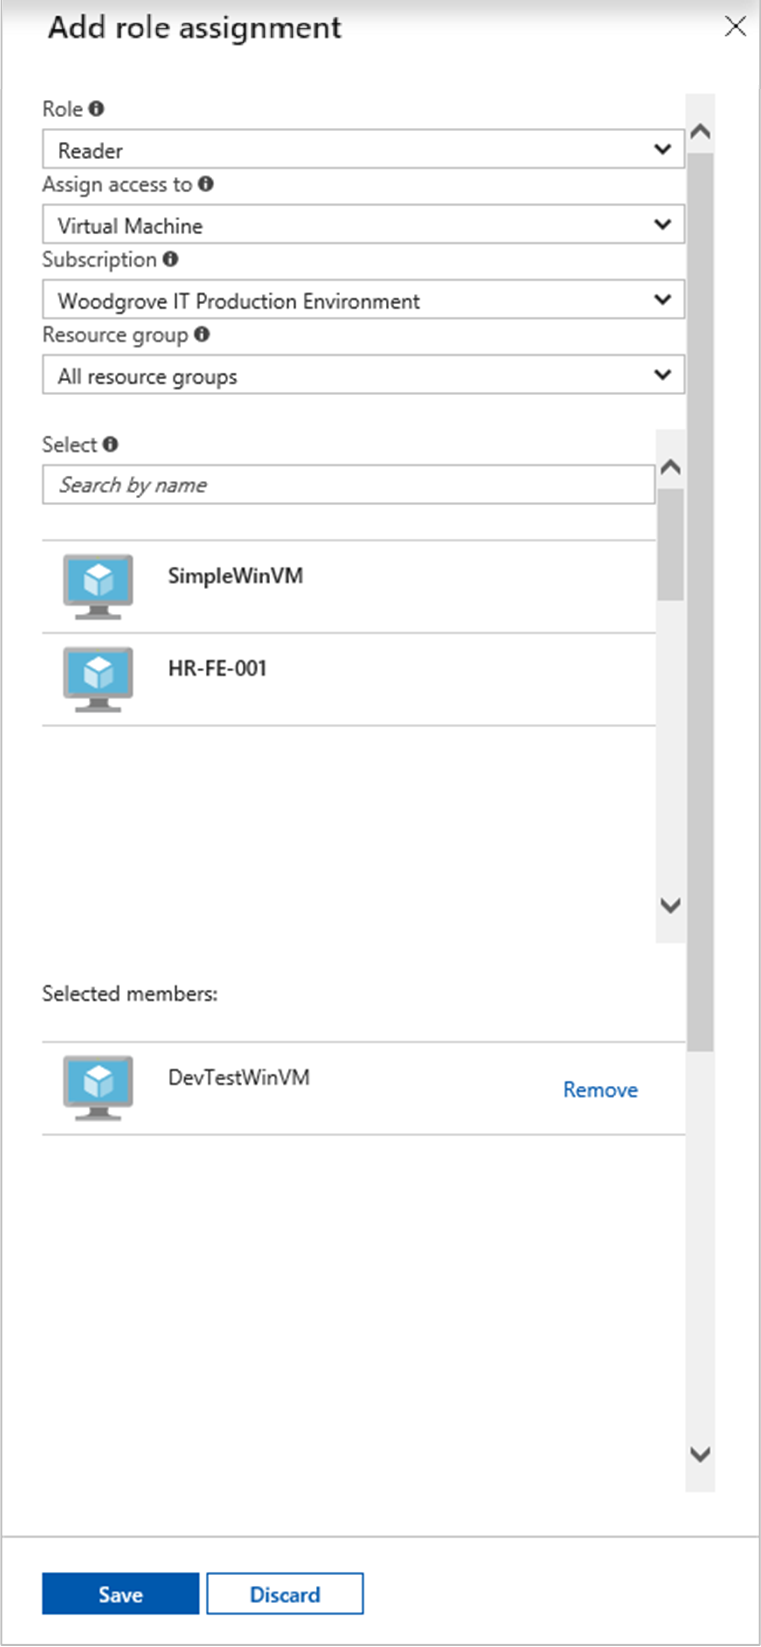
- Then Add role assignment and a new role assignment for your Windows VM. Select Role as Reader.
- In the next drop-down list, choose to Assign access to the resource Virtual Machine.
- Next, important step is to ensure that the proper subscription is listed in the Subscription dropdown. And for Resource Group, select All resource groups.
- Finally, in click choose your Windows VM in the dropdown and choose Save.
Get an access token using the VM’s system-assigned managed identity and use it to call Azure Resource Manager
You will have to use PowerShell in this portion.
- Firstly, In the portal, navigate to Virtual Machines and choose to go to your Windows virtual machine and in the Overview, choose Connect.
- Type in your Username and Password for which you added when you created the Windows VM.
- Subsequently, you have created a Remote Desktop Connection with the virtual machine, open PowerShell in the remote session.
- Furthermore, Using the Invoke-WebRequest cmdlet, make a request to the local managed identity for Azure resources endpoint to get an access token for Azure Resource Manager.
- Now, Next, extract the full response, stored as a JavaScript Object Notation (JSON) formatted string in the $response object.
- Next, choose to extract the access token from the response.
- Finally, call Azure Resource Manager using the access token. In this instance, we’re also using the Invoke-WebRequest cmdlet to make the call to Azure Resource Manager, and include the access token in the Authorization header.
Register a new application using the Azure portal
- Firstly, visit and sign in Azure portal using either a work or school account or a personal Microsoft account.
- Now that, If your account gives you access to more than one tenant, select your account in the upper right corner. Set your portal session to the Azure AD tenant according to your wants.
- Choose Azure Active Directory. Under Manage, choose App registrations.
- choose New registration.
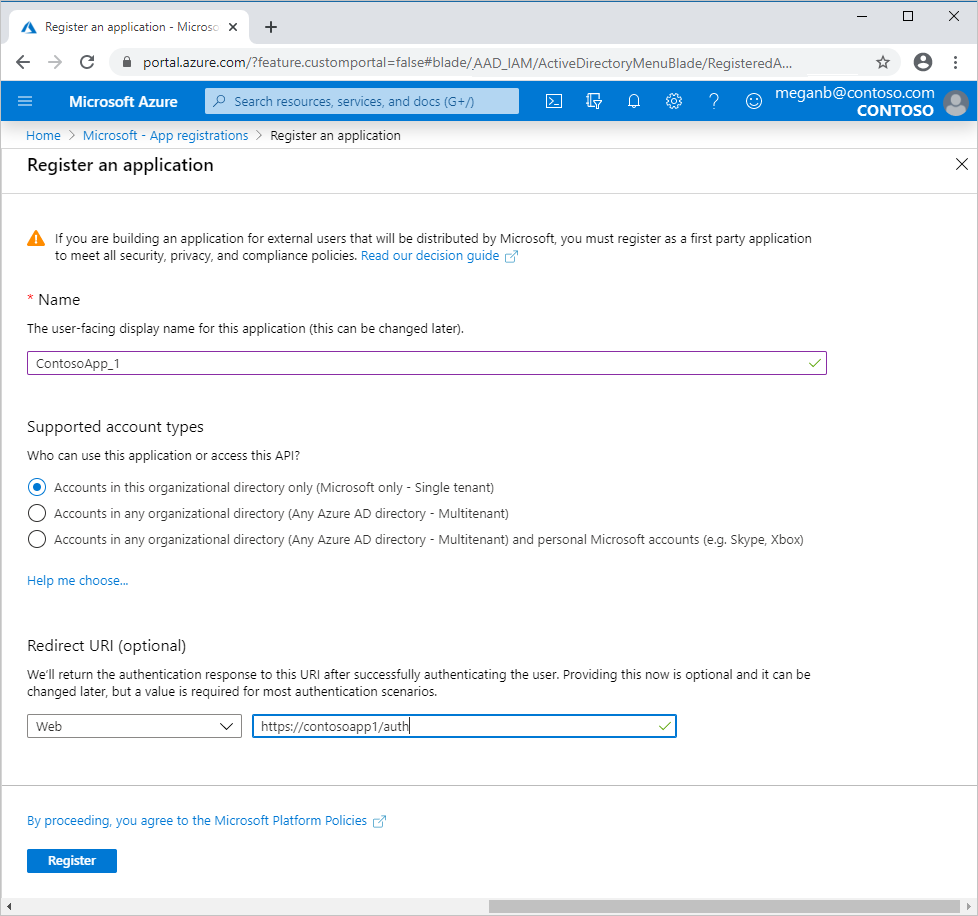
- In Register an application, enter a logical application name to display to users.
- Under Redirect URI (optional), choose the type of app you’re building: Web or Public client (mobile & desktop). Then type the redirect URI, or reply URL, for your application.
- Firstly, For web applications, provide the base URL of your application. For example,
https://localhost:31544might be the URL for a web app running on your local machine. Users would be using this URL to sign in to a web client application. - Subsequently, For public client applications, provide the URI used by Azure AD to return to token responses. type a value specific to your application, such as
myapp://auth.
- Firstly, For web applications, provide the base URL of your application. For example,
- When you are finished, choose Register.
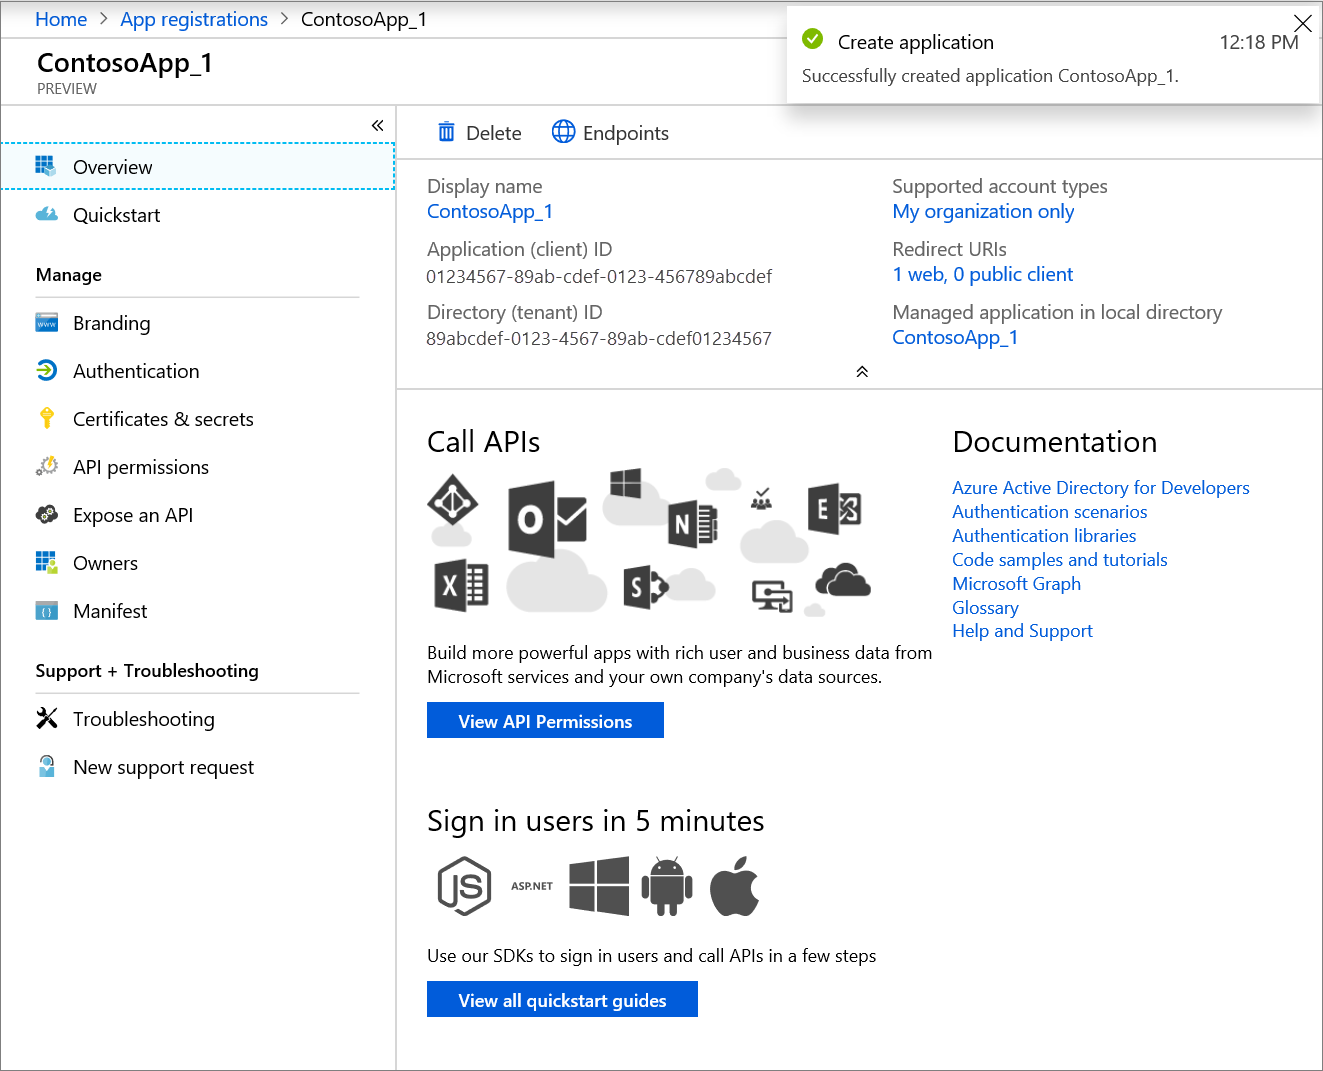
Azure AD always assigns a unique application, or client, ID to your app. The portal will open your application’s Overview page. To add capabilities to your application, you can choose other configuration options including branding, certificates and secrets, API permissions, and many more options.

Reference documentation – Use a Windows VM system-assigned managed identity to access Resource Manager