Deploy an Azure Kubernetes Service (AKS) cluster
This tutorial will help you in learning about how to Deploy an Azure Kubernetes Service (AKS) cluster. Azure Kubernetes Service (AKS) is a managed Kubernetes service that lets you quickly deploy and manage clusters. In this quickstart, you deploy an AKS cluster using the Azure portal.
Create an AKS cluster
To create an AKS cluster, complete the following steps:
- Firstly, On the Azure portal menu or from the Home page, choose Create a resource.
- choose Containers > Kubernetes Service.
- On the Basics page, set the following options:
- Project details: choose an Azure Subscription, then choose or create an Azure Resource group, such as myResourceGroup.
- Cluster details: Enter a Kubernetes cluster name, such as myAKSCluster. choose a Region, Kubernetes version, and DNS name prefix for the AKS cluster.
- Primary node pool: choose a VM Node size for the AKS nodes. The VM size can’t be changed once an AKS cluster has been deployed. – choose the number of nodes to deploy into the cluster. For this quickstart, set Node count to 1. Node count can be adjusted after the cluster has been deployed.
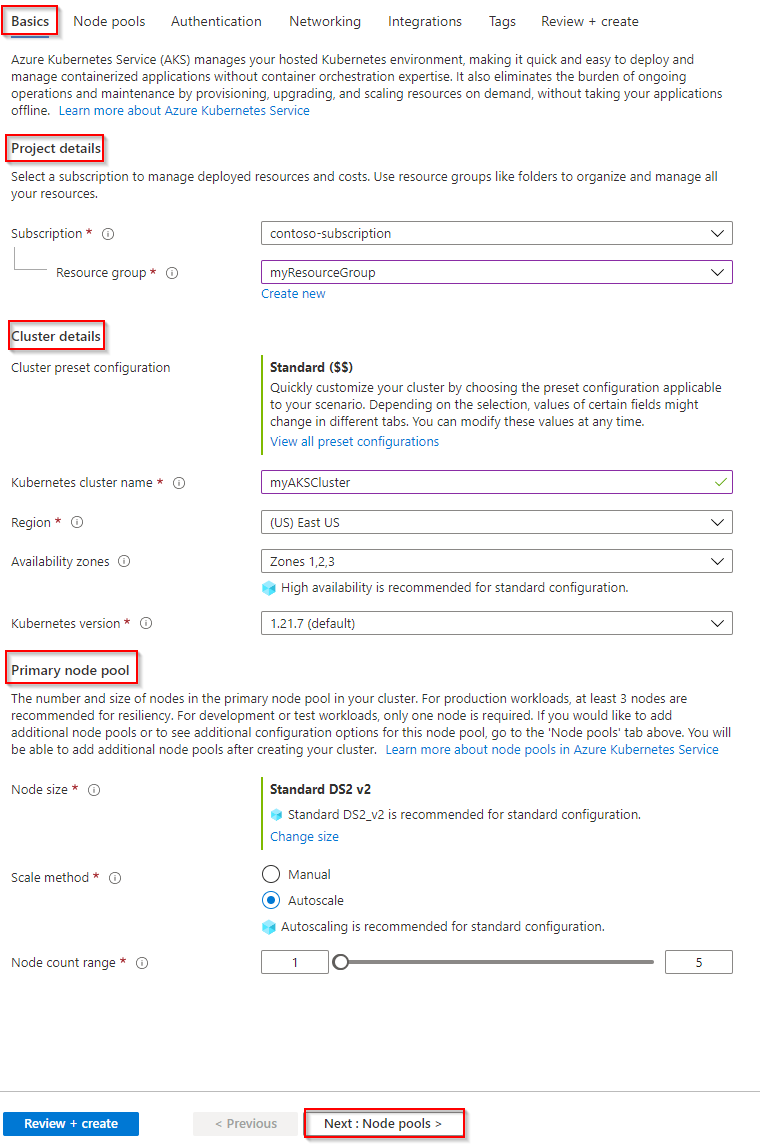
- choose Next: Scale when complete.
- On the Scale page, keep the default options. At the bottom of the screen,choose Next: Authentication.
- On the Authentication page, configure the following options:
- Create a new service principal by leaving the Service Principal field with (new) default service principal. Or you can choose Configure service principal to use an existing one. If you use an existing one, you will need to provide the SPN client ID and secret.
- Enable the option for Kubernetes role-based access controls (RBAC). This will provide more fine-grained control over access to the Kubernetes resources deployed in your AKS cluster.
By default, Basic networking is used, and Azure Monitor for containers is enabled. Click Review + create and then Create when validation completes.
It takes a few minutes to create the AKS cluster. When your deployment is complete, click Go to resource, or browse to the AKS cluster resource group, such as myResourceGroup, and select the AKS resource, such as myAKSCluster.
Connect to the cluster
To manage a Kubernetes cluster, you use kubectl, the Kubernetes command-line client. The kubectl client is pre-installed in the Azure Cloud Shell.
Open Cloud Shell using the >_ button on the top of the Azure portal.
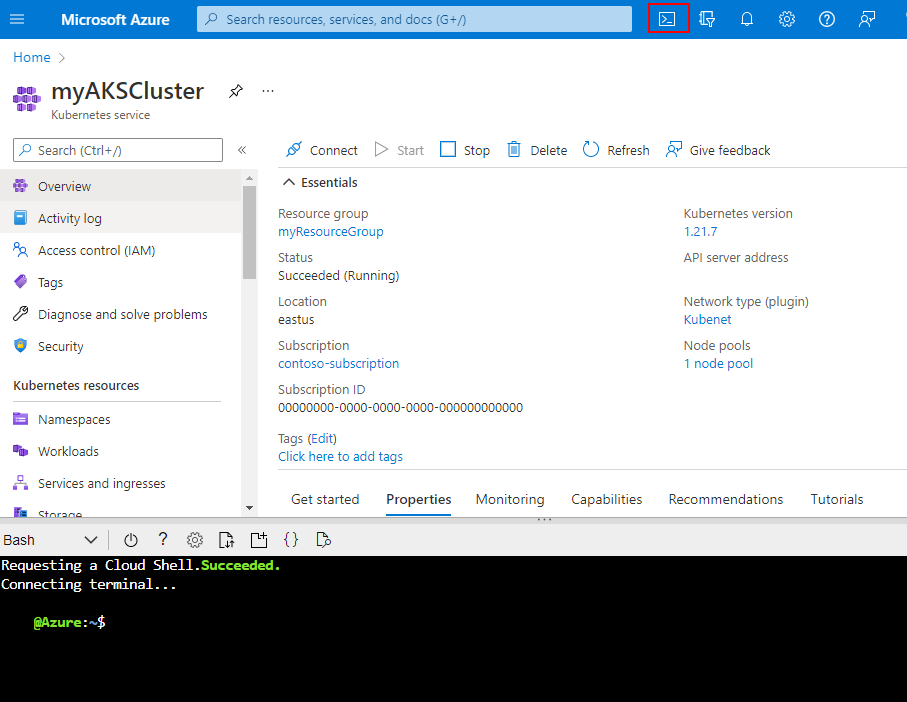
To configure kubectl to connect to your Kubernetes cluster, use the az aks get-credentials command. This command downloads credentials and configures the Kubernetes CLI to use them.
To verify the connection to your cluster, use the kubectl get command to return a list of the cluster nodes.
Monitor health and logs
When you created the cluster, Azure Monitor for containers was enabled. This monitoring feature provides health metrics for both the AKS cluster and pods running on the cluster.
It may take a few minutes for this data to populate in the Azure portal. To see current status, uptime, and resource usage for the Azure Vote pods, browse back to the AKS resource in the Azure portal, such as myAKSCluster. You can then access the health status as follows:
- Firstly, Under Monitoring on the left-hand side, choose Insights
- Also, Across the top, choose to + Add Filter
- Subsequently, Select Namespace as the property, then choose <All but kube-system>
- Finally, Choose to view the Containers.
Delete cluster
When the cluster is no longer needed, delete the cluster resource, which deletes all associated resources. This operation can be completed in the Azure portal by selecting the Delete button on the AKS cluster dashboard. Alternatively, the az aks delete command can be used in the Cloud Shell:
az aks delete –resource-group myResourceGroup –name myAKSCluster –no-wait

Reference documentation – Quickstart: Deploy an Azure Kubernetes Service (AKS) cluster using the Azure portal