Deploy a container instance in Azure
Use Azure Container Instances to run serverless Docker containers in Azure with simplicity and speed. Deploy an application to a container instance on-demand when you don’t need a full container orchestration platform like Azure Kubernetes Service.
Create a container instance
Firstly, log in to azure portal and then Select the Create a resource > Containers > Container Instances.

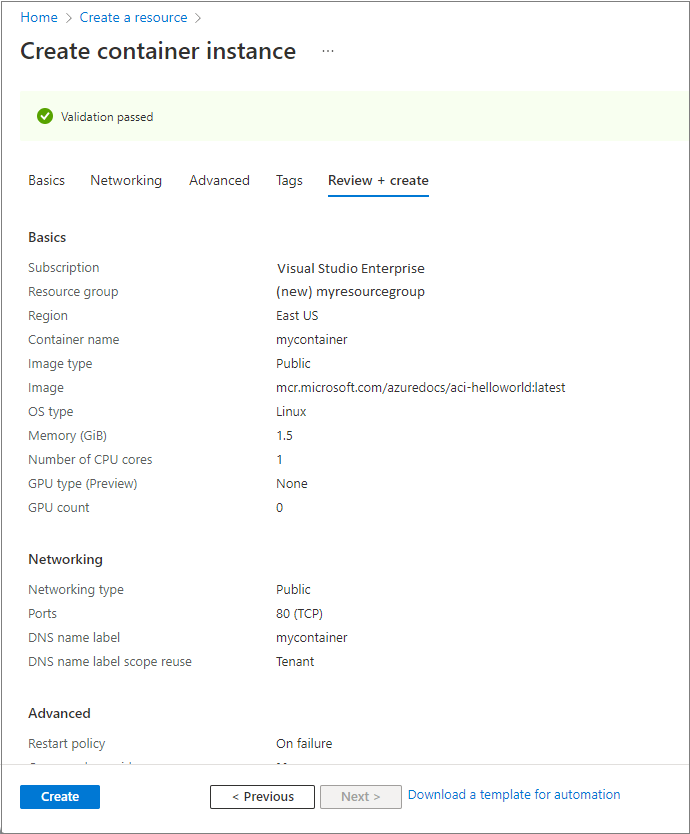
On the Basics page, enter the following values in the Resource group, Container name, and Container image text boxes. Leave the other values at their defaults, then select OK.
- Resource group: Create new >
myresourcegroup - Container name:
mycontainer - Image source: Quickstart images
- Container image:
mcr.microsoft.com/azuredocs/aci-helloworld(Linux)

For this quickstart, you use default settings to deploy the public Microsoft aci-helloworld image. This sample Linux image packages a small web app written in Node.js that serves a static HTML page. You can also bring your own container images stored in Azure Container Registry, Docker Hub, or other registries.
On the Networking page, specify a DNS name label for your container. The name must be unique within the Azure region where you create the container instance. Your container will be publicly reachable at <dns-name-label>.<region>.azurecontainer.io. If you receive a “DNS name label not available” error message, try a different DNS name label.

Leave the other settings at their defaults, then select Review + create.
When the validation completes, you’re shown a summary of the container’s settings. Select Create to submit your container deployment request.
When deployment starts, a notification appears to indicate the deployment is in progress. Another notification is displayed when the container group has been deployed.
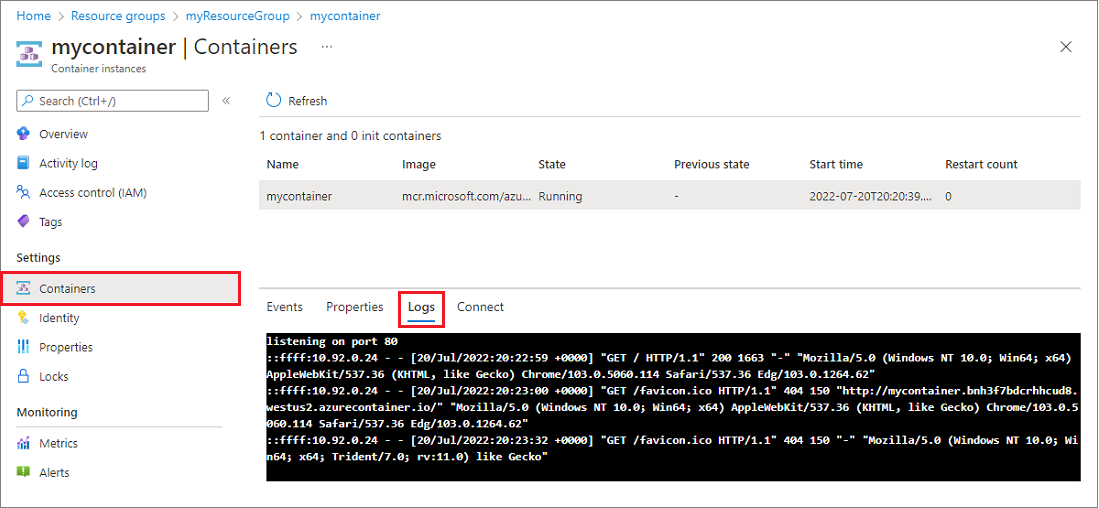
Open the overview for the container group by navigating to Resource Groups > myresourcegroup > mycontainer. Take note of the FQDN (the fully qualified domain name) of the container instance, as well its Status.

Once its Status is Running, navigate to the container’s FQDN in your browser.

Congratulations! By configuring just a few settings, you’ve deployed a publicly accessible application in Azure Container Instances.
View container logs
Viewing the logs for a container instance is helpful when troubleshooting issues with your container or the application it runs.
To view the container’s logs, under Settings, select Containers, then Logs. You should see the HTTP GET request generated when you viewed the application in your browser.
Clean up resources
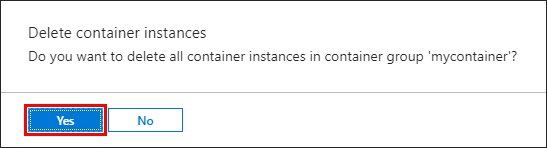
When you’re done with the container, select Overview for the mycontainer container instance, then select Delete.

Select Yes when the confirmation dialog appears.

Reference documentation – Quickstart: Deploy a container instance in Azure using the Azure portal