Create and deploy a cloud service
This tutorial will help to explain how to use the Quick Create method to create a new cloud service and then use Upload to upload and deploy a cloud service package in Azure. When you use this method, the Azure portal makes available convenient links for completing all requirements as you go. If you’re ready to deploy your cloud service when you create it, you can do both at the same time using Custom Create.
Concepts
Three components are required to deploy an application as a cloud service in Azure:
- Service Definition
The cloud service definition file (.csdef) defines the service model, including the number of roles. - Service Configuration
The cloud service configuration file (.cscfg) provides configuration settings for the cloud service and individual roles, including the number of role instances. - Service Package
The service package (.cspkg) contains the application code and configurations and the service definition file.
Create and deploy
Log in to Azure portal.
Click Create a resource > Compute, and then scroll down to and click Cloud Service.

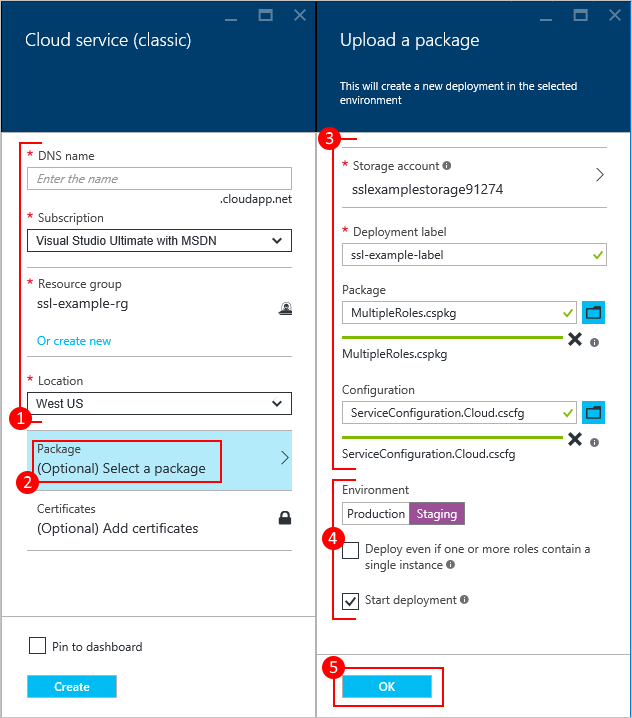
In the new Cloud Service pane, enter a value for the DNS name.
Create a new Resource Group or select an existing one.
Select a Location.
Click Package. This opens the Upload a package pane. Fill in the required fields. If any of your roles contain a single instance, ensure Deploy even if one or more roles contain a single instance is selected.
Make sure that Start deployment is selected.
Click OK which will close the Upload a package pane.
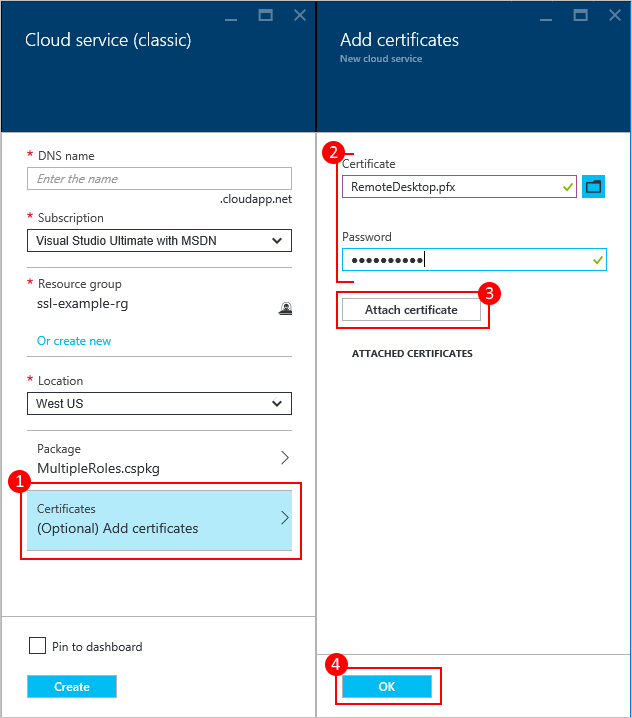
If you do not have any certificates to add, click Create.
Upload a certificate
If your deployment package was configured to use certificates, you can upload the certificate now.
- Select Certificates, and on the Add certificates pane, select the TLS/SSL certificate .pfx file, and then provide the Password for the certificate,
- Click Attach certificate, and then click OK on the Add certificates pane.
- Click Create on the Cloud Service pane. When the deployment has reached the Ready status, you can proceed to the next steps.
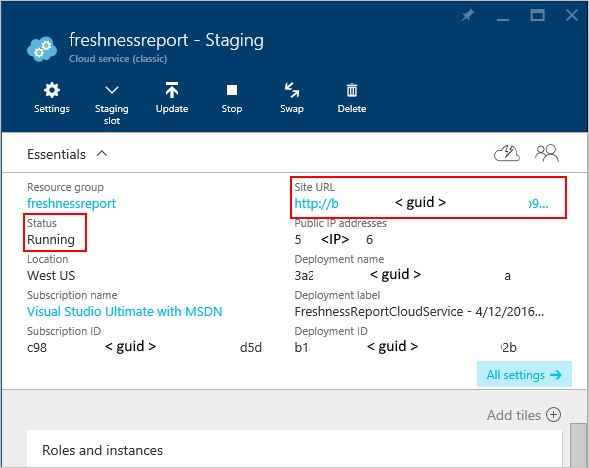
Verify your deployment completed successfully
- Click the cloud service instance.The status should show that the service is Running.
- Under Essentials, click the Site URL to open your cloud service in a web browser.

Reference Documentation – How to create and deploy a cloud service