Best practices for Azure RBAC & Viewing Role Assignments
This tutorial will help you understand and will describe some best practices for using Azure role-based access control (Azure RBAC) and viewing role assignments. These best practices are extracted from our experience with Azure RBAC and the experiences of customers.
AZ-303 exam is retired. AZ-305 replacement is available.
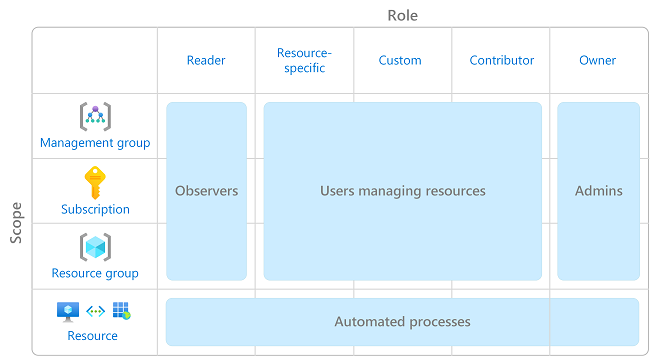
Only grant the access users in need
Using Azure RBAC, you can separate duties within your team and grant only the amount of access to users that they need to perform their jobs. Instead of giving everybody, without any restrictions on permissions in your Azure subscription or resources, you can permit only certain actions at a particular scope.
When team is planning your access control strategy, it’s a best practice to grant users the least privilege to get the work done. The diagram given below shows a suggested pattern for using Azure RBAC.
Limit the number of subscription owners
You should be having a maximum of 3 subscription owners to lessen the potential for breach by a compromised owner.
Use Azure AD Privileged Identity Management
To keep safe privileged accounts from malicious cyber-attacks, you can use Azure Active Directory Privileged Identity Management (PIM). It will lower the exposure time of privileges and increase your visibility into their use through reports and alerts. PIM will help to protect privileged accounts by providing just-in-time privileged access to Azure AD and Azure resources.
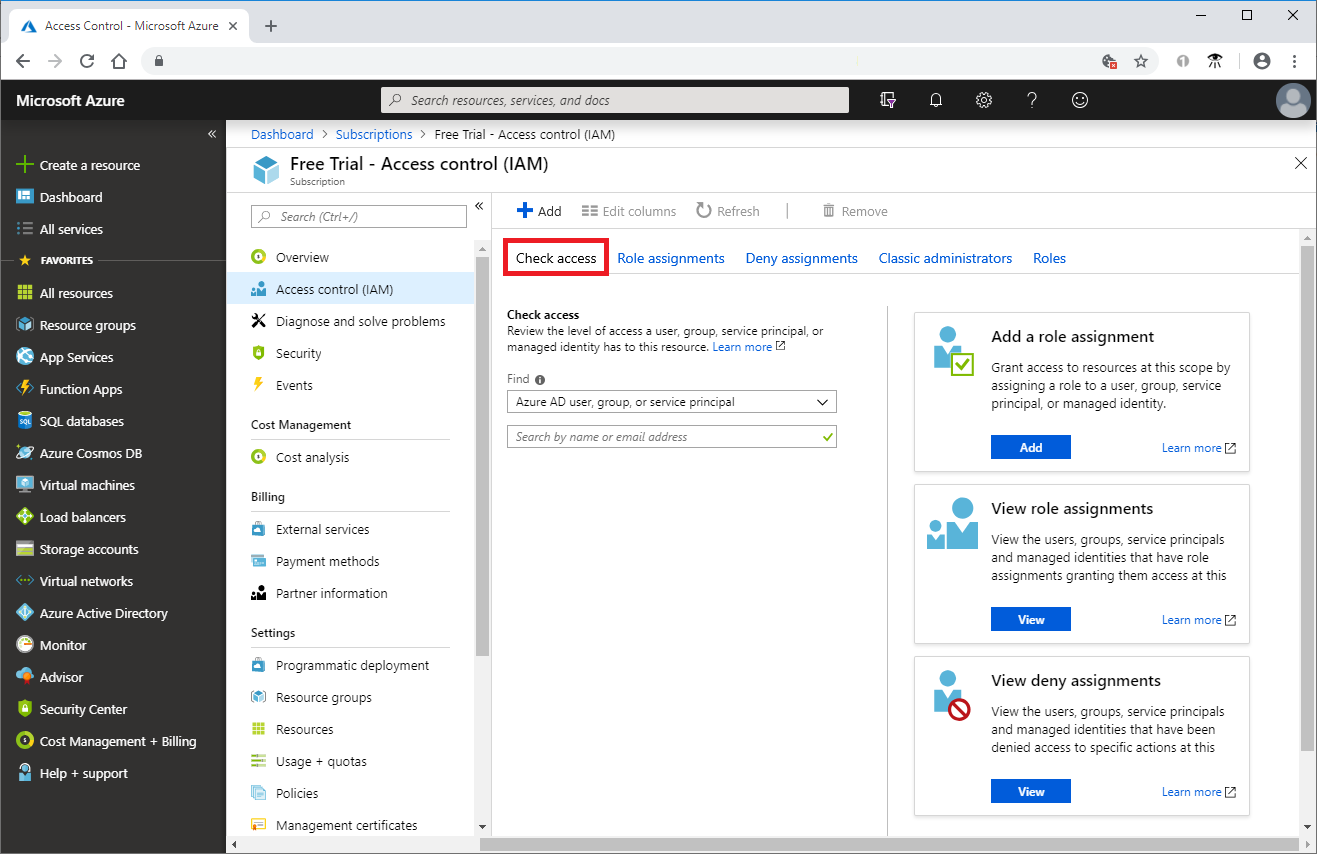
Viewing role assignments
The way that you watch the access for a user is to list their roles assignments. Follow the below mentioned steps to viewing the role assignments for a single user, group, service principal, or managed identity at the subscription scope.
- Visit Azure portal, choose All services and then Subscriptions.
- Subsequently, choose your subscription.
- choose Access control (IAM).
- Furthermore, choose the Check access tab.
- Also, In the Find list, choose the type of security principal you want to check access for.
- Subsequently, In the search box, type a string to search the directory for display names, email addresses, or object identifiers.
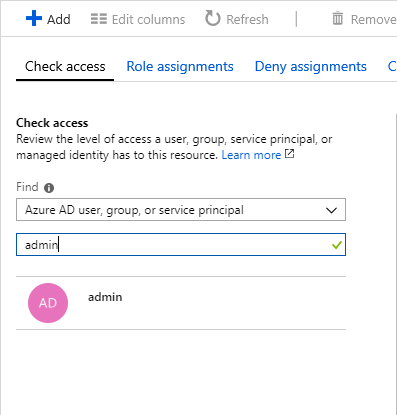
- Now, choose the security principal to open the assignments pane.
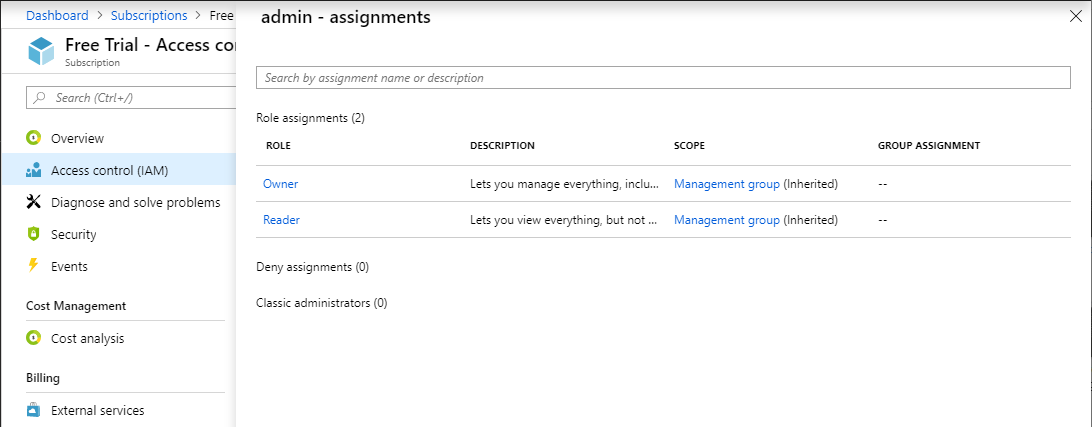 Now, On this pane, you can see the roles assigned to the selected security principal and the scope. If there are any denied assignments at this scope or inherited to this scope, they will be listed on the screen.

Reference documentation and Image source – Quickstart: View the access a user has to Azure resources