Using Privileged Identity Management (PIM)
Exam AZ-304 is retired. AZ-305 replacement is available.
In this article we will learn and understand about the process of enabling Privileged Identity Management (PIM) and get started using it.
However, using Privileged Identity Management (PIM) helps in managing, controlling, and monitoring access within your Azure Active Directory (Azure AD) organization. Moreover, with PIM you can provide as-needed and just-in-time access to Azure resources, Azure AD resources, and other Microsoft online services like Office 365 or Microsoft Intune.
Prerequisites
For using Privileged Identity Management, you must have one of the following licenses:
- Firstly, Azure AD Premium P2
- Secondly, Enterprise Mobility + Security (EMS) E5
Preparing PIM for Azure AD roles
After enabling the Privileged Identity Management for your directory, you can start preparing Privileged Identity Management to manage Azure AD roles.
And, below there are the tasks we recommend for you for preparing for Azure AD roles, in order:
- Firstly, configuring Azure AD role settings.
- Then, giving eligible assignments.
- Lastly, allowing eligible users to activate their Azure AD role just-in-time.

Preparing PIM for Azure roles
After enabling the Privileged Identity Management for your directory, you can start preparing Privileged Identity Management to manage Azure roles for Azure resource access on a subscription. And, below there are the tasks we recommend for you for preparing for Azure roles, in order:
- Firstly, discovering Azure resources
- Secondly, configuring Azure role settings.
- Then, giving eligible assignments.
- Lastly, allowing eligible users to activate their Azure roles just-in-time.
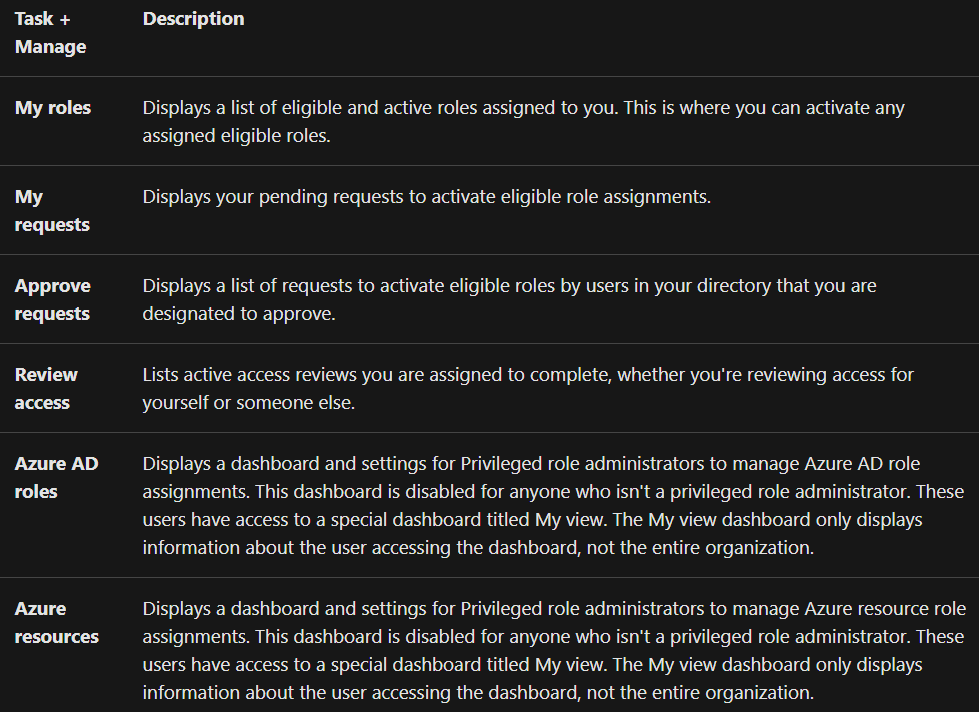
Navigating to your tasks
After setting up Privileged Identity Management, you can learn your way around.
Adding a PIM tile to the dashboard
For making it easier to open Privileged Identity Management, add a PIM tile to your Azure portal dashboard.
- Firstly, Sign in to the Azure portal.
- Then, select All services and find the Azure AD Privileged Identity Management service.
- Thirdly, select the Privileged Identity Management Quickstart.
- Lastly, check the Pin blade to a dashboard to pin the Privileged Identity Management Quickstart blade to the dashboard.

Reference: Microsoft Documentation