Steps to Configure Azure Active Directory (Azure AD) for Authorizing Requests from Client Application
One of the primary benefits of using Azure Active Directory (Azure AD) with Azure Blob storage is that you need not store your credentials in your code. Moreover, we can request an OAuth 2.0 access token from the Microsoft identity platform (formerly known as Azure AD). The Azure AD authenticates the security principal (it can be a user, group, or service principal) running the application. So if authentication succeeds, then the Azure AD returns the access token to the application. Thereafter the application can then use the access token to authorize requests to Azure Blob storage or Queue storage.
Steps to Assign a role to an Azure Active Directory (Azure AD) Security Principal
In order to authenticate a security principal from your Azure Storage application follow the steps below –
- Firstly, configure role-based access control (RBAC) settings for that security principal
- Then, Azure Storage defines built-in RBAC roles that encompass permissions for containers and queues.
- Lastly, when the RBAC role is assigned to a security principal, that security principal is granted access to that resource.

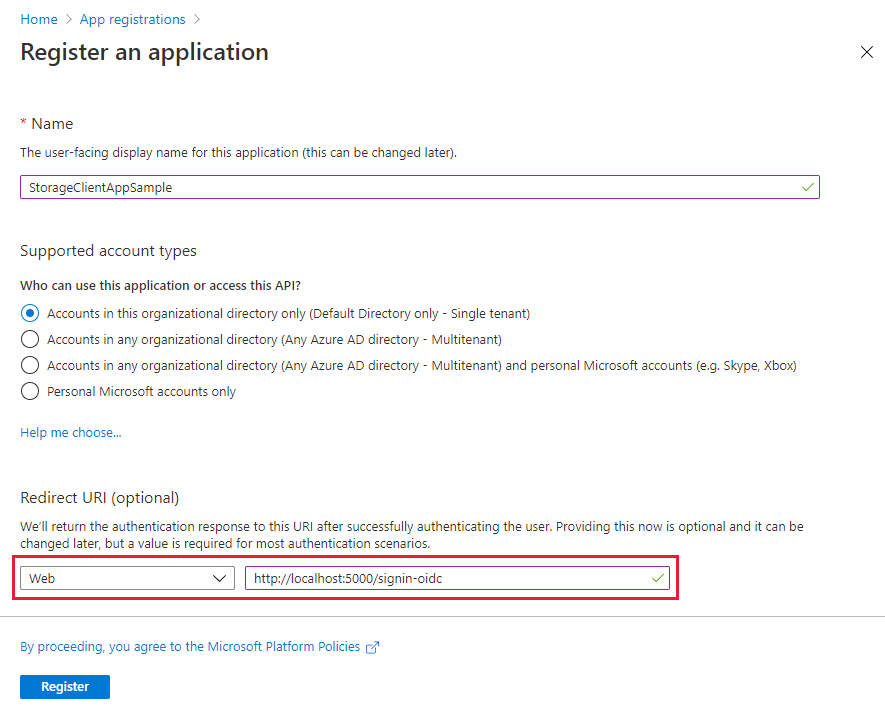
Steps to Register with an Azure Active Directory (Azure AD) Tenant
We shall now define the steps to register your application with an Azure AD Tenant
- Firstly, in order for Azure AD to authorize access to storage resources, it is important to register your client application with an Azure AD tenant from the Azure portal.
- After registering your client application, you must supply information about the application to Azure AD.
- Thereafter, Azure AD provides a client ID (known as an application ID) used to associate your application with Azure AD at runtime.
Steps to grant your registered app permissions to Azure Storage
In order to grant your application permissions to call Azure Storage APIs we will use the following steps to enable your application to authorize requests to Azure Storage with Azure AD
- On the Overview page for your registered application, select View API Permissions.
- In the API permissions section, select Add permission and choose Microsoft APIs
- Select Azure Storage from the list of results to display the Request API permissions pane.
- Under What type of permissions does your application require?, observe that the available permission type is Delegated permissions. This option is selected for you by default.
- In the Select permissions section of the Request API permissions pane, select the checkbox next to user_impersonation, then click Add permissions.
How to create a client secret?
Every application needs a client secret to prove its identity when requesting a token. Therefore in order to add the client secret, we will use the following steps –
- In the first step, navigate to your app registration in the Azure portal.
- Second Step, select the Certificates & secrets setting.
- Third Step, under Client secrets, click New client secret to create a new secret.
- Fourth Step, provide a description for the secret and choose the desired expiration interval.
- Fifth Step, immediately copy the value of the new secret to a secure location. The full value is displayed to you only once.

Reference: Microsoft Documentation