Role Assignment using Azure Portal
Before you learn to add or remove Azure role assignments using the Azure portal, it is very important to understand Azure Role-Based Access Control (RBAC). We may define Azure role-based access control (RBAC) is an authorization system that can be used to manage access to Azure resources. Now in order to grant access, you are required to assign roles to users, groups, service principals, or managed identities at a particular scope.
Prerequisites of Assigning Roles:
In order to add or remove role assignments, we are required are –
- Microsoft.Authorization/roleAssignments/write
- Microsoft.Authorization/roleAssignments/delete permissions (From User Access Administrator or Owner)
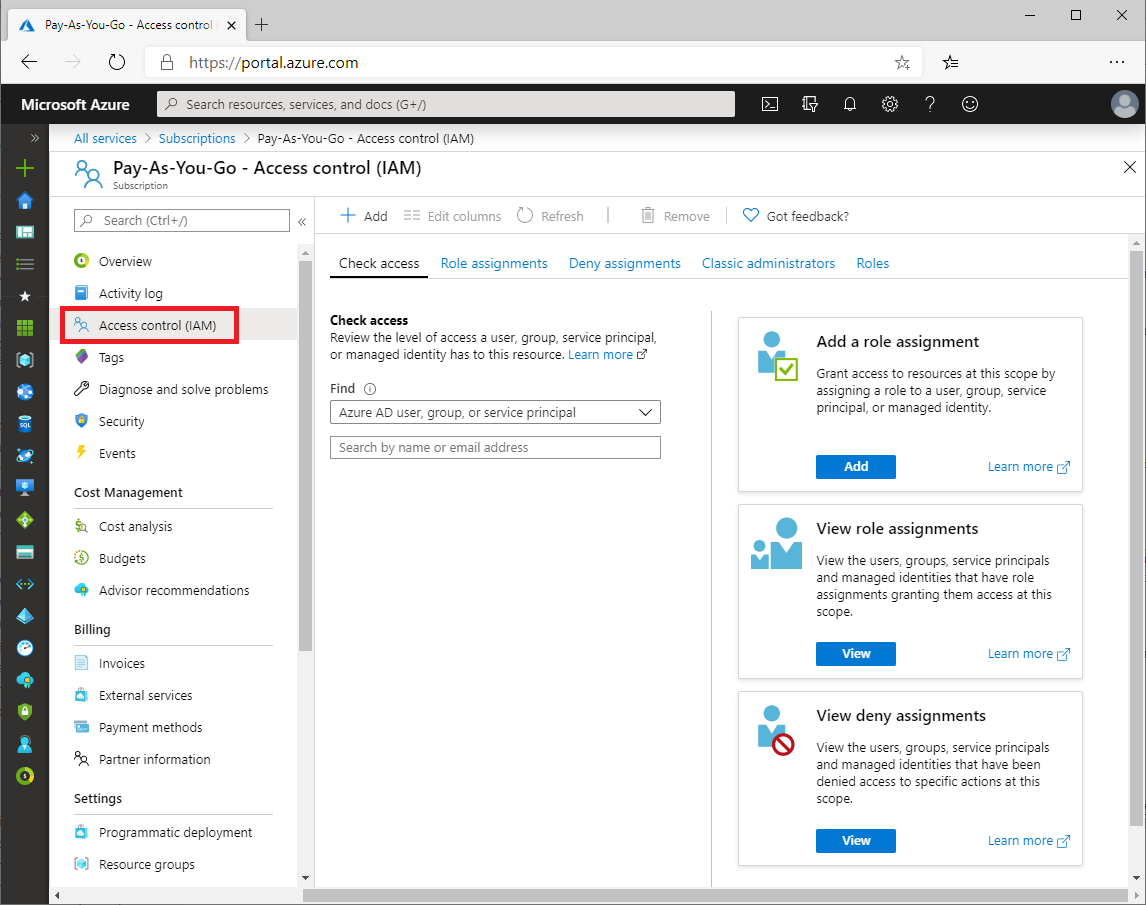
Access control (IAM)
IAM (Identity and Access Management) is a specified page for assigning roles and granting access to Azure resources. In the Azure portal, Access Control is also known as identity and access management.
Steps to Add a Role Assignment
In Azure role-based access control (RBAC), in order to grant access to an Azure resource, you must add a role assignment. We shall now discuss the steps to add a role assignment.
- First Step – In the Azure portal, we will click on All services and then select the scope that we want to grant access to namely, Management groups, Subscriptions, Resource groups, or a resource.
- Second Step – We should then Click the specific resource for that scope.
- Third Step – Now Click Access control (IAM).
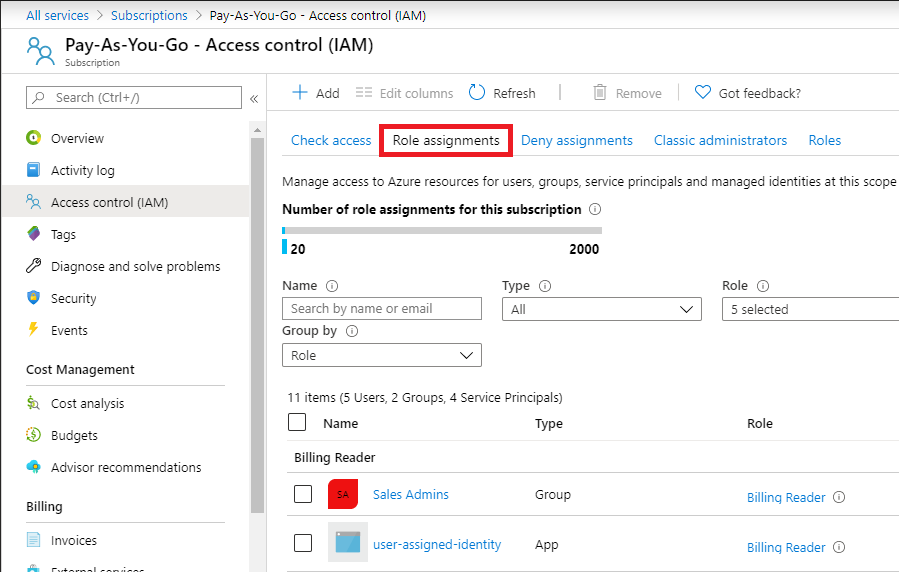
- Fourth Step – In this step we will click the Role assignments tab to view the role assignments at this scope.
- Fifth Step – Now Click Add > Add role assignment. But in case you do not have permissions to assign roles, the Add role assignment option will be disabled.
- Sixth Step – In the Role drop-down list, select a role such as Virtual Machine Contributor.
- Seventh Step – In this step we will select a user, group, service principal, or managed identity. Then in the Select list, in case, we do not find the security principal in the list, next we can type in the Select box to search the directory for display names, email addresses, and object identifiers.
- Eighth Step – Click Save to assign the role. After a few moments, the security principal is assigned the role at the selected scope.
Steps to Add a role assignment for a managed identity
In this topic, we will describe an alternate way to add role assignments for a managed identity. Thereby, using these steps, you start with the managed identity and then select the scope and role.
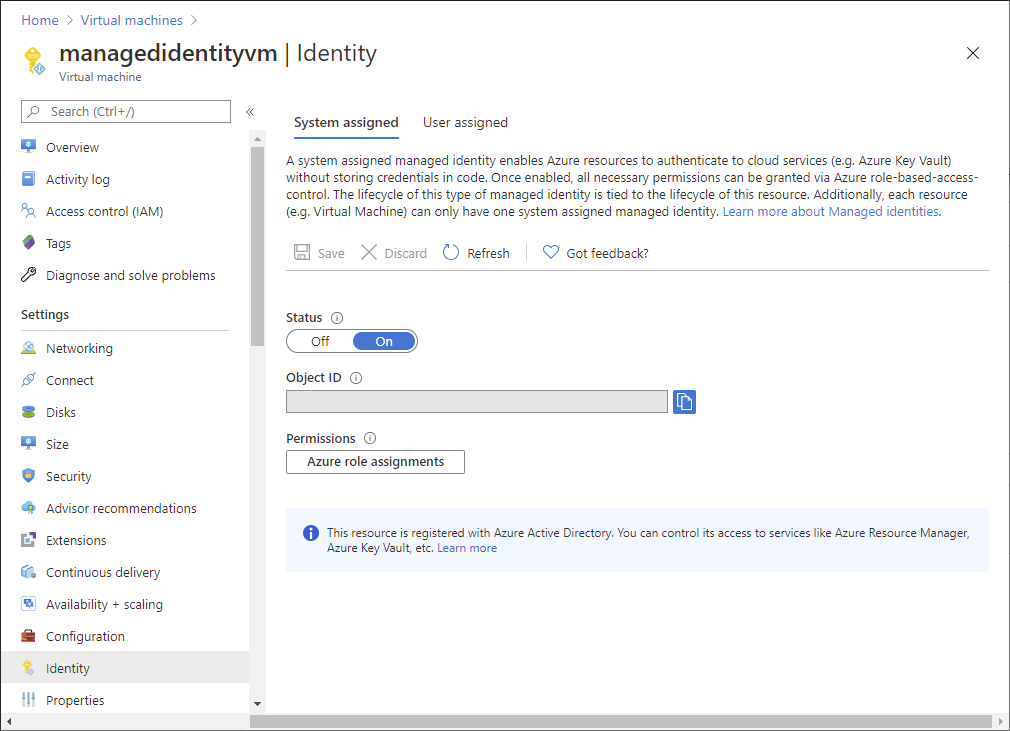
- Firstly, in the Azure portal, open a system-assigned managed identity.
- Then, in the left menu, click Identity.
- Next, under Permissions, click Azure role assignments. If roles are already assigned to the selected system-assigned managed identity, you see the list of role assignments. This list includes all role assignments you have permission to read.
- Now, to change the subscription, click the Subscription list.
- Then click Add role assignment (Preview).
- In this step, use the drop-down lists to select the set of resources that the role assignment applies to such as Subscription, Resource Group, or resource. But in case you do not have role assignment write permissions for the selected scope, then an inline message will be displayed.
- Select a role such as Virtual Machine Contributor, in the Role drop-down list.
- Lastly, Click Save to assign the role.

Steps to Remove a Role Assignment
In order to remove access from an Azure resource, in Azure RBAC we must remove a role assignment.
- The first step we will first Open Access control (IAM) at a scope, such as management group, subscription, resource group, or resource, where you want to remove access.
- In the second step, click the Role assignments tab to view all the role assignments for this subscription.
- Next in the list of role assignments, add a checkmark next to the security principal with the role assignment you want to remove.
- Now Click Remove.
- Lastly, in the remove role assignment message that appears, click Yes.
Note – Any message displaying that inherited role assignments cannot be removed, indicates that you are trying to remove a role assignment at a child scope. In this case, you must open Access control (IAM) at the scope where the role was assigned and then try again.

Reference: Microsoft Documentation