Optimize costs by automating Azure Blob Storage access tiers
In this we will learn how to Optimize costs by automating Azure Blob Storage access tiers. However, Data sets have unique lifecycles. And, Azure Blob Storage lifecycle management offers a rich, rule-based policy for GPv2 and blob storage accounts. Use the policy to transition your data to the appropriate access tiers or expire at the end of the data’s lifecycle.
The lifecycle management policy lets you:
- Firstly, transition blobs from cool to hot immediately if accessed to optimize for performance
- Secondly, transition blobs, blob versions, and blob snapshots to a cooler storage tier (hot to cool, hot to archive, or cool to archive) if not accessed or modified for a period of time to optimize for cost
- Thirdly, delete blobs, blob versions, and blob snapshots at the end of their lifecycles
- Then, define rules to be run once per day at the storage account level
- Lastly, apply rules to containers or a subset of blobs (using name prefixes or blob index tags as filters)
Add or remove a policy
You can add, edit, or remove a policy by using any of the following methods:
- Firstly, Azure portal
- Secondly, Azure PowerShell
- Thirdly, Azure CLI
- Lastly, REST APIs
Let’s check how to manage policy:
Portal
There are two ways to add a policy through the Azure portal.
- Firstly, Azure portal List view
- Secondly, Azure portal Code view
Azure portal List view
- Firstly, sign in to the Azure portal.
- Secondly, in the Azure portal, search for and select your storage account.
- Under Blob service, select Lifecycle Management to view or change your rules.
- Thirdly, select the List View tab.
- Then, select Add a rule and name your rule on the Details form. You can also set the Rule scope, Blob type, and Blob subtype values.
- After that, select Base blobs to set the conditions for your rule.
- Next, if you selected Limit blobs with filters on the Details page, select Filter set to add an optional filter.
- Lastly, select Add to add the new policy.

Azure portal Code view
- Firstly, sign in to the Azure portal.
- Secondly, in the Azure portal, search for and select your storage account.
- Then, under Blob service, select Lifecycle Management to view or change your policy.
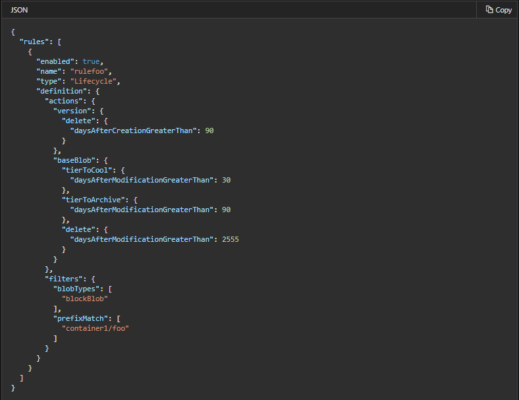
- Next, the following JSON is an example of a policy that can be pasted into the Code View tab.
- Lastly, select Save.
Policy
A lifecycle management policy is a collection of rules in a JSON document:
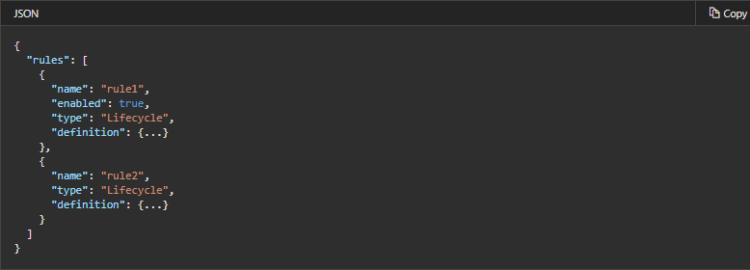

Rules
Each rule definition includes a filter set and an action set. The filter set limits rule actions to a certain set of objects within a container or objects names. However, the action set applies the tier or delete actions to the filtered set of objects.
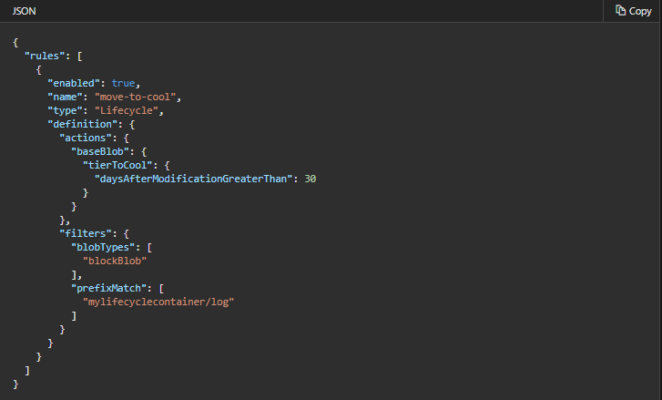
Sample rule
The following sample rule filters the account to run the actions on objects that exist inside container1 and start with foo.
- Firstly, Tier blob to cool tier 30 days after last modification
- Secondly, Tier blob to archive tier 90 days after last modification
- Thirdly, Delete blob 2,555 days (seven years) after last modification
- Lastly, Delete previous blob versions 90 days after creation
Move data based on last accessed date (preview)
You can enable last access time tracking to keep a record of when your blob is last read or written. Moreover, you can use last access time as a filter to manage tiering and retention of your blob data.
The Last accessed option is available in preview in the following regions:
- Firstly, France Central
- Secondly, Canada East
- Lastly, Canada Central
However, in order to use the Last accessed option, select Access tracking enabled on the Lifecycle Management page in the Azure portal.
How last access time tracking works
When last access time tracking is enabled, the blob property called LastAccessTime is updated when a blob is read or written. A Get Blob operation is considered an access operation. Get Blob Properties, Get Blob Metadata, and Get Blob Tags are not access operations, and therefore don’t update the last access time.
Further, to minimize the impact on read access latency, only the first read of the last 24 hours updates the last access time. Subsequent reads in the same 24-hour period do not update the last access time.
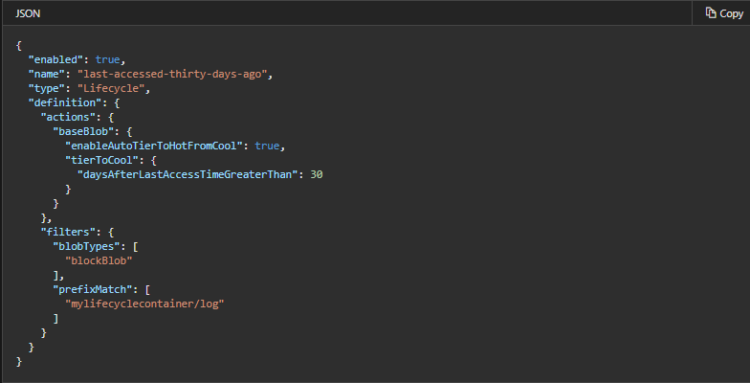
In the following example, blobs are moved to cool storage if they haven’t been accessed for 30 days. The enableAutoTierToHotFromCool property is a Boolean value that indicates if a blob should automatically be tiered from cool back to hot if it is accessed again after being tiered to cool.
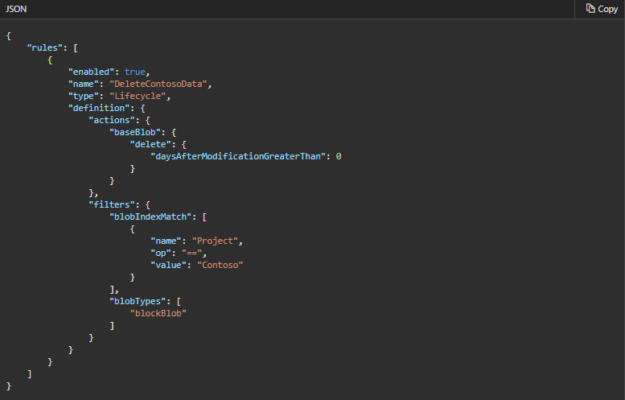
Delete data with Blob Index tags
Some data should only be expired if explicitly marked for deletion. You can configure a lifecycle management policy to expire data that are tagged with blob index key/value attributes. However, the following example shows a policy that deletes all block blobs tagged with Project = Contoso. To learn more about the Blob Index, see Manage and find data on Azure Blob Storage with Blob Index (Preview).
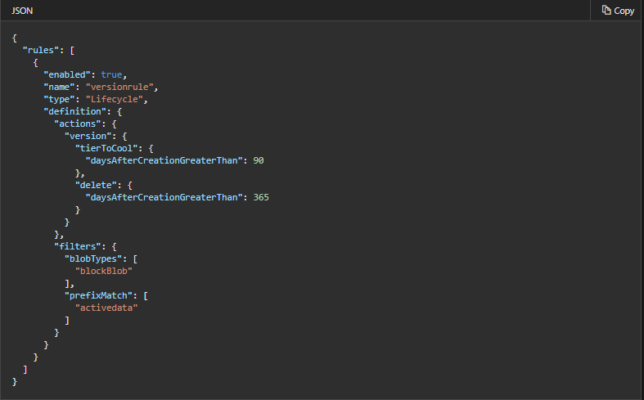
Manage versions
For data that is modified and accessed regularly throughout its lifetime, you can enable blob storage versioning to automatically maintain previous versions of an object. Moreover, you can create a policy to tier or delete previous versions. The version age is determined by evaluating the version creation time. This policy rule tiers previous versions within container activedata that are 90 days or older after version creation to cool tier, and deletes previous versions that are 365 days or older.

Reference: Microsoft Documentation