Learn to Create Users and Groups
We shall now discuss the process of adding new users or deleting existing users from your Azure Active Directory (Azure AD) organization. Now in order to add or delete users, it is very important that you must be either a User administrator or Global administrator. Let us learn to create users and groups using Azure Directory
What are the steps to Create User / Add a New User?
We can create a new user using the Azure Active Directory portal. Therefore to add a new user, we use the following steps –
- Firstly, sign in to the Azure portal as a User administrator for the organization.
- The second step, search for and select Azure Active Directory from any page.
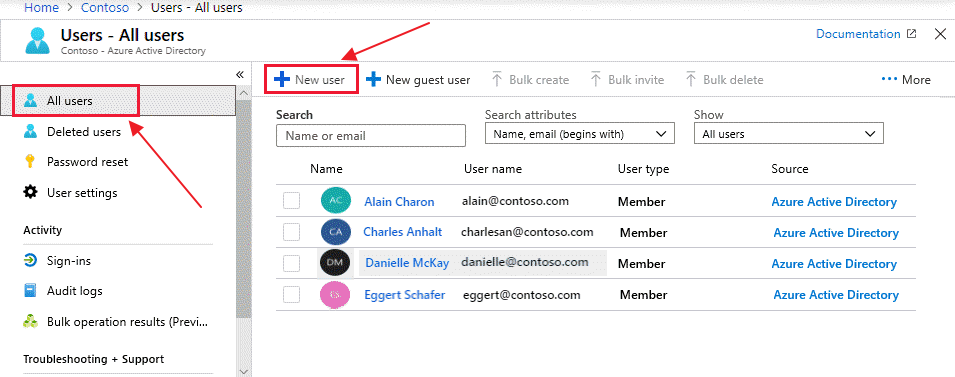
- Now select Users, and then select New user.
- Then, on the User page, enter information for this user:
- Name. Required: The first and last name of the new user. For example, Mary Parker.
- User name. Required. The user name of the new user. For example, [email protected] domain part of the user name must use either the initial default domain name, <yourdomainame>.onmicrosoft.com, or a custom domain name, such as contoso.com. For more information about how to create a custom domain name, see Add your custom domain name using the Azure Active Directory portal.
- Groups: Optionally, you can add the user to one or more existing groups. You can also add the user to groups at a later time. For more information about adding users to groups, see Create a basic group and add members using Azure Active Directory.
- Directory role: If you require Azure AD administrative permissions for the user, you can add them to an Azure AD role. You can assign the user to be a Global administrator or one or more of the limited administrator roles in Azure AD. For more information about assigning roles, see How to assign roles to users.
- Job info: You can add more information about the user here, or do it later. For more information about adding user info, see How to add or change user profile information.
5. Copy the autogenerated password provided in the Password box. You’ll need to give this password to the user to sign in for the first time.
6. Select Create.
Finally, the user is created and added to the Azure AD organization.

How can we Add a New Guest User?
Primarily, we can invite a new guest user to collaborate with an organization by selecting the user from the New user page. Therefore, if the organization’s external collaboration settings are configured such that you will be allowed to invite guests, thereby the user will be emailed an invitation they must accept in order to begin collaborating.
How to Add a consumer user?
There are cases when there is a requirement to manually create consumer accounts in Azure Active Directory B2C (Azure AD B2C) directory. For more information about creating consumer accounts, see Create and delete consumer users in Azure AD B2C.
How to Add a new user within a hybrid environment?
In case we have an environment with both Azure Active Directory (cloud) and Windows Server Active Directory (on-premises), then we can add new users by syncing the existing user account data.
What are the steps to Delete a user?
We can delete an existing user using Azure Active Directory portal. Following are the steps to delete a user –
- Firstly, sign in to the Azure portal using a User administrator account for the organization.
- Secondly, search for and select Azure Active Directory from any page.
- Next, search for and select the user that we want to delete from your Azure AD tenant.
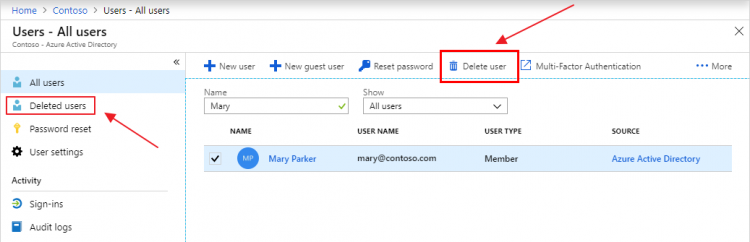
- Then, select Delete user.
- Users – All users page with Delete user highlighted
In this case, the user is deleted and no longer appears on the Users – All users page. Note, the user can be viewed on the Deleted users page for the next 30 days of deletion. Also, we can restore the user during that time. Note that when a user is deleted, any licenses possessed by the user are then made available to other users.

Reference: Microsoft Documentation