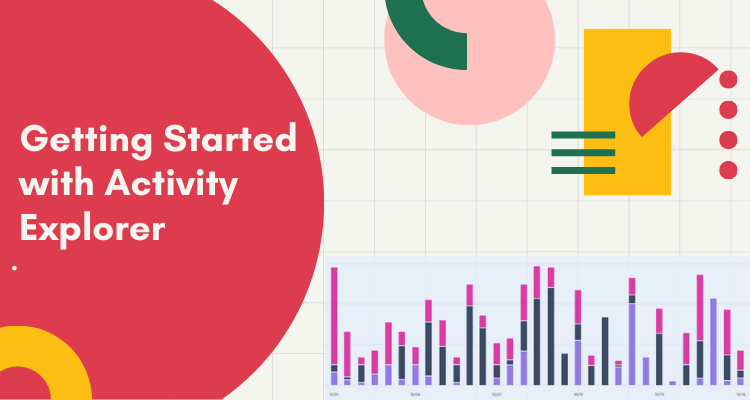
Getting started with activity explorer and content explorer
Microsoft 365 is a suite of cloud-based productivity tools and services provided by Microsoft. One of the features of Microsoft 365 is the Activity Explorer, which allows users to view and analyze the activity data of their organization’s Microsoft 365 services. In this guide, we’ll go through the steps to get started with Activity Explorer.
- Step 1: Sign in to Microsoft 365 To access Activity Explorer, you must have a Microsoft 365 account. Sign in to your account using your credentials.
- Step 2: Access the Microsoft 365 admin center Once you’ve signed in, click on the “Admin” app in the app launcher, which will take you to the Microsoft 365 admin center.
- Step 3: Navigate to the Activity Explorer In the Microsoft 365 admin center, select the “Reports” tab on the left-hand side. From there, select “Usage” and then “Activity Explorer” to access the Activity Explorer dashboard.
- Step 4: Use the Activity Explorer The Activity Explorer dashboard provides an overview of the activity data for your organization’s Microsoft 365 services. You can view activity data for different services, such as Exchange, SharePoint, Teams, and more.
- You can also filter the data by date range, user, service, and activity type to get a more specific view of the data. The Activity Explorer dashboard also provides visual representations of the data, such as charts and graphs, which can help you to quickly identify trends and patterns in the activity data.
Prerequisites
Note that for each account that accesses and uses data classification should have a license assigned to it from one of these subscriptions:
- Microsoft 365 (E5)
- Office 365 (E5)
- Advanced Compliance (E5) add-on
- Advanced Threat Intelligence (E5) add-on
- Microsoft 365 E5/A5 Info Protection & Governance
- Microsoft 365 E5/A5 Compliance
Permissions
An account must be explicitly assigned membership in any one of these role groups or explicitly granted the role.
Roles and Role Groups
There are roles and role groups that you can use to fine-tune your access controls. To learn more about them, see Permissions in the Microsoft Purview compliance portal.
| Microsoft Purview Roles | Microsoft Purview Role Groups | Microsoft 365 Roles | Microsoft 365 Role Groups |
|---|---|---|---|
| Information Protection Admin | Information Protection | Global Admins | Compliance Administrator |
| Information Protection Analyst | Information Protection Admins | Compliance Admins | Security Administrator |
| Information Protection Investigator | Information Protection Investigators | Security Admins | Security Reader |
| Information Protection Reader | Information Protection Analysts | Compliance Data Admins | |
| Information Protection Readers |
Activity Explorer
The activity explorer shows you how activities on your tagged content have changed over time. The activity data is gathered from the Microsoft 365 unified audit logs, converted, and shown in the Activity Explorer user interface. However, there are over 30 distinct filters to choose from, including:
- date range
- activity type
- location
- user
- sensitivity label
- retention label
- file-path
- DLP policy
- Prerequisites
Activity types
Activity Explorer collects information about activities from audit logs from a variety of sources. Sensitivity labelling and retention labelling operations from Office native programmes, Azure Information Protection add-in, SharePoint Online, Exchange Online (sensitivity labels only), and OneDrive, on the other hand. Here are a few examples:
- Firstly, a label applied
- Secondly, a label changed (upgraded, downgraded, or removed)
- Then, auto-labeling simulation
- Lastly, file read
Microsoft Reference Link – Get started with activity explorer

Further, activity explorer also collects DLP policy matches events from:
- Firstly, Exchange Online
- Secondly, SharePoint Online
- Thirdly, OneDrive
- Teams Chat and Channel (preview)
- Then, on-premises SharePoint folders and libraries
- on-premises file shares
- Lastly, Windows 10 devices via Endpoint data loss prevention (DLP).
Content explorer
The content explorer is a tab in the compliance center’s data categorization pane. It gives administrators access to the material in the overview pane that has been summarised. Access to content explorer, on the other hand, is severely restricted because it allows you to see the contents of scanned files. Access to content explorer is granted by two roles:
- Firstly, content explorer list viewer.
- Secondly, content explorer content viewer.
Administrators may also use content explorers to acquire a current view of specific things that have been categorized across the company. It also allows administrators to go deeper into things by allowing them to access and examine scanned source information stored in a variety of places, including Exchange, SharePoint, and OneDrive.
Sensitive information types
A DLP policy can aid in the protection of sensitive information, which is described as a sort of sensitive information. Microsoft 365, on the other hand, contains ready-to-use definitions for several typical sensitive information kinds from a variety of geographies. Credit card numbers, bank account numbers, national ID numbers, and Windows Live ID service numbers are just a few examples.
Sensitivity labels
A sensitivity label is just a label that highlights the item’s importance to your company. It is possible to apply it manually or automatically. It becomes embedded in the document after application and will follow it everywhere it goes. A sensitivity label allows for a variety of security features, such as required watermarking or encryption. Furthermore, in order for the necessary data to appear on the data categorization page, sensitivity labels must be enabled for files in SharePoint and OneDrive.
Retention labels
A retention label allows you to define how long a labeled item is kept and the steps to be taken prior to deleting it. They can apply manually or automatically via policies. Moreover, they can help your organization to stay in compliance with legal and regulatory requirements.
How to use content explorer
- Firstly, open Microsoft 365 compliance center > Data classification > Content explorer.
- Secondly, if you know the name of the label, or the sensitive information type, you can type that into the filter box.
- Alternately, you can browse for the item by expanding the label type and selecting the label from the list.
- Then, select a location under All locations and drill down the folder structure to the item.
- Lastly, double-click to open the item natively in content explorer.

Reference: Get started with activity explorer and Get started with content explorer