Deploy and configure Azure Bastion Service
In this we will learn about, how to connect to a virtual machine through your browser using Azure Bastion and the Azure portal. In the Azure portal, we will deploy Bastion to your virtual network. After deploying Bastion, we will connect to a VM via its private IP address using the Azure portal. Further, in this we will learn how to create a bastion host for your VNet and connect to a Windows virtual machine.
Prerequisites
- Firstly, a virtual network.
- Secondly, Windows virtual machine in the virtual network.
- The following required roles:
- Reader role on the virtual machine.
- Then, Reader role on the NIC with private IP of the virtual machine.
- Reader role on the Azure Bastion resource.
- Lastly, Ports: To connect to the Windows VM, you must have the following ports open on your Windows VM:
- Inbound ports: RDP (3389)

Create a bastion host
- Firstly, from the Home page, select + Create a resource.
- Then, on the New page, in the Search box, type Bastion, then select Enter to get to the search results. On the result for Bastion, verify that the publisher is Microsoft. Then, Select Create.
- Next, on the Create a Bastion page, configure a new Bastion resource.
- Subscription: The Azure subscription you want to use to create a new Bastion resource.
- Resource Group: The Azure resource group in which the new Bastion resource will be created. If you don’t have an existing resource group, you can create a new one.
- Name: The name of the new Bastion resource.
- Region: The Azure public region that the resource will be created in.
- Virtual network: The virtual network in which the Bastion resource will be created. You can create a new virtual network in the portal during this process, or use an existing virtual network.
- Subnet: Once you create or select a virtual network, the subnet field will appear. The subnet in your virtual network where the new Bastion host will be deployed. Then, the subnet will be dedicated to the Bastion host. Select Manage subnet configuration and create the Azure Bastion subnet. Select +Subnet and create a subnet using the following guidelines:
- After finishing the settings, select Review + Create. This validates the values. Once validation passes, you can create the Bastion resource.
- Then, select Create.
- Lastly, you will see a message letting you know that your deployment is underway. Status will display on this page as the resources are created. It takes about 5 minutes for the Bastion resource to be created and deployed.
Connect to a VM
- Firstly, open the Azure portal. Navigate to the virtual machine that you want to connect to, then select Connect. Select Bastion from the dropdown.
- After you select Bastion from the dropdown, a side bar appears that has three tabs: RDP, SSH, and Bastion. Because Bastion was provisioned for the virtual network, the Bastion tab is active by default. Select Use Bastion.
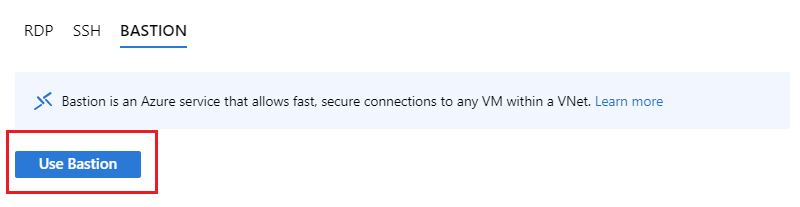
- Then, select Use Bastion
- Next, on the Connect using Azure Bastion page, enter the username and password for your virtual machine, then select Connect.
- Lastly, the RDP connection to this virtual machine via Bastion will open directly in the Azure portal (over HTML5) using port 443 and the Bastion service.

Reference: Microsoft Documentation