Creating and encrypting a Windows virtual machine with the Azure portal
Here you will learn about how Azure VMs can be created through the Azure portal. The Azure portal is a browser-based user interface to create VMs and their associated resources. Here, you will use the Azure portal to deploy a Windows virtual machine, create a key vault for the storage of encryption keys, and encrypt the VM. If you don’t have an Azure subscription, create a free account before you begin.
Signing in to Azure
Firstly, sign in to the Azure portal.
Creating a virtual machine
- To begin with, choose to create a resource in the upper left corner of the Azure portal.
- Secondly, on the New page, under Popular, select Windows Server 2016 Datacenter.
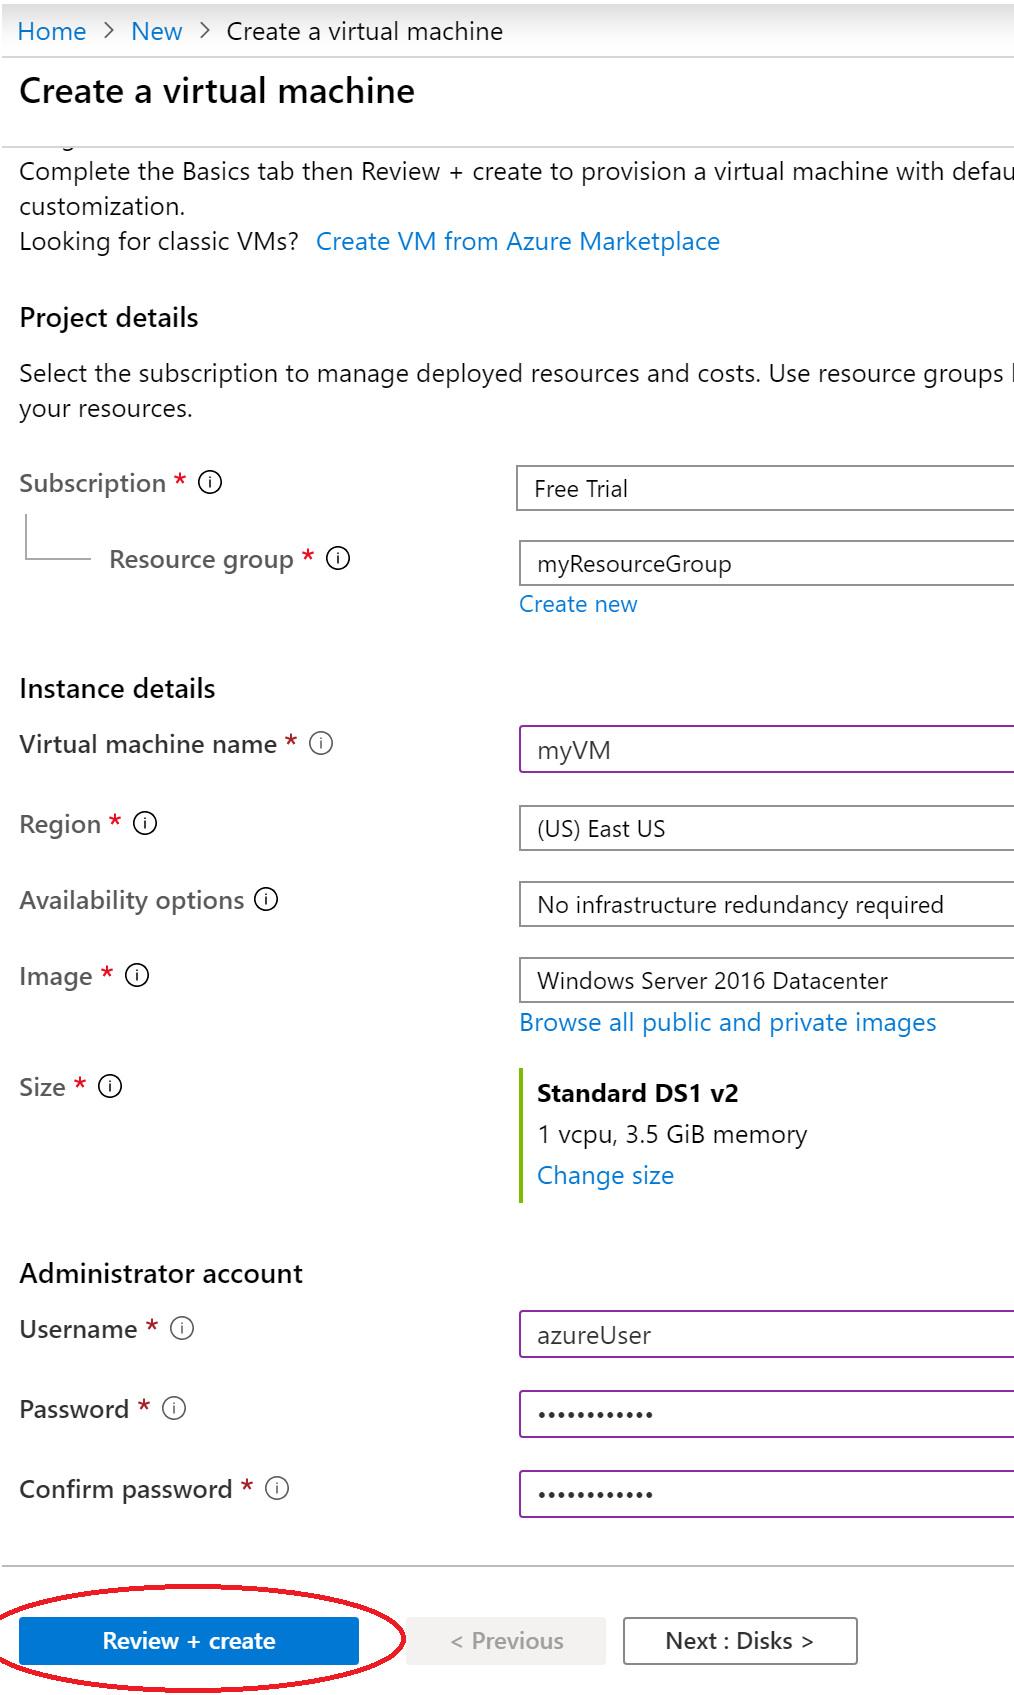
- Subsequently, in the Basics tab, under Project details, make sure the correct subscription is selected.
- Next, for “Resource Group”, select Create new. Enter myResourceGroup as the name and select Ok.
- Furthermore, for the VM name, enter MyVM.
- Also, for Region, select (US) East US.
- After this, verify that the Size is Standard D2s v3.
- Now, under Administrator account, select Password. Enter a user name and a password.
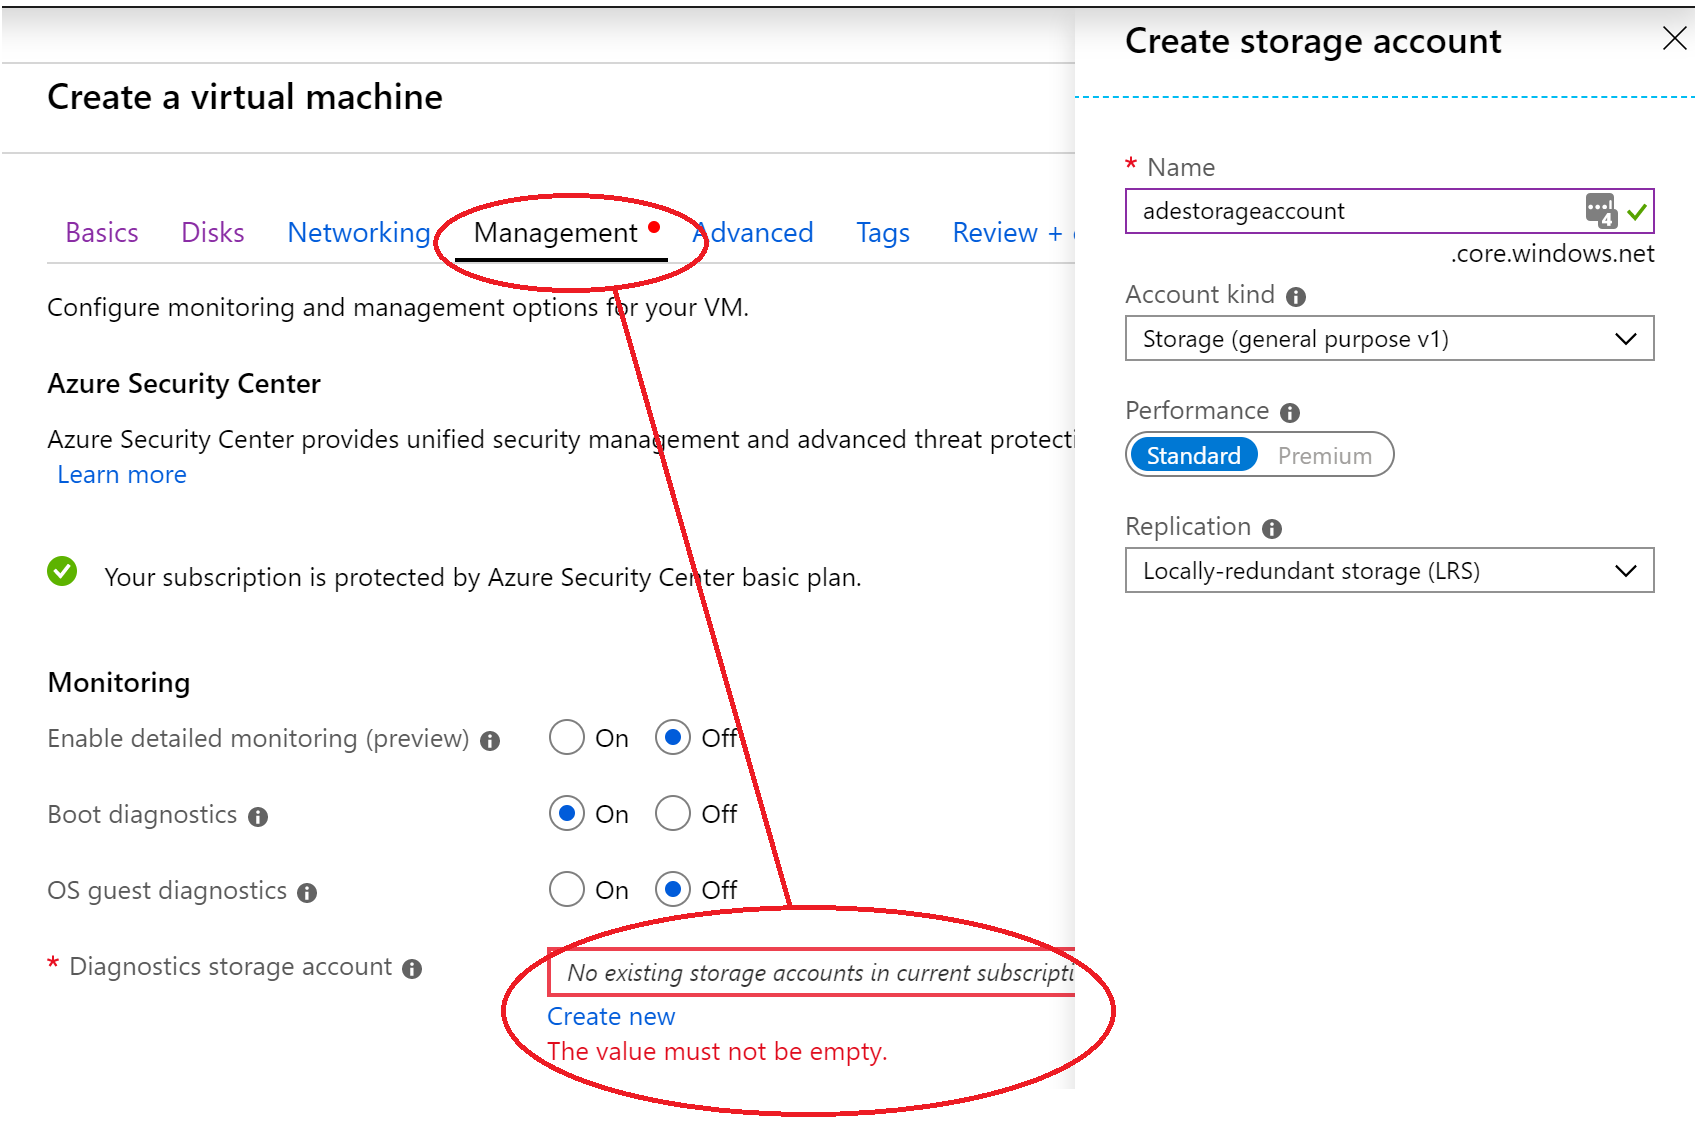
- Now, select the “Management” tab and confirm that you have a Diagnostics Storage Account. In case, you have no storage accounts, then elect “Create New”, give your new account a name, and select “Ok”
- Now, click “Review + Create”.
- And, on the Create a virtual machine page, you can view the details regarding the VM you are about to create. When you are ready, select Create.

Lastly, it will take a some time for your VM to be deployed. When the deployment is finished, move on to the next section of encrypting the VM.
Encrypt the VM
- First of all, select Go to the resource.
- Now, on the left-hand sidebar, select Disks.
- After this, on the top bar, select Additional Settings.
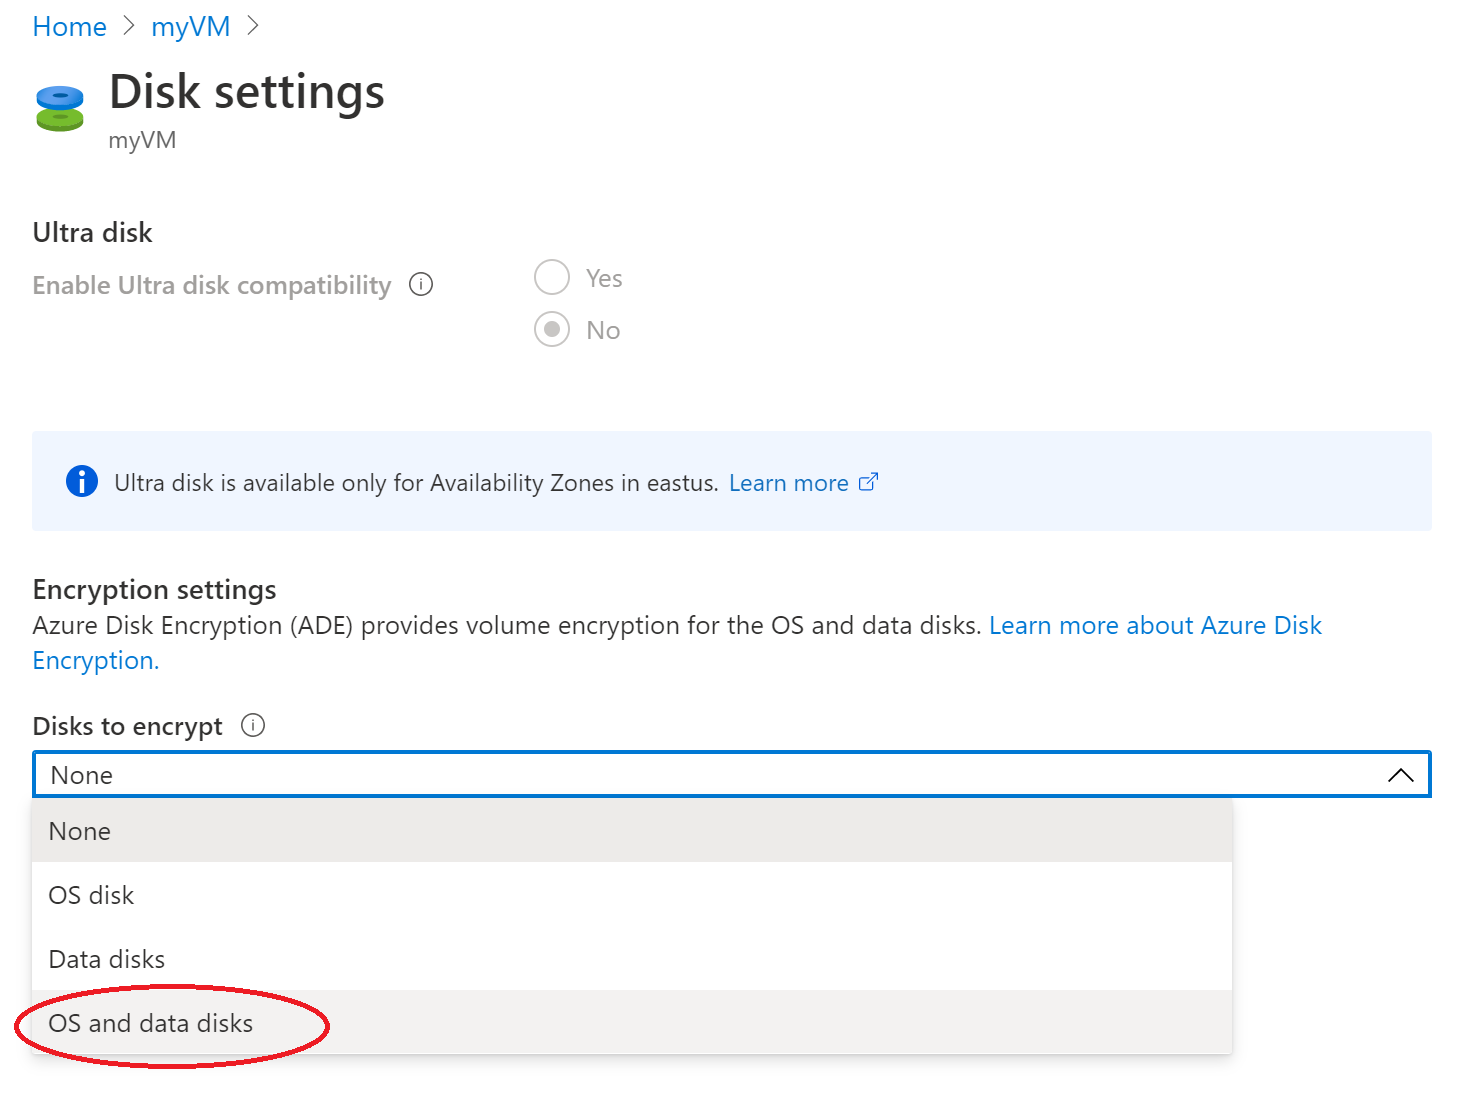
- Furthermore, under Encryption settings > Disks to encrypt, select OS and data disks.
- Now under Encryption settings, locate and choose Select a key vault and key for encryption.
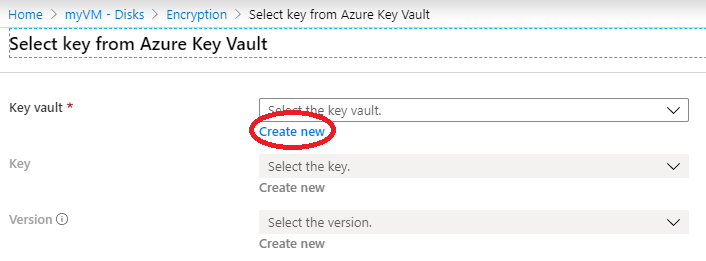
- On the Select key from Azure Key Vault screen, click Create New.
- Moving on, to the left of Key vault and key, select Click to select a key.
- Now, on the Select key from Azure Key Vault, under the Key Vault field, select Create new.
- After this, on the Create key vault screen, ensure that the Resource Group is myResourceGroup, and give your key vault a name. Every key vault across Azure must have an unique name.
- Moreover, on the Access Policies tab, check the Azure Disk Encryption for volume encryption box.
- Don’t forget to select Review + create.
- After this the key vault has passed validation, select Create. This will return you to the Select key from Azure Key Vault screen.
- Now, leave the Key field blank and choose Select.
- In the end, click Save. A popup will warn you that the VM will reboot. Click Yes.
Clean up resources
When no longer needed, you can delete the resource group, virtual machine, and all related resources. To do so, select the resource group for the virtual machine, select Delete, then confirm the name of the resource group to delete.

Reference: Microsoft Documentation