Creating an Azure DNS zone and record using the Azure portal
Here you’ll learn about Azure DNS to resolve hostnames in your public domain. Also, you’ll learn step by step how to create an Azure DNS zone and further how to record with the help of the Azure portal.
Creating a DNS zone
To begin with, a DNS zone comprises of the DNS entries for a particular domain. So, in order to host the domain in Azure DNS, one must create a DNS zone for that domain name.
To generate the DNS zone:
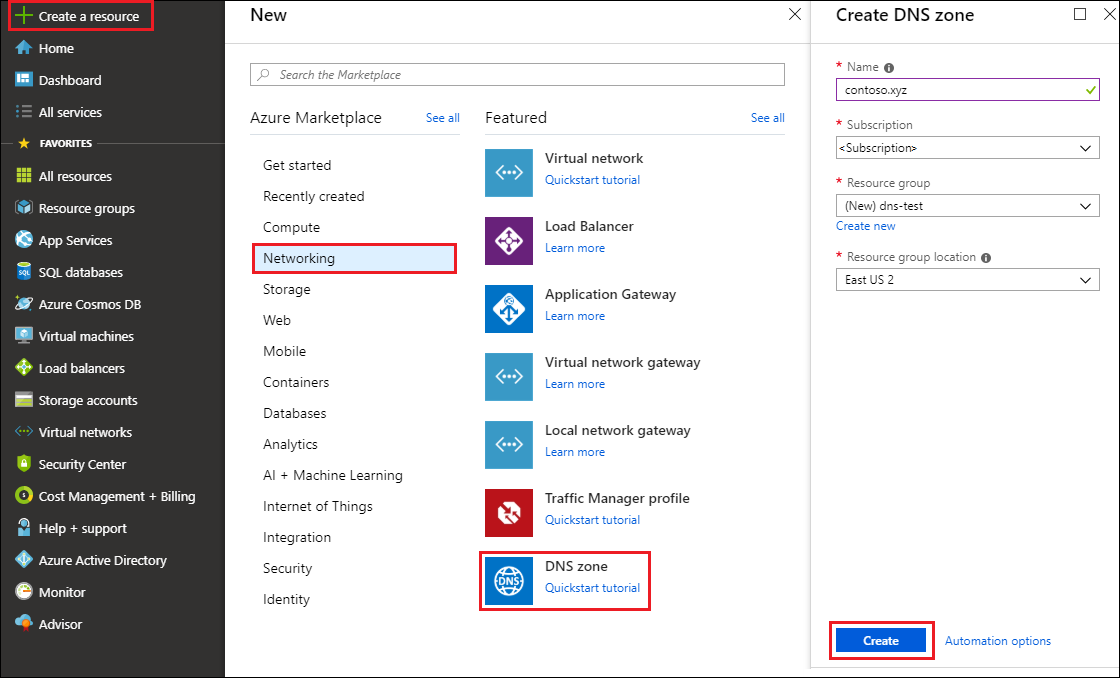
- First of all, select Create a resource, then Networking, and later DNS zone.
- On the Create DNS zone page, select the following values of name and Resource Group.
- Click Create.
Creating a DNS record
To create DNS entries for the domain inside the DNS zone. You need to first create a new address record or ‘A’ record to determine a hostname to an IPv4 address.
To create an ‘A’ record:
- On the Azure portal, first, open the contoso.xyz DNS zone in the MyResourceGroup resource group.
- Now, select + Record set.
- Subsequently, type the following values:
- Name: Type www. The record name is the hostname that you wish to propose to the specified IP address.
- Type: Select A. ‘A’ records are the most basic, however, there are other various record types for mail servers (‘MX’), IP v6 addresses (‘AAAA’).
- TTL: Type 1. Time-to-live of the DNS requests defines how long DNS servers and clients can cache a response.
- TTL unit: Select Hours. This is the time unit for the TTL value.
- IP address: For instance, type 10.10.10.10. This value is the IP address the record name resolves to. In a real-world scenario, you would enter the public IP address for your web server.

Testing the name resolution
Now that you have got a test DNS zone with a test ‘A’ record, you can test the name resolution with a tool called nslookup.
To test DNS name resolution:
- Now, under All resources, start with the contoso.xyz DNS zone in the MyResourceGroup resource group. Also, you can enter contoso.xyz in the Filter by name box to find it more easily.
- Next, copy one of the name server names from the name server list on the Overview page.

- Now the command prompt box will open, here run the following command:Copy
nslookup www.contoso.xyz <name server name>
This result verifies that name resolution is working correctly.
Cleaning up resources
Now that you no longer require the resources you created, remove them by deleting the MyResourceGroup resource group. Open the MyResourceGroup resource group, and select Delete resource group.

Reference: Microsoft Documentation