Creating an ASP.NET Core web app in Azure
On this page, you’ll learn to create and deploy your first ASP.NET Core web app to Azure App Service. When you’re finished, you’ll have an Azure resource group consisting of an App Service hosting plan and an App Service with a deployed web application. So, let’s begin:
Prerequisites
- An Azure account with an active subscription. So, first, create an account for free.
- To expand to App Service on Linux.
- Also, install Visual Studio 2019 with the ASP.NET and web development workload.
Creating an ASP.NET Core web app
To create an ASP.NET Core web app in Visual Studio by following these steps:
- First of all, open Visual Studio and select Create a new project.
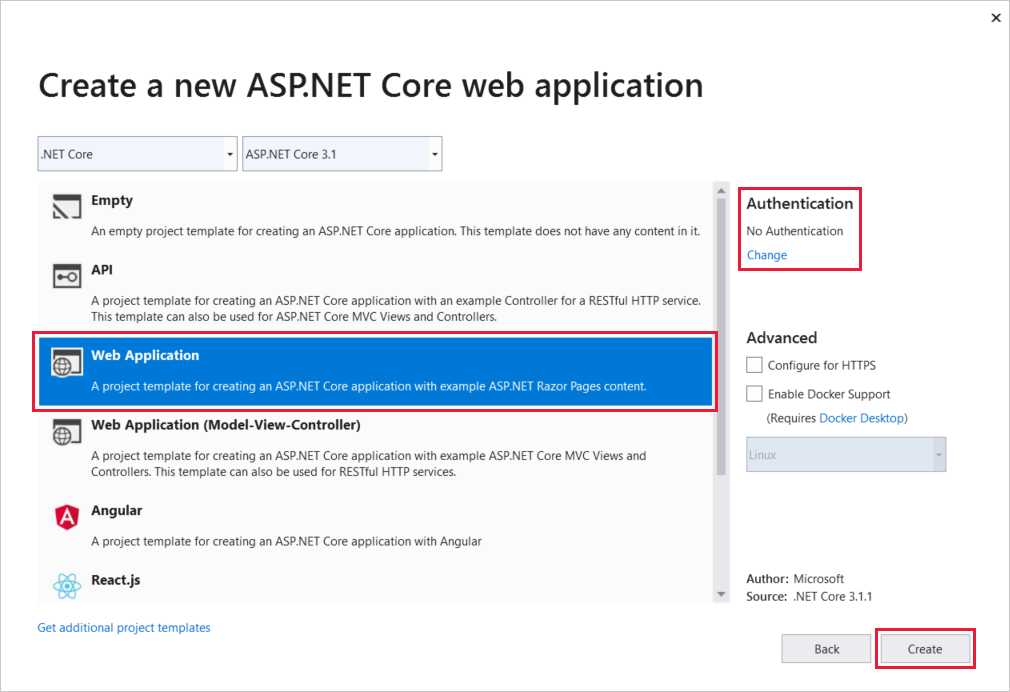
- Next, create a new project, select ASP.NET Core Web Application and verify that C# is listed in the languages for that choice, then select Next.
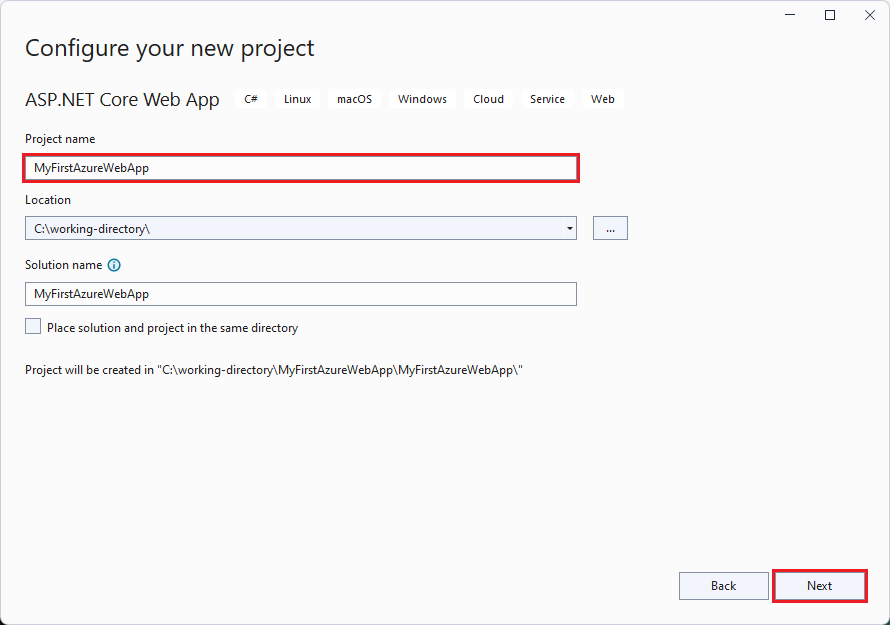
- After this, in Configure your new project, name your web application project myFirstAzureWebApp, and select Create.
- Moreover, you can deploy any type of ASP.NET Core web app to Azure. Then, select Create.
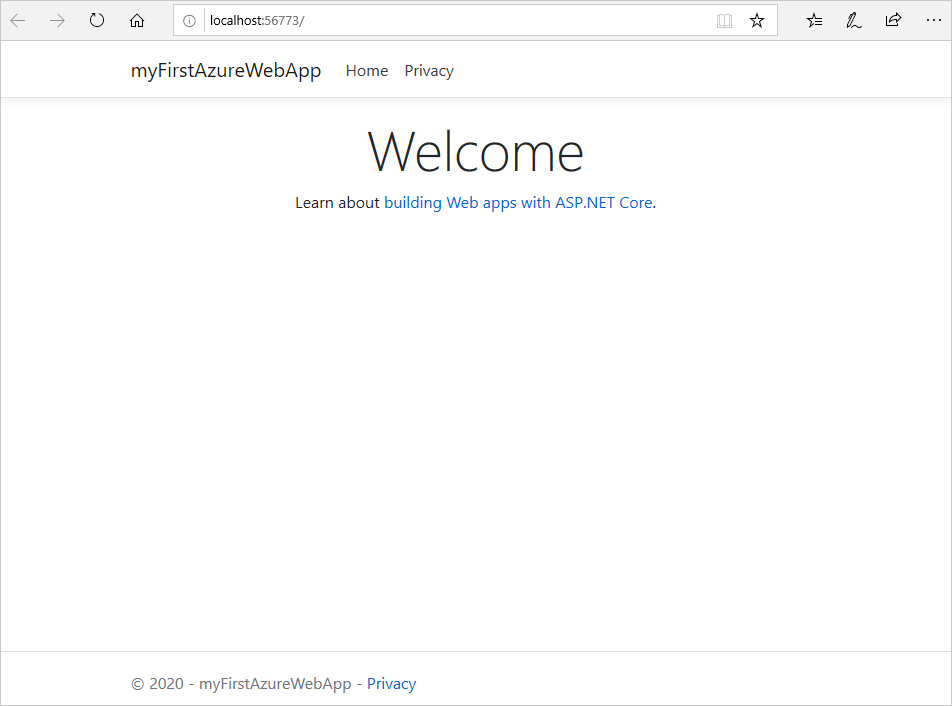
- From the Visual Studio menu, click Debug > Start Without Debugging to run your web app locally.
Publishing your web app
To publish, you must first create and configure a new App Service that you can publish your app to.
So, follow these steps to create your App Service and publish your web app:
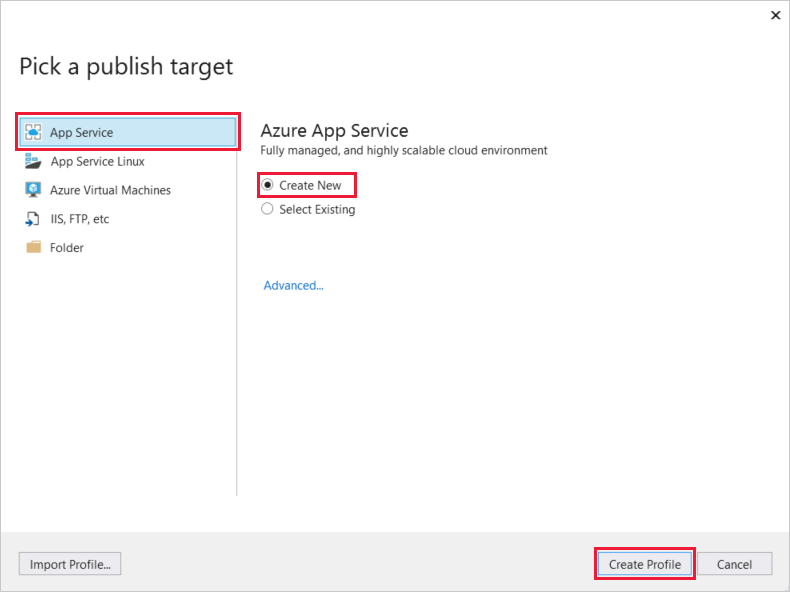
- First of all, in Solution Explorer, right-click the myFirstAzureWebApp project and select Publish.
- Then, in the Pick a publish target dialogue box, select App Service, click Create New, and then decide Create Profile.
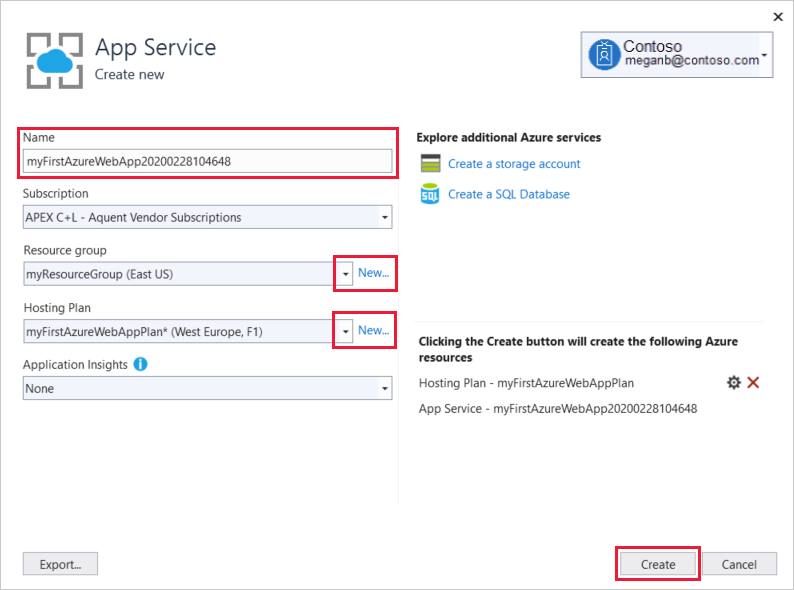
- In the App Service: Create new dialogue, render a globally unique Name for your app by either accepting the default name.
- And, for Subscription, allow the subscription that is listed and select a new one from the drop-down list.
- From the Resource group, click New. In New resource group name, list myResourceGroup and select OK.
- For Hosting Plan, click New.
- For Hosting Plan: Create a new dialogue.
- Now, leave Application Insights set to None.
- After this, create a new dialogue box, select Create to start creating the Azure resources.
- After completion, select Publish.
 Visual Studio publishes your ASP.NET Core web app to Azure, and launches the app in your default browser.
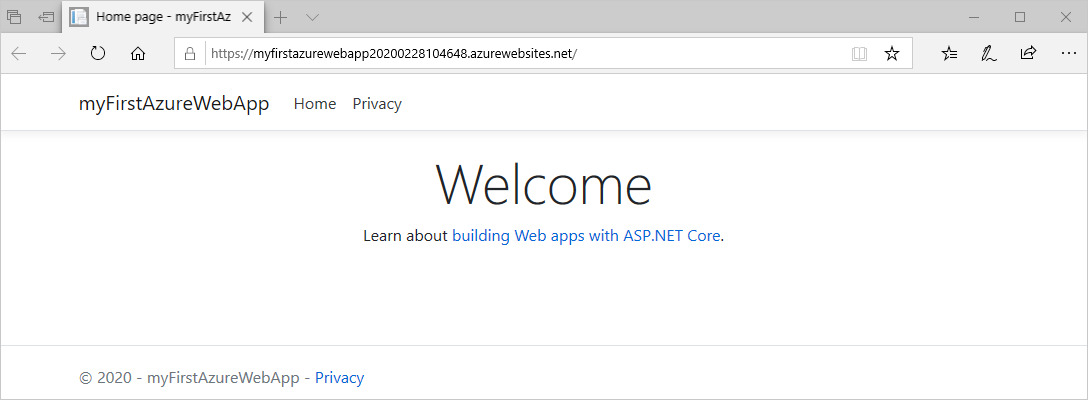
Update the app and redeploy
To update, Follow the steps mentioned below:
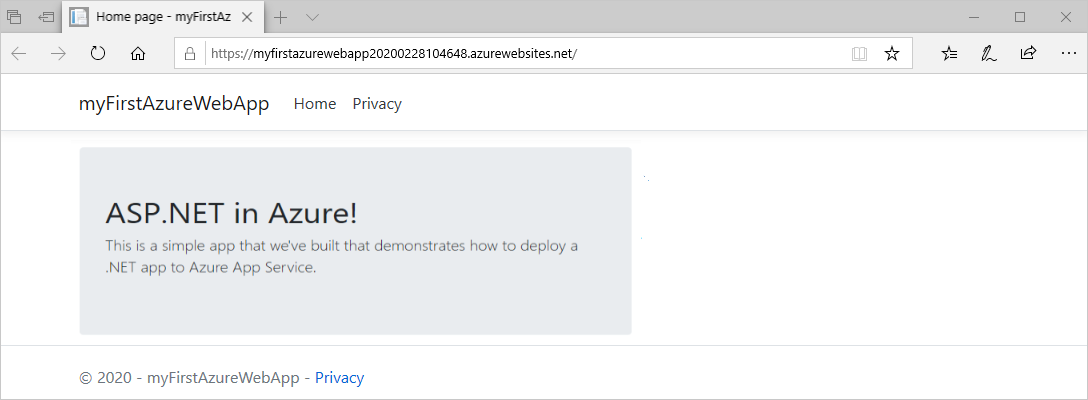
- Begin with, in Solution Explorer, under your project, open Pages > Index.cshtml.
- Reinstate the entire <div> tag with the following code: HTMLCopy
<div class="jumbotron"> <h1>ASP.NET in Azure!</h1> <p class="lead">This is a simple app that we've built that demonstrates how to deploy a .NET app to Azure App Service.</p> </div>

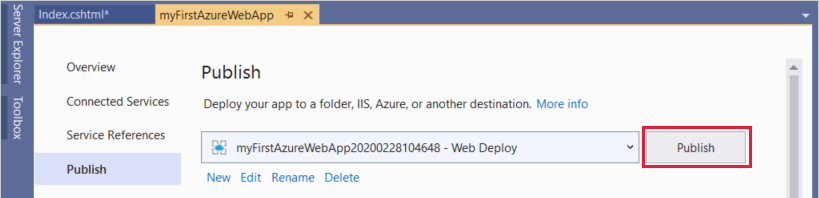
- And,to redeploy to Azure, right-click the myFirstAzureWebApp project in Solution Explorer and click Publish.
- On the Publish summary page, click Publish.
In the end, Visual Studio launches a browser to the URL of the web app.
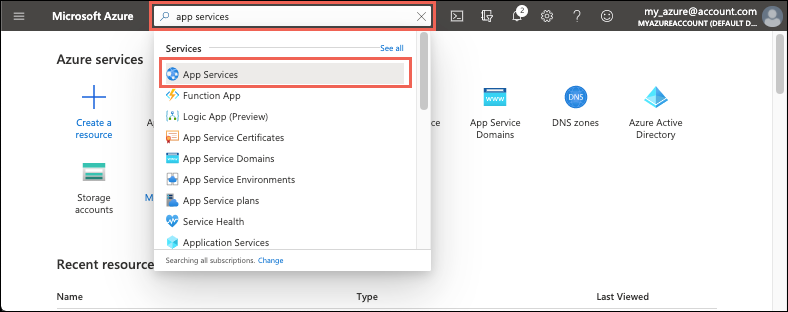
Manage the Azure app
In order to manage the web app, visit the Azure portal, and search for and select App Services.
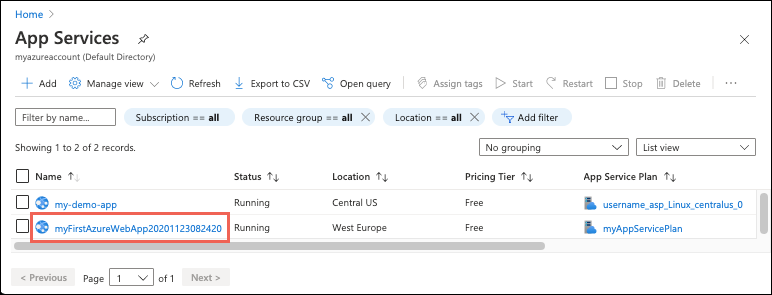
Moving on the App Services page, click the name of your web app.
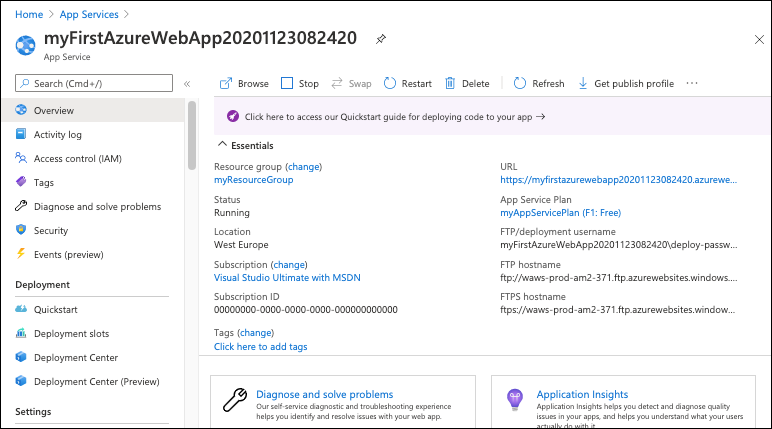
The left menu offers further pages for configuring your app.
Cleaning up resources
In the above-mentioned steps, we created Azure resources in a resource group.
From the Azure portal menu or Home page, click Resource groups, and on the Resource groups page, click myResourceGroup.
On the myResourceGroup page, make sure that the listed resources are the ones you want to delete.
Select Delete resource group, type myResourceGroup in the text box to confirm, and then select Delete.

Reference: Microsoft Documentation