Create and manage a VPN gateway using Azure portal
In this, we will learn about Azure VPN gateways with creating a virtual network, VPN gateway, viewing the gateway public IP address and reset a VPN gateway.
Create a virtual network
- Firstly, Sign in to the Azure portal.
- Secondly, search resources, service, and docs (G+/), type virtual network.
- Thirdly, select Virtual Network from the Marketplace results.
- Then, On the Virtual Network page, select Create.
- Once you select Create, the Create virtual network page opens.
- Then, On the Basics tab, configure Project details and Instance details VNet settings.
- Next, on the IP Addresses tab, configure the values. The values shown in the examples below are for demonstration purposes. Adjust these values according to the settings that you require.
- On the Security tab, at this time, leave the default values:
- DDos protection: Basic
- Firewall: Disabled
- After that, Select Review + create to validate the virtual network settings.
- Lastly, After the settings have been validated, select Create.
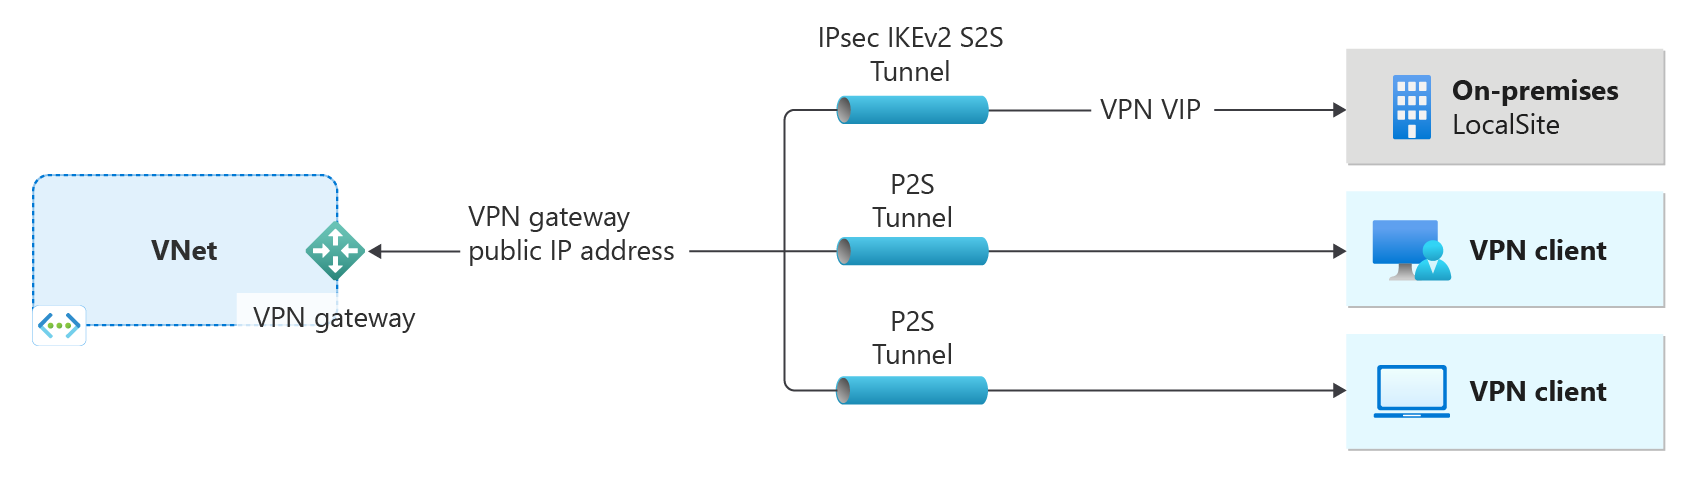
Create a VPN gateway
In this step, you create the virtual network gateway for your VNet. Creating a gateway can often take 45 minutes or more, depending on the selected gateway SKU.
Create a virtual network gateway using the following values:
Name: VNet1GW
Region: East US
Gateway type: VPN
VPN type: Route-based
SKU: VpnGw1
Generation: Generation1
Virtual network: VNet1
Gateway subnet address range: 10.1.255.0/27
Public IP address: Create new
Public IP address name: VNet1GWpip
Enable active-active mode: Disabled
Configure BGP: Disabled

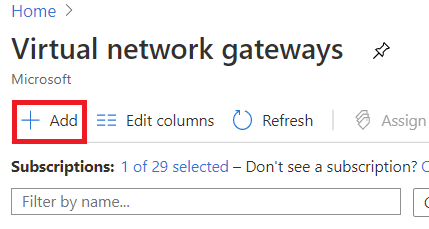
- Firstly, from the Azure portal, in Search resources, services, and docs (G+/) type virtual network gateway. Locate Virtual network gateway in the search results and select it.
- Secondly, on the Virtual network gateway page, select + Add. This opens the Create virtual network gateway page.
- Next, on the Basics tab, fill in the values for your virtual network gateway.
- Subscription: Select the subscription you want to use from the dropdown.
- Resource Group: This setting is autofilled when you select your virtual network on this page.
- Then, select Review + create to run validation.
- Lastly, once validation passes, select Create to deploy the VPN gateway.
Resize a gateway SKU
There are specific rules regarding resizing vs. changing a gateway SKU. In this section, we will resize the SKU. For more information, see Gateway settings – resizing and changing SKUs.
- Firstly, go to the Configuration page for your virtual network gateway.
- Secondly, select the arrows for the dropdown.
- Lastly, select the SKU from the dropdown.
Reset a gateway
- Firstly, in the portal, go to the virtual network gateway that you want to reset
- Secondly, on the page for the virtual network gateway, select Reset.
- Lastly, on the Reset page, select Reset. Once the command is issued, the current active instance of the Azure VPN gateway is rebooted immediately. Resetting the gateway will cause a gap in VPN connectivity, and may limit future root cause analysis of the issue.

Reference: Microsoft Documentation