Many organizations and businesses are using Microsoft Azure services and it becomes quite tough work to handle all things at once. So, in order to make handling and managing tasks easy, Azure provides Cloud Shell that acts as a Microsoft-managed admin machine. Whether talking about the features, pricing or getting started with the Cloud Shell, this service is useful in all ways. So, let’s begin the Azure Cloud Shell to learn more about this.
What is Azure Cloud Shell?
Azure Cloud Shell is used for managing Azure resources with capabilities for authentication and browser-accessible shell interface. This service provides a flexible shell experience. That is to say, you get to choose the best either Bash or PowerShell. Moreover, in Cloud Shell, there is no need for worrying about installing, versioning, and maintaining a machine as it comes with a pre-configured shell experience for managing Azure resources.
Ways to access the Cloud Shell:
The Cloud Shell can be accessed in three ways:
1. Direct link
Open a browser to https://shell.azure.com.
2. Azure portal
Chooses the Cloud Shell icon on the Azure portal
3. Code snippets
Select the Try It button on docs.microsoft.com and Microsoft Learn. This button will appear with Azure CLI and Azure PowerShell code snippets:
Azure CLI
az account show
Azure PowerShell
Get-AzSubscription
What are the features of Cloud Shell?
Azure Cloud Shell is loaded with unique features that make it more useful for providing solutions to many top organizations. Some of the features includes:
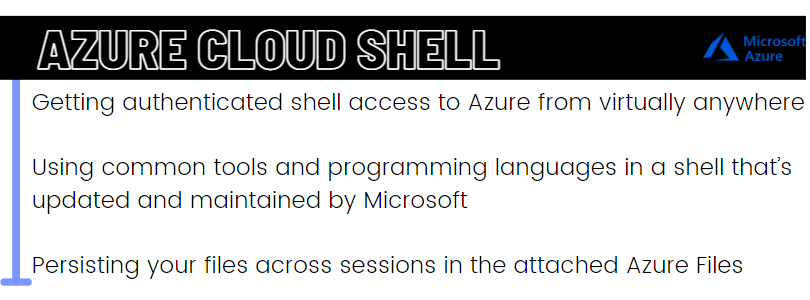
1. Accessing Shell from virtually anywhere
In Cloud Shell, you get the option for connecting to Azure using an authenticated, browser-based shell experience hosted in the cloud. This is accessible from virtually anywhere. However, Azure Cloud Shell is allocated per unique user account and it authenticates automatically with every session. Further, in this, you will get a modern command-line experience from multiple access points. This also includes the Azure portal, Azure docs, shell.azure.com, Azure mobile app, and VS Code Azure Account extension.
2. Options for selecting preferred shell experience
Azure Cloud Shell provides the flexible shell experience that works best as per your requirements. This comes with Bash and PowerShell experiences.
3. Common tools and programming languages
Microsoft always maintains and updates its services regularly and the same goes with the Cloud Shell. This service comes with updated CLI tools including Linux shell interpreters, PowerShell modules, container tools, database tools, Azure tools, text editors, source control, build tools, and more. Moreover, it also has the support for several popular programming languages like Node.js, .NET, and Python.
4. Persisting your files in the attached cloud storage
Cloud Shell has the ability to link an Azure Files share for persisting your data. Here, firstly, Cloud Shell will create a file share in Azure Files for persisting data over sessions. And then, it will automatically re-attach it for subsequent sessions.
5. Creating and editing files in the Cloud Shell editor
Cloud Shell provides an integrated file editor created on the open-source Monaco Editor. Using this, you can run code for entering a file editing experience combined into the Cloud Shell window. The files created and edited will be automatically synced to your backing Azure Files share.
6. Authenticated and configured Azure workstation
Cloud Shell comes with command-line tools and language support. Moreover, it has the ability for authenticating securely for providing instant access to your resources via the Azure CLI or Azure PowerShell cmdlets.
Getting Started with Cloud Shell
1. Bash in Azure Cloud Shell
In this, we will learn the process of using Bash in Azure Cloud Shell in the Azure portal.
1. Starting Cloud Shell
- Firstly, from the top navigation of the Azure portal launch Cloud Shell.
- Secondly, choose the subscription for creating a storage account and Microsoft Azure Files share.
- Thirdly, select “Create storage”
2. Selecting the Bash environment
- Examine that the environment drop-down from the left-hand side of the shell window says, Bash.
3. Setting your subscription
- Firstly, list subscriptions you have access to.
Azure CLI
az account list
- Then, set your preferred subscription:
Azure CLI
az account set –subscription ‘my-subscription-name’
4. Creating a resource group
- Creating a new resource group in WestUS named “MyRG”.
Azure CLI
az group create –location westus –name MyRG
5. Creating a Linux VM
- Creating an Ubuntu VM in your new resource group. Here, the Azure CLI will create SSH keys and set up the VM with them.
Azure CLI
az vm create -n myVM -g MyRG –image UbuntuLTS –generate-ssh-keys
6. SSH into your Linux VM
- Firstly, in the Azure portal search bar, search for your VM name.
- Secondly, click “Connect” for getting the VM name and public IP address.
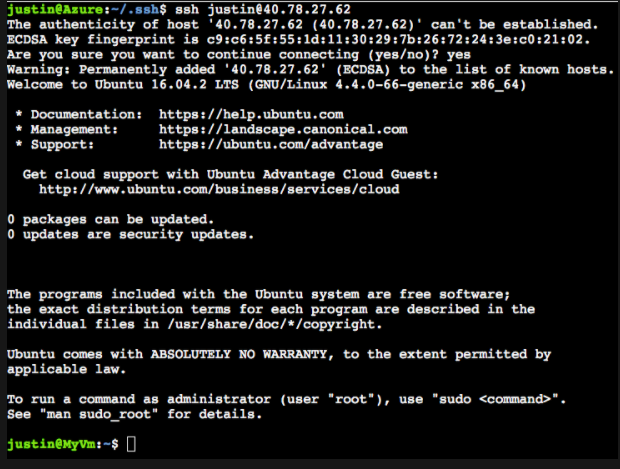
- Then, with the ssh cmd SSH into your VM.
- ssh username@ipaddress
- An Ubuntu welcome prompt will appear after establishing the SSH connection,
7. Cleaning up
- Firstly, exit your ssh session.
- exit
- Then, delete your resource group and any resources within it.
Azure CLI
az group delete -n MyRG

2. PowerShell in Azure Cloud Shell
In this, we will learn the process of using the PowerShell in Cloud Shell in the Azure portal.
1. Starting Cloud Shell
- Firstly, from the top navigation bar of the Azure portal click on the Cloud Shell button.
- Secondly, from the drop-down and you will be in Azure drive choose the PowerShell environment.
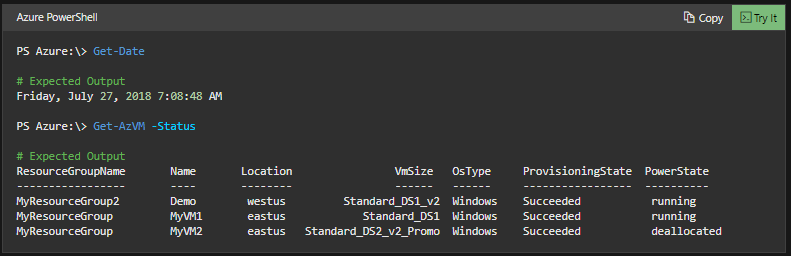
2. Running PowerShell commands
Running regular PowerShell commands in the Cloud Shell, like:
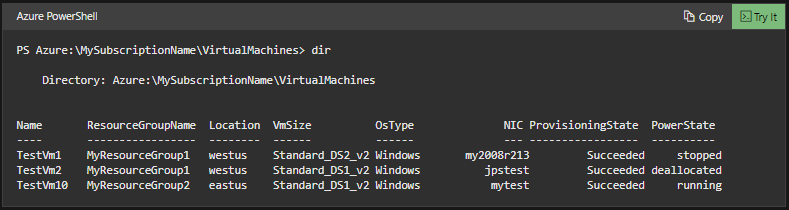
Interacting with virtual machines
All your virtual machines are available under the current subscription via VirtualMachines directory.
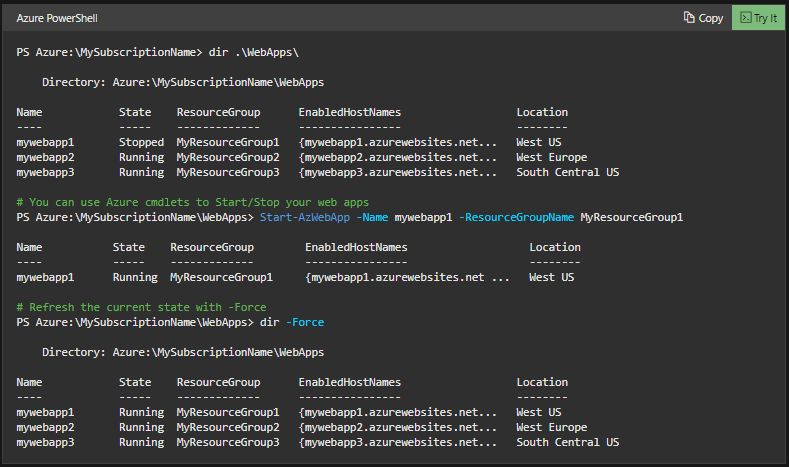
3. Discovering WebApps
You can easily navigate your web apps resources by entering into the WebApps directory.
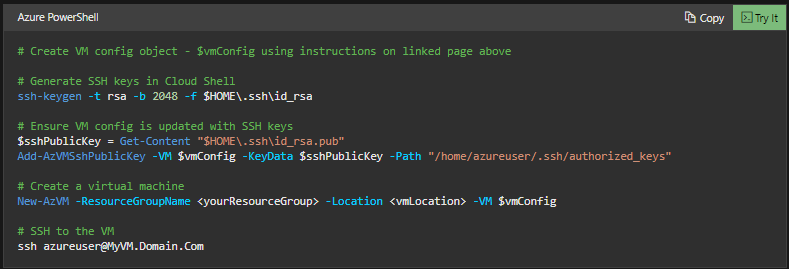
4. SSH
For authenticating to servers or VMs using SSH, create the public-private key pair in Cloud Shell and publish the public key to authorized_keys on the remote machine. This is like /home/user/.ssh/authorized_keys.
Using SSH
For creating a new VM configuration using Azure PowerShell cmdlets follow instructions. However, add SSH public key to the VM configuration before calling into New-AzVM to kick off the deployment. The newly created VM will have the public key in the ~\.ssh\authorized_keys location, thereby allowing credential-free SSH session to the VM.
3. Configuring Ansible using Azure Cloud Shell
Ansible has the ability for automating cloud provisioning, configuration management, and application deployments. Using Ansible, it is possible to provision virtual machines, containers, and networks. Moreover, it also enables you to automate the deployment and configure resources in your environment.
1. Configuring environment
If you have a Cloud Shell session open then, move to the next section.
- Firstly, browse to the Azure portal
- Secondly, login to your Azure subscription and change the Azure directory.
- Thirdly, open Cloud Shell.
- Then, configure the environment and storage settings.
- Lastly, select the CLI you want to use in Cloud Shell.
2. Automatic credential configuration
Ansible authenticates with Azure after signing into the Cloud Shell. This is used for managing infrastructure without any additional configuration. However, define the subscription Ansible uses by exporting the AZURE_SUBSCRIPTION_ID environment variable while operating with multiple subscriptions.
Further, run the following command for listing all of your Azure subscriptions:
Azure CLI
az account list
Then, set the AZURE_SUBSCRIPTION_ID using your Azure subscription ID as follows:
Console
export AZURE_SUBSCRIPTION_ID=<your-subscription-id>
3. Testing Ansible installation
In this, we will learn to create a test resource group inside the new Ansible configuration.
Creating an Azure resource group
- Firstly, save the below code as create_rg.yml.
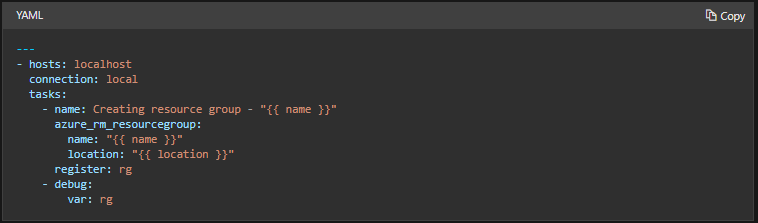
- Then, use ansible-playbook to run the playbook. Here, replace the placeholders with the name and location of the resource group to be created.
Bash
ansible-playbook create_rg.yml –extra-vars “name=<resource_group_name> location=<resource_group_location>”
4. Deleting an Azure resource group
Ansible
- Firstly, save the below code as delete_rg.yml.

- Then, use the ansible-playbook command for running the playbook. Here, replace the placeholder with the name of the resource group to be deleted. And, all resources inside the resource group will be deleted.
Bash
ansible-playbook delete_rg.yml –extra-vars “name=<resource_group>”
Cloud Shell pricing
Azure Cloud Shell comes with no upfront cost, no termination fees, and you only pay for what you use. However, Cloud Shell billing depends on the Azure Files share used for persisting data. And, the total cost depends on:
- Firstly, how much do you store,
- Secondly, the volume and type of storage transactions,
- Thirdly, outbound data transfers,
- Lastly, the data redundancy option you choose.
Further, with Azure Files share the Azure Cloud Shell creates locally redundant storage (LRS) accounts by default. And, this share will have a 5-GB disk image for Bash.
Final Words
Above we have understood the Azure Cloud Shell by learning the basics, features, and steps to get started with this service. However, we know that Azure Cloud Shell is a browser-accessible and authenticated shell that has the ability for controlling Azure resources. So, if you have an interest in Cloud Shell then start using this to get the best shell experience as per your requirement (Bash or PowerShell).
