Manage Resource Groups
Exam AZ-103: Microsoft Azure Administrator is retired. AZ-104 is available.
Use Azure Policies for Resource Groups
Azure policy needs a tag and value on a resource group. Such that it is required to specify the required tag name and value. We can deploy this sample policy using –
- Azure Portal
- Azure PowerShell
- Azure CLI
- REST API
Policy Definition
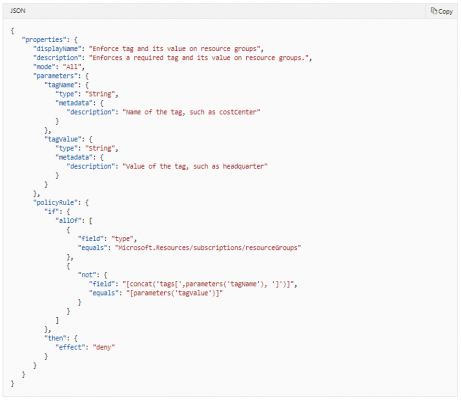
We shall now take an example that illustrates the complete composed JSON policy definition, used by the REST API, ‘Deploy to Azure’ buttons, and manually in the portal.
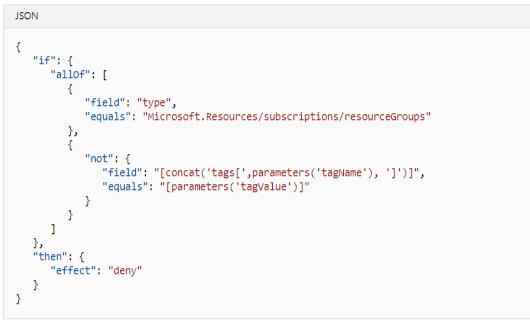
Policy Rules
Following JSON defines the rules of the policy, used by Azure CLI and Azure PowerShell.
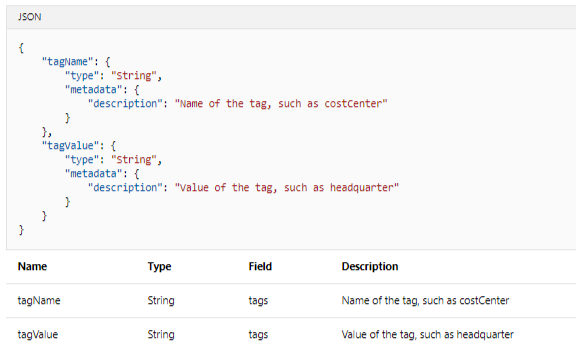
Policy Parameter
JSON defining the policy parameters, used by Azure CLI and Azure PowerShell.
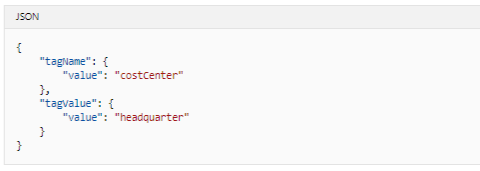
Note, we must understand that while creating an assignment via PowerShell or Azure CLI, the parameter values can be passed as JSON in either a string or via a file using -PolicyParameter (PowerShell) or –params (Azure CLI). PowerShell also supports -PolicyParameterObject which requires passing the cmdlet a Name/Value hashtable where Name is the parameter name and Value is the single value or array of values being passed during assignment.
In the above illustration parameter, a tagName of costCenter and tagValue of headquarter is defined.
Azure PowerShell
Deploy and remove scripts in Azure PowerShell use the following commands. Such that each command in the table below links to command-specific documentation –
| Command | Notes |
|---|---|
| New-AzPolicyDefinition | Helps to creates a new Azure Policy definition. |
| Get-AzResourceGroup | Helps to get a single resource group. |
| New-AzPolicyAssignment | Helps to create a new Azure Policy assignment. In this example, we provide it a definition, but it can also take an initiative. |
| Remove-AzPolicyAssignment | Helps to remove an existing Azure Policy assignment. |
| Remove-AzPolicyDefinition | Helps to remove an existing Azure Policy definition |
Azure CLI
| Command | Notes |
|---|---|
| az policy definition create | Helps to create a new Azure Policy definition. |
| az group show | Helps to get a single resource group. |
| az policy assignment create | Helps to create a new Azure Policy assignment. |
| az policy assignment delete | Helps to remove an existing Azure Policy assignment. |
| az policy definition delete | Helps to remove an existing Azure Policy definition. |
REST API
| Service | Group | Operation | Notes |
|---|---|---|---|
| Resource Management | Policy Definitions | Create | Creates a new Azure Policy definition at a subscription. Alternative: Create at management group |
| Resource Management | Policy Assignments | Create | Creates a new Azure Policy assignment. In this example, we provide it a definition, but it can also take an initiative. |
| Resource Management | Policy Assignments | Delete | Removes an existing Azure Policy assignment. |
| Resource Management | Policy Definitions | Delete | Removes an existing Azure Policy definition. Alternative: Delete at management group |
Configure Resource Locks
Being an Azure Administrator we would require to lock a subscription, resource group, or resource to prevent other users in the organization from inadvertently modifying or deleting important resources. This can be done either by setting the lock level to CanNotDelete or ReadOnly, where in the portal, the locks are referred as ‘Delete; and ‘Read-only’ respectively.
- CanNotDelete – It indicates that the authorized users can still read and modify a resource, but they can’t delete the resource.
- ReadOnly – It means that the authorized users can read a resource, but they can’t delete or update the resource. Such that applying this lock is similar to restricting all authorized users to the permissions granted by the Reader role.
How Locks are Applied?
In the process of applying a lock at a parent scope, all resources within that scope inherit the same lock. Such that even resources we add later inherit the lock from the parent. In which case the most restrictive lock in the inheritance takes precedence.
Features of ReadOnly Lock
ReadOnly lock on a SQL Database prevents us from deleting or modifying the database. but it doesn’t stops us from creating, updating, or deleting data in the database. ReadOnly lock can be applied to the resource or to the resource group containing the resource. Common the operations that are blocked by a ReadOnly lock include –
- ReadOnly lock on a storage account stops all users from listing the keys. In which case the list keys operations are handled through a POST request since the returned keys are available for write operations.
- ReadOnly lock on an App Service resource stops Visual Studio Server Explorer from displaying files for the resource since that interaction requires write access.
- ReadOnly lock on a resource group contains a virtual machine stops all users from starting or restarting the virtual machine, such that these operations require a POST request.
Who can create or delete locks?
In order to create or delete management locks, we must have access to Microsoft.Authorization/* or Microsoft.Authorization/locks/* actions. Only Owner and User Access Administrator are granted those actions.
Steps to create locks
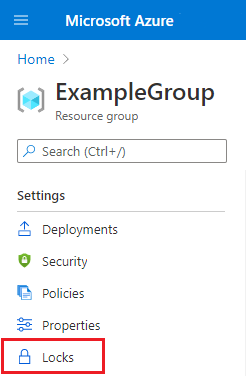
Step 1 – Go to the Settings blade for the resource, resource group, or subscription which is required to be locked, select ‘Locks’.
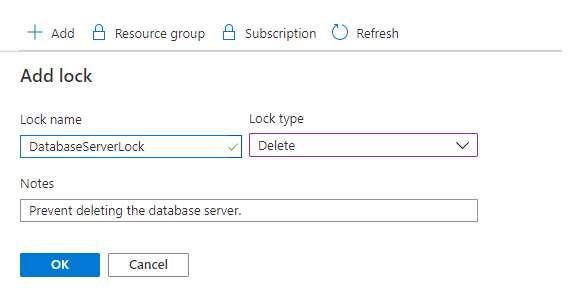
Step 2 – In the second step add a lock, select Add. If you want to create a lock at a parent level, select the parent. Such that the currently selected resource inherits the lock from the parent.

Step 3 – In step 3, you are required to give the lock a name and lock level. Alternatively we can add notes that describe the lock.
Step 4 – In this step in order to delete the lock, select the ellipsis and Delete from the available options.

Configure Resource Policies
It is very important to understand the process to create and manage policies in Azure for staying compliant with the corporate standards and service level agreements. We shall now discuss Azure Policy to do some of the more common tasks related to creating, assigning, and managing policies across your organization.
Process of Assigning a policy
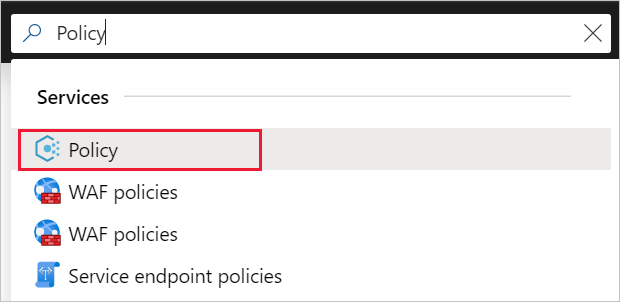
Step 1 – In the first step launch the Azure Policy service in the Azure portal by clicking All services, then searching for and selecting Policy.
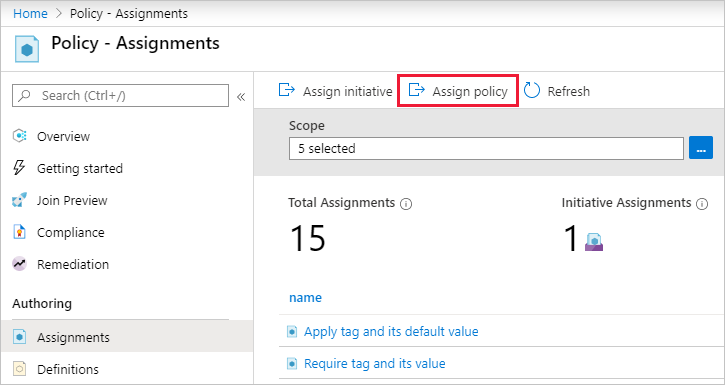
Step 2 – In the second step, select Assignments on the left side of the Azure Policy page.

Step 3 – In the third step, select Assign Policy from the top of the Policy – Assignments page.
Step 4 – In this step, on the Assign Policy page, select the Scope by clicking the ellipsis and selecting either a management group or subscription. We can also optionally, select a resource group. Then click Select at the bottom of the Scope page.
Step 5 – In this step the Resources can be excluded based on the Scope. Such that exclusions start at one level lower than the level of the Scope. Exclusions are optional.
Step 6 – In this step, select the Policy definition ellipsis to open the list of available definitions. We can also filter the policy definition Type to Built-in to view all and read their descriptions.
Step 7 – This step Require Select Require SQL Server version 12.0. Type require sql server into the search box and then press ENTER or click out of the search box. Click Select at the bottom of the Available Definitions page once you have found and selected the policy definition.
Step 8 – In this step the Assignment name is automatically populated with the policy name being selected, but it can be changed. For instance, leave Require SQL Server version 12.0.
Step 9 – In this step it is suggested to leave Create a Managed Identity unchecked. Such that this box must be checked when the policy or initiative being assigned includes a policy with the deployIfNotExists effect.
Step 10 – The last step requires to click Assign.
How to implement a new custom policy?
- Step 1 – Select Definitions under Authoring in the left side of the Azure Policy page.
- Step 2 – Select + Policy definition at the top of the page. This button opens to the Policy definition page.
- Step 3 – Enter information like management groups, name of the policy definition, description, choose from existing option or create new category, etc
Identify Auditing Requirements
Steps involved in auditing Requirements are –
Step 1 – In this step to view the activity logs through the portal, select Monitor
Step 2 – In this step select Activity Log.
Step 3 – In this step we can see a summary of recent operations. Such that a default set of filters is applied to the operations. The information on the summary includes who started the action and when it happened.
Step 4 – In this step we can quickly run a pre-defined set of filters, select Quick Insights
Step 5 – In this step we must select one of the options.
Step 6 – In this step notice the filters have been changed to focus on deployment errors in the last 24 hours. Only operations that match the filters are displayed.
Step 7 – In this step to focus on specific operations, change the filters or apply new ones.
Step 8 – If we need to run the query again later, select Pin current filters.
Step 9 – We can give the filter a name.
Step 10 – The filter is available in the dashboard.
Step 11 – In this step from the portal, we can view changes to a resource. Go back to the default view in Monitor, and select an operation that involved changing a resource
Step 12 – In this step Select Change history (Preview) and pick one of the available operations.
Step 13 – The last steps changes in the resource are displayed.
Implement and Set Tagging on Resource Groups
We can apply tags to the Azure resources giving metadata to logically organize them into a taxonomy. Here, each tag consists of a name and a value pair. Note that once we apply tags, we can retrieve all the resources in the subscription with that tag name and value. The tags used enable us to retrieve related resources from different resource groups. Now, this approach is helpful when we need to organize resources for billing or management.
Note – The taxonomy used should consider a self-service metadata tagging strategy in addition to an auto-tagging strategy to reduce the burden on users and increase accuracy.
Limitations apply to Tags
- Not all resource types support tags. In order to determine if we can apply a tag to a resource type, see Tag support for Azure resources.
- Each resource or resource group can have a maximum of 50 tag name/value pairs. Such that , storage accounts only support 15 tags, but that limit will be raised to 50 in a future release. In case we need to apply more tags than the maximum allowed number, use a JSON string for the tag value. The JSON string can contain many values that are applied to a single tag name. A resource group can contain many resources that each have 50 tag name/value pairs.
- The tag name is limited to 512 characters, and the tag value is limited to 256 characters.
- Generalized VMs don’t support tags.
- Tags applied to the resource group are not inherited by the resources in that resource group.
- Tags can’t be applied to classic resources such as Cloud Services.
- Tag names can’t contain these characters: <, >, %, &, \, ?, /
- To apply tags to resources, the user must have write access to that resource type.
- To apply tags to all resource types, use the Contributor role.
- To apply tags to only one resource type, use the contributor role for that resource.
We can use Azure Policy to enforce tagging rules and conventions. The process of creating a policy, we avoid the scenario of resources being deployed to the subscription that don’t comply with the expected tags for the organization. Such that instead of manually applying tags or searching for resources that are not compliant, we can create a policy that automatically applies the needed tags during deployment.
| Tags | Description |
|---|---|
| Apply tag and its default value | Appends a specified tag name and value, if that tag is not provided. You specify the tag name and value to apply. |
| Billing Tags Policy Initiative | Requires specified tag values for cost center and product name. Uses built-in policies to apply and enforce required tags. You specify the required values for the tags. |
| Enforce tag and its value | Requires a specified tag name and value. You specify the tag name and value to enforce. |
| Enforce tag and its value on resource groups | Requires a tag and value on a resource group. You specify the required tag name and value. |
Move Resources across Resource Groups
Moving resources from one subscription to another is a three-step process:
We consider only one dependent resource
- Step 1: If dependent resources are distributed across different resource groups, first move them into one resource group.
- Step 2: Move the resource and dependent resources together from the source subscription to the target subscription.
- Step 3: Optionally, redistribute the dependent resources to different resource groups within the target subscription.

Tips before moving resources
- Resources that we want to move must support the move operation
- Some services have specific limitations or requirements when moving resources.
- Source and destination subscriptions must be active.
- Source and destination subscriptions must exist within the same Azure Active Directory tenant.
- The destination subscription must be registered for the resource provider of the resource being moved.
- The account moving the resources must have at least the following permissions –
- Microsoft.Resources/subscriptions/resourceGroups/moveResources/action on the source resource group.
- Microsoft.Resources/subscriptions/resourceGroups/write on the destination resource group.
- Before moving the resources, check the subscription quotas for the subscription when we are moving the resources to.
- For a move across subscriptions, the resource and its dependent resources must be located in the same resource group and they must be moved together.
Remove Resource Group
Following are the steps used to generate a template using the portal –
- Sign in to the Azure portal.
- Select Create a resource > Storage > Storage account – blob, file, table, queue
- Enter the following information:
Resource group – Select Create new, and specify a resource group name of your choice. On the screenshot, the resource group name is mystorage1016rg. Resource group is a container for Azure resources. Resource group makes it easier to manage Azure resources.
Name – Give storage account a unique name. The storage account name must be unique across all of Azure, and it contain only lowercase letters and numbers. Name must be between 3 and 24 characters. In case we get an error message saying “The storage account name ‘mystorage1016’ is already taken”, try using storage, for example johndolestorage1016. We can use the default values for the rest of the properties.
- Select Review + create on the bottom of the screen. Do not select Create in the next step.
- Select Download a template for automation on the bottom of the screen.
- Select Download from the top of the screen.
- Open the downloaded zip file, and then save template.json to computer.
- Select the Parameter tab to see the values you provided for the parameters. Write down these values, you need them in the next section when you deploy the template.
Edit and Deploy the Template
Steps for editing and deploying the templates –
- In the Azure portal, select Create a resource.
- In Search the Marketplace, type template deployment, and then press ENTER.
- Select Template deployment.
- Select Create.
- Select Build your own template in the editor.
- Select Load file, and then follow the instructions to load template.json
- Make the following three changes to the template – Remove the storageAccountName parameter as shown in the previous screenshot, Add one variable called storageAccountName, Update the name element of the Microsoft.Storage/storageAccounts resource to use the newly defined variable instead of the parameter
- Select Save.
- Enter the following values – name, resource group, location, account type, kind, access tier, Https Traffic Only Enabled, I agree to the terms and conditions stated
- Select Purchase.
- Select the bell icon (notifications) from the top of the screen to see the deployment status. We shall see Deployment in progress. Wait until the deployment is completed.
- Select Go to resource group from the notification pane.