Manage Azure Subscription
Exam AZ-103: Microsoft Azure Administrator is retired. AZ-104 is available.
Assign Administrators Permission
In order to manage access to Azure resources, one should have the appropriate administrator role. As we know, Azure has an authorization system referred as Role-Based Access Control (RBAC) with various built-in roles to choose from. Such that we can assign these roles at different scopes, like – Management Group, Subscription, or Resource Group.
It is suggested by Microsoft that we should manage access to resources using RBAC. However, we would need to use a classic administrator, if we are still using the classic deployment model and managing the classic resources by using Azure Service Management PowerShell Module.
Assigning a user as an Administrator of subscription
For making a user an administrator of an Azure subscription, it is suggested to assign them the Owner role (an RBAC role) at the subscription scope. Such that the Owner role gives the user full access to all resources in the subscription, which includes the right to delegate access to others.
Steps for role assignment
- Step 1 – In the Azure portal, open Subscriptions.
- Step 2 – Click the subscription where we want to grant access.
- Step 3 – Click Access control (IAM).
- Step 4 – Click the Role assignments tab to view all the role assignments for this subscription.
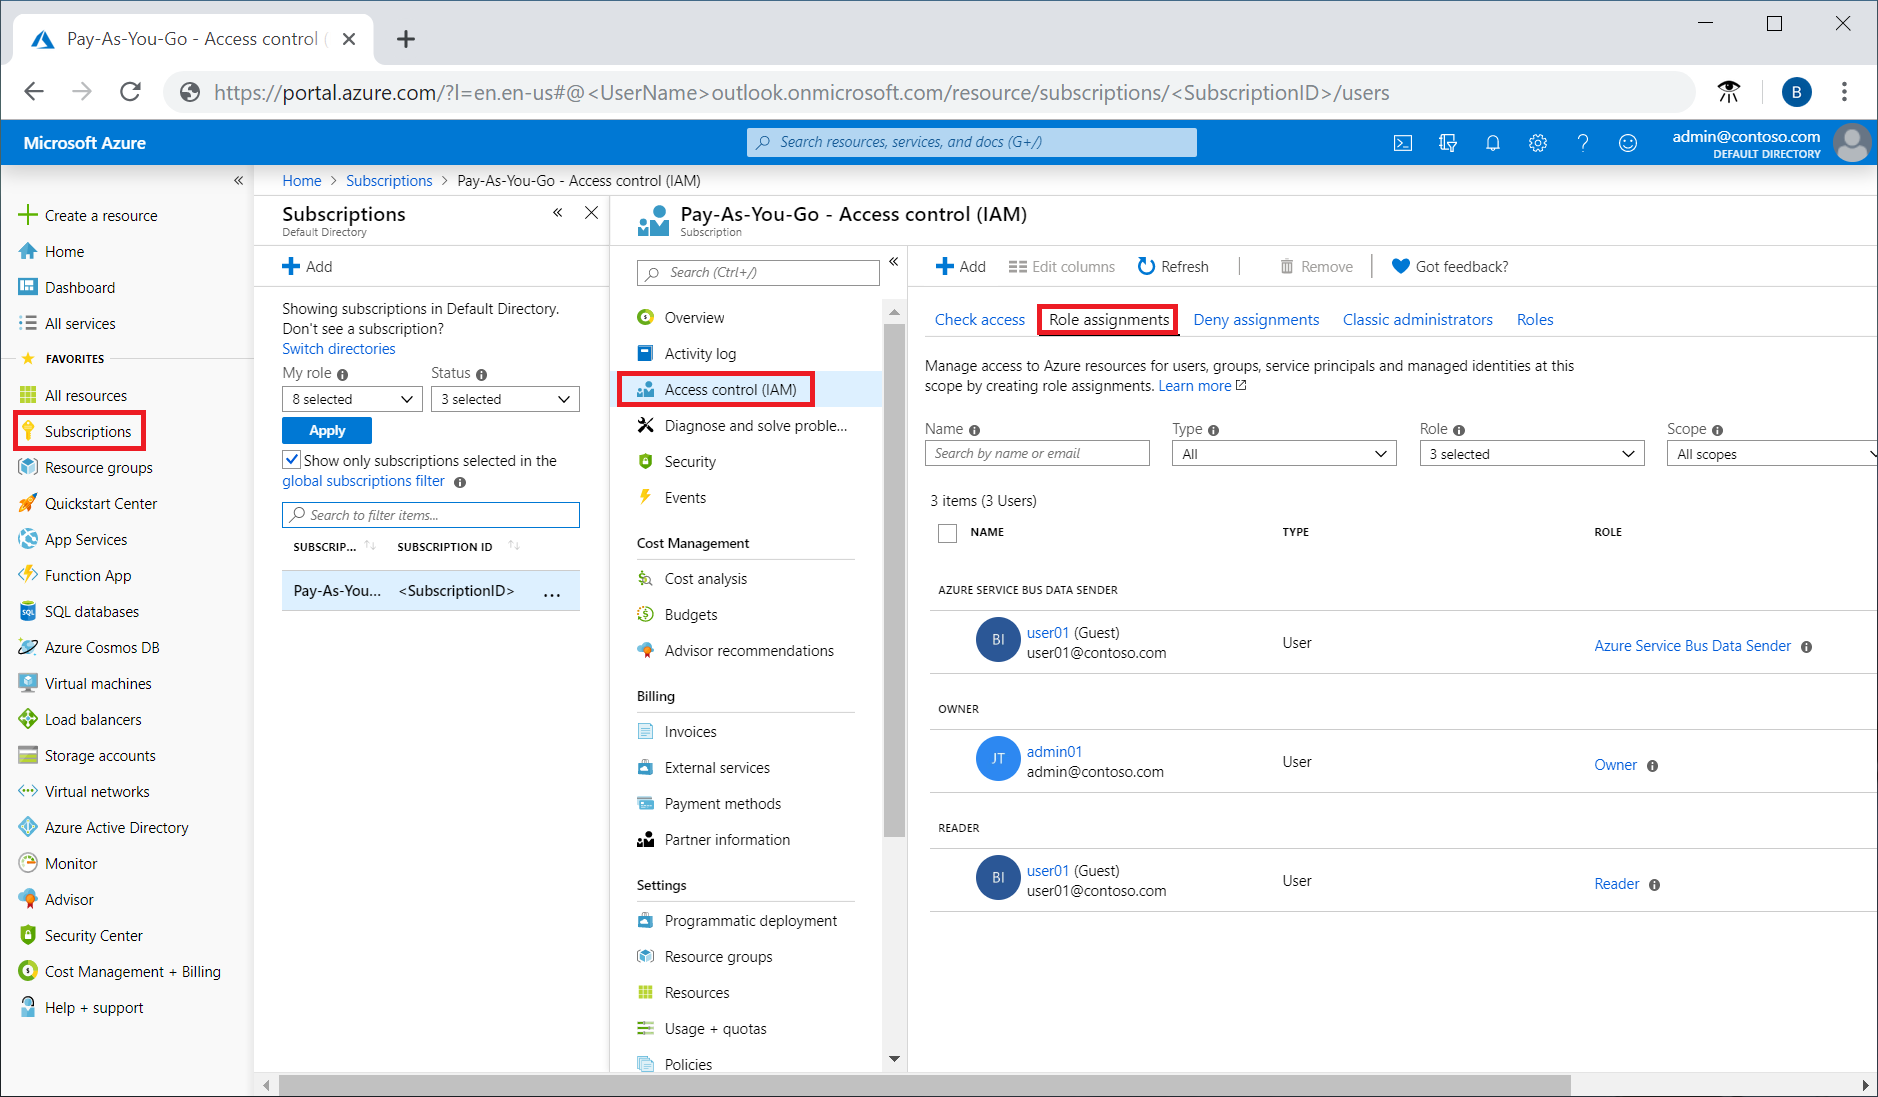
- Step 5 – Click Add > Add role assignment to open the Add role assignment pane. In case we don’t have permissions to assign roles, the option will be disabled.
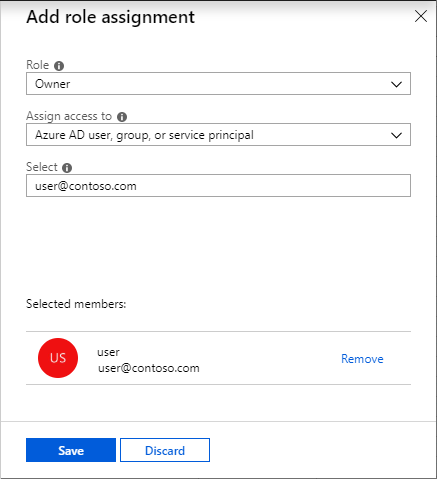
- Step 6 – In the Role drop-down list, select the Owner role.
- Step 7 – In the Select list, select a user. If we are unable to see the user in the list, we can type in the Select box to search the directory for display names and email addresses.
- Step 8 – Click Save to assign the role. After a few moments, the user is assigned the Owner role at the subscription scope.
Configure Cost Center Quotas and Tagging
When moving to Azure we must keep in mind how to report on cost. Now this is done using quotas and tagging. But before we get into quotas and tagging, there are a couple things which must be taken care of beforehand together with Azure spending limit. Let us suppose if we are using a free trial, of a Visual Studio subscription, Azure in Open or AIO, or BizSpark subscription, then the services will be disabled when all the credits are consumed. So it is extremely crucial to keep in mind if we are using any of these subscriptions. At times there will be cases when we may want to remove the spending limit. Such that we can remove a spending limit for the current billing period or indefinitely. Primarily the two main reasons why we would want to remove the spending limit are –
- We cannot have a disruption to the services or the services that we are going to use will exceed the limits such as maybe a larger virtual machine image.
- Using resource tags is a great way to create reports based on those tags
We will now discuss Microsoft Azure limits, which are also sometimes called quotas. If we want to raise the limit or quota above the default limit, then it is suggested to open an online customer support request at no charge. Such that the limits cannot be raised above the maximum limit value. In case there is no maximum limit column, the resource doesn’t have adjustable limits.
Quotas for resources in Azure resource groups are per-region accessible by the subscription, not per-subscription as the service management quotas are. We shall now consider vCPU quotas as an example. To request a quota increase with support for vCPUs, we must first decide how many vCPUs we would want to use in which regions. After which we make a specific request for Azure resource group vCPU quotas for the amounts and regions that we want. In case we need to use 30 vCPUs in West Europe to run the application there, then we specifically request 30 vCPUs in West Europe. Also the vCPU quota is not increased in any other region–only West Europe has the 30-vCPU quota.
As a result, decide what your Azure resource group quotas must be for your workload in any one region. Then request that amount in each region into which you want to deploy.
Configure Azure Subscription Policies at Azure Subscription Level
This is the first and foremost step in understanding compliance in Azure is to identify the status of the resources. This is one of the quickstart steps through to the process of creating a policy assignment to identify virtual machines that are not using managed disks.
Such that at the end of this process, we will be successfully identify virtual machines that are not using managed disks. Such that they are non-compliant with the policy assignment. Also if you don’t have an Azure subscription, create a free account before we begin.
How to Create a policy assignment?
In this quickstart, we will create a policy assignment and assign the Audit VMs that do not use managed disks policy definition.
Step 1 – Launch the Azure Policy service in the Azure portal by clicking All services, then searching for and selecting Policy.

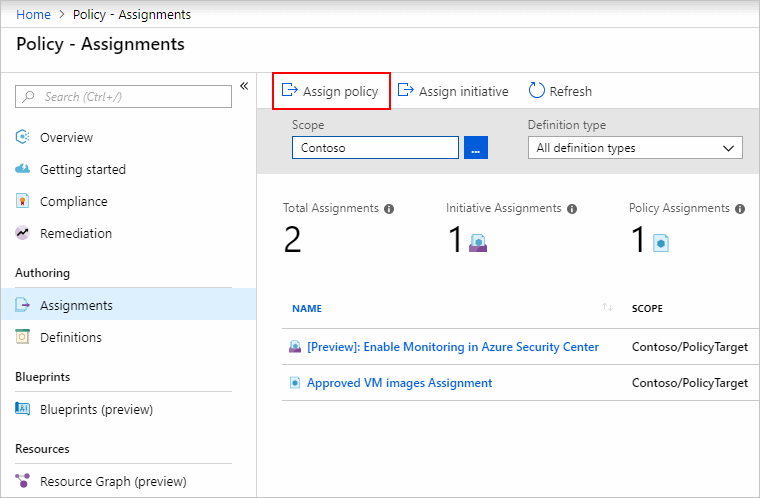
Step 2 – Select Assignments on the left side of the Azure Policy page. An assignment is a policy that has been assigned to take place within a specific scope.

Step 3 – Select Assign Policy from the top of the Policy – Assignments page.
Step 4 – On the Assign Policy page, select the Scope by clicking the ellipsis and selecting either a management group or subscription. Optionally, select a resource group. Here scope determines what resources or grouping of resources the policy assignment gets enforced on. Thereafter click Select at the bottom of the Scope page.
Step 5 – Resources can be excluded based on the Scope. Exclusions start at one level lower than the level of the Scope. Exclusions are optional, so leave it blank for now.
Step 6 – Select the Policy definition ellipsis to open the list of available definitions. Azure Policy comes with built-in policy definitions which we can use. Many built-in policy definitions are available, such like – Enforce tag and its value, Apply tag and its value, Require SQL Server version 12.0
Step 7- Search through the policy definitions list to find the Audit VMs that do not use managed disks definition. Click on that policy and click Select.

Step 8 – Assignment name is automatically populated with the policy name being selected, but we can change it. We can also add an optional description, such that the description provides details about this policy assignment. Assigned by will automatically fill based on who is logged in. This field is optional, so custom values can be entered.
Step 9 – Leave Create a Managed Identity unchecked. Such that this box must be checked when the policy or initiative includes a policy with the deployIfNotExists effect.
Step 10 – Click Assign.
How to identify non-complaint resources?
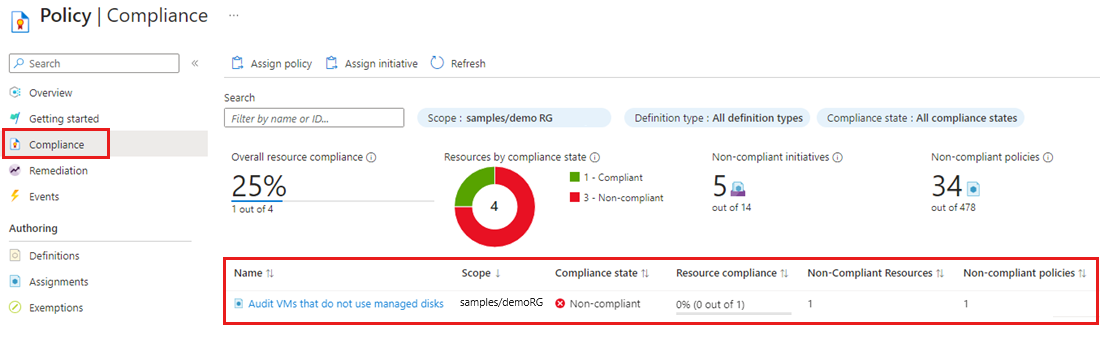
Step 1 – Select Compliance in the left side of the page. Then locate the Audit VMs that do not use managed disks policy assignment you created.
Step 2 – In case there are any existing resources that are are not compliant with this new assignment, they appear under ‘Non-compliant resources’.
Note – When a condition is evaluated against the existing resources and found true, then those resources are marked as non-compliant with the policy.
How to clean up resources?
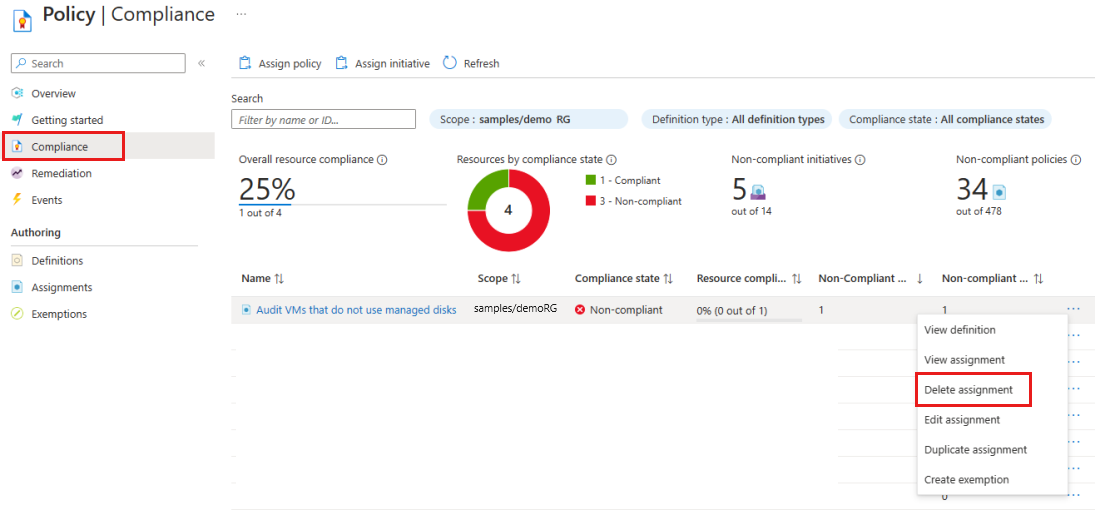
In order to remove the assignment created, given steps must be followed –
- Select Compliance (or Assignments) in the left side of the Azure Policy page and locate the Audit VMs that do not use managed disks policy assignment you created.
- Right-click the Audit VMs that do not use managed disks policy assignment and select Delete assignment