Learn to use Azure Monitor to Create, view, and manage activity log alerts
This tutorial will help you to Learn to use Azure Monitor to Create, view, and manage activity log alerts. Activity log alerts are alerts that are triggered when a new activity log event occurs that meets the alert’s requirements. These Azure resource alerts may be established with the help of an Azure Resource Manager template. In the Azure portal, they may also be created, edited, or removed.
When you create alert rules, ensure the following:
- Firstly, The subscription in the scope isn’t different from the subscription where the alert is created.
- Also, The criteria must be the level, status, caller, resource group, resource ID, or resource type event category on which the alert is configured.
- Subsequently, There’s no “anyOf” condition or nested conditions in the alert configuration JSON. Basically, only one “allOf” condition is allowed with no further “allOf” or “anyOf” conditions.
- Furthermore, When the category is “administrative,” you must specify at least one of the preceding criteria in your alert. You may not create an alert that activates every time an event is created in the activity logs.
- Finally, Alerts cannot be created for events in Alert category of activity log.
Create with the Azure portal
Use the following procedure.
- Firstly, In the Azure portal, select Monitor > Alerts.
- Then, Select New alert rule in the upper-left corner of the Alerts window.
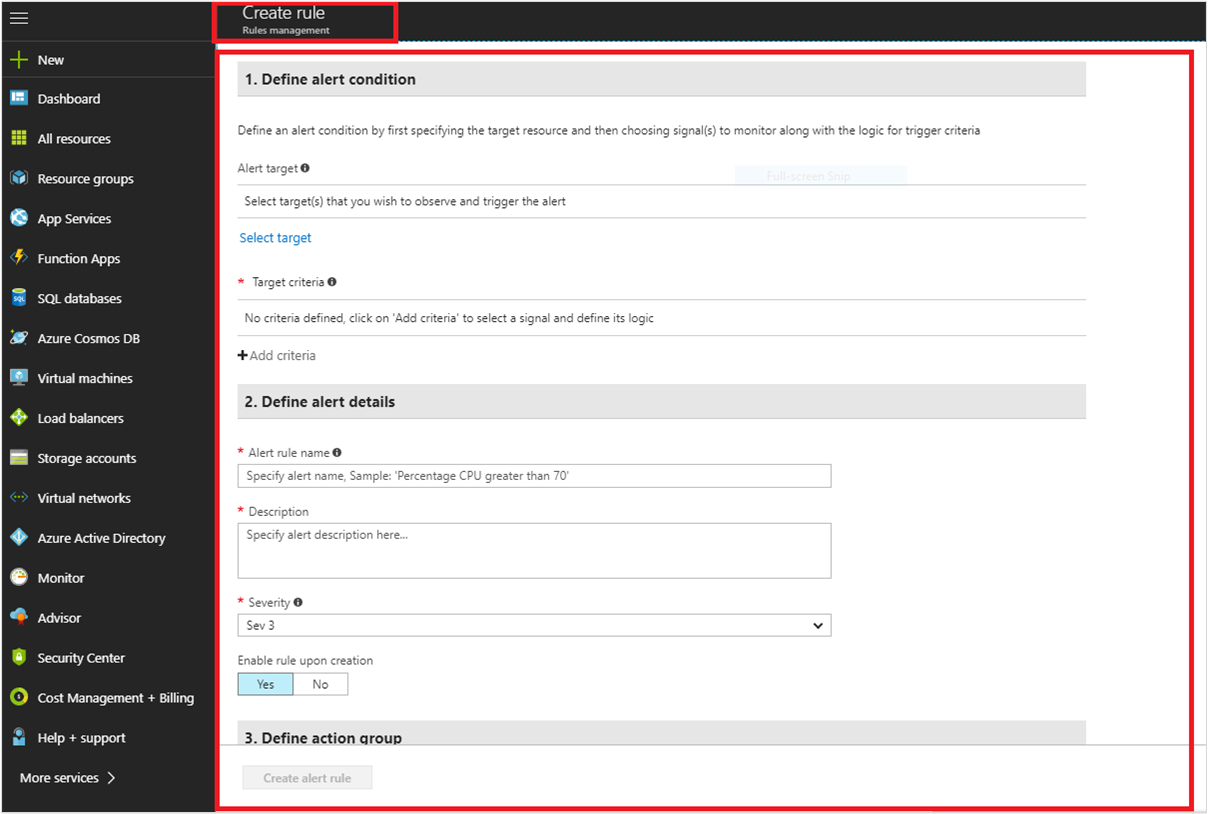
- Furthermore, Under Define alert condition, provide the following information, and select Done:
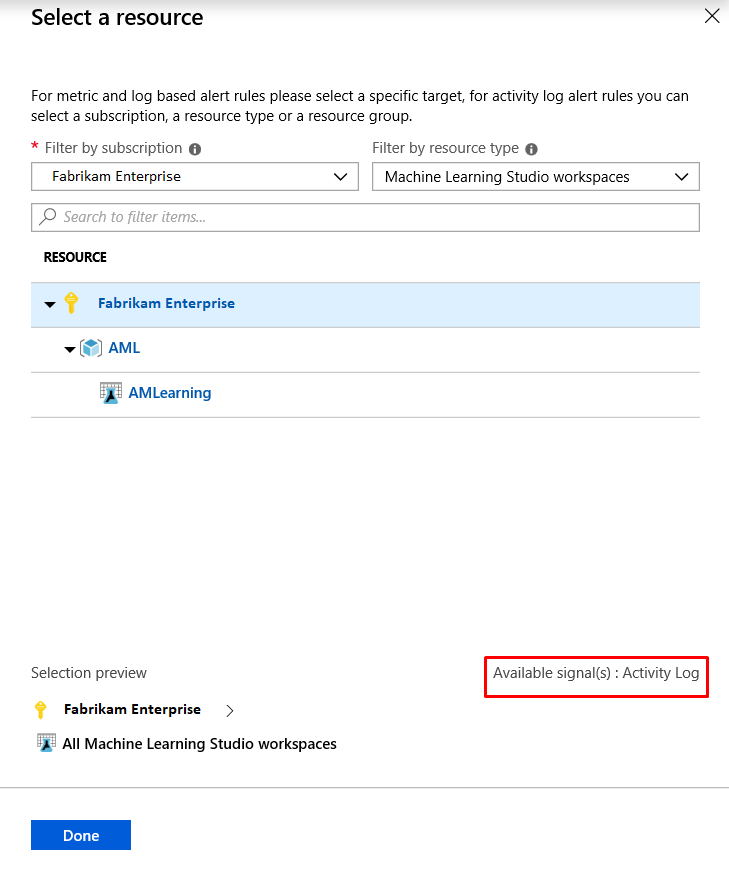
- Alert target: To view and select the target for the new alert, use Filter by subscription / Filter by resource type. Select the resource or resource group from the list displayed.
Alert target sample view
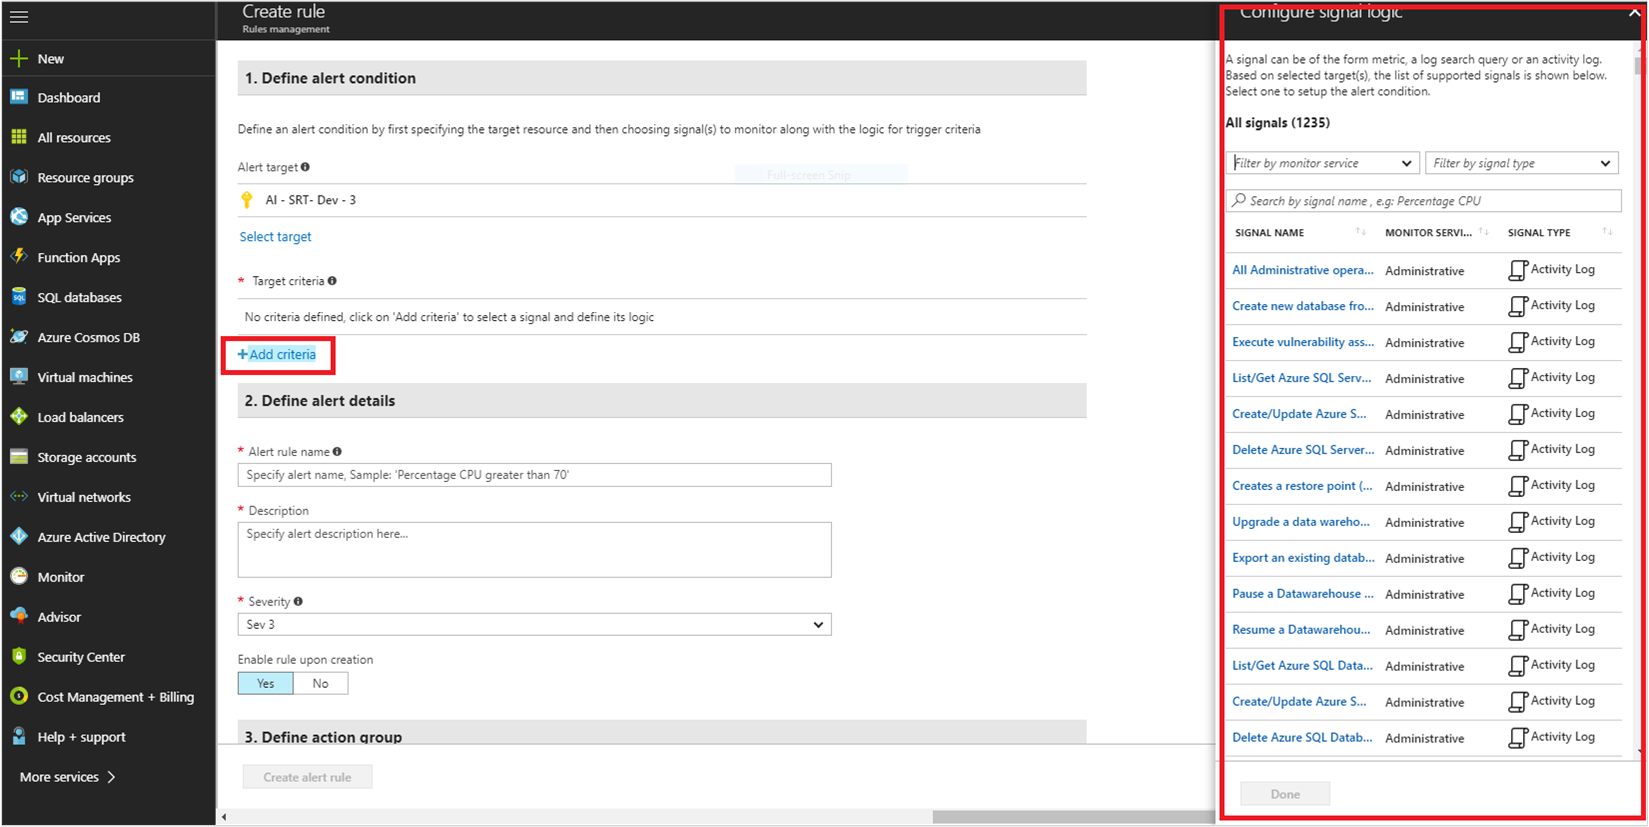
- Firstly, Under Target criteria, select Add criteria. All available signals for the target are displayed, which includes those from various categories of Activity Log. The category name is appended to the Monitor Service name.
- Secondly, Select the signal from the list displayed of various operations possible for the type Activity Log.You can select the log history timeline and the corresponding alert logic for this target signal:
Add criteria screen
- Also, History time: Events available for the selected operation can be plotted over the last 6, 12, or 24 hours or over the last week.
- Subsequently, Alert logic:
- Event level: The severity level of the event: Verbose, Informational, Warning, Error, or Critical.
- Status: The status of the event: Started, Failed, or Succeeded.
- Event initiated by: Also known as the caller. The email address or Azure Active Directory identifier of the user who performed the operation.
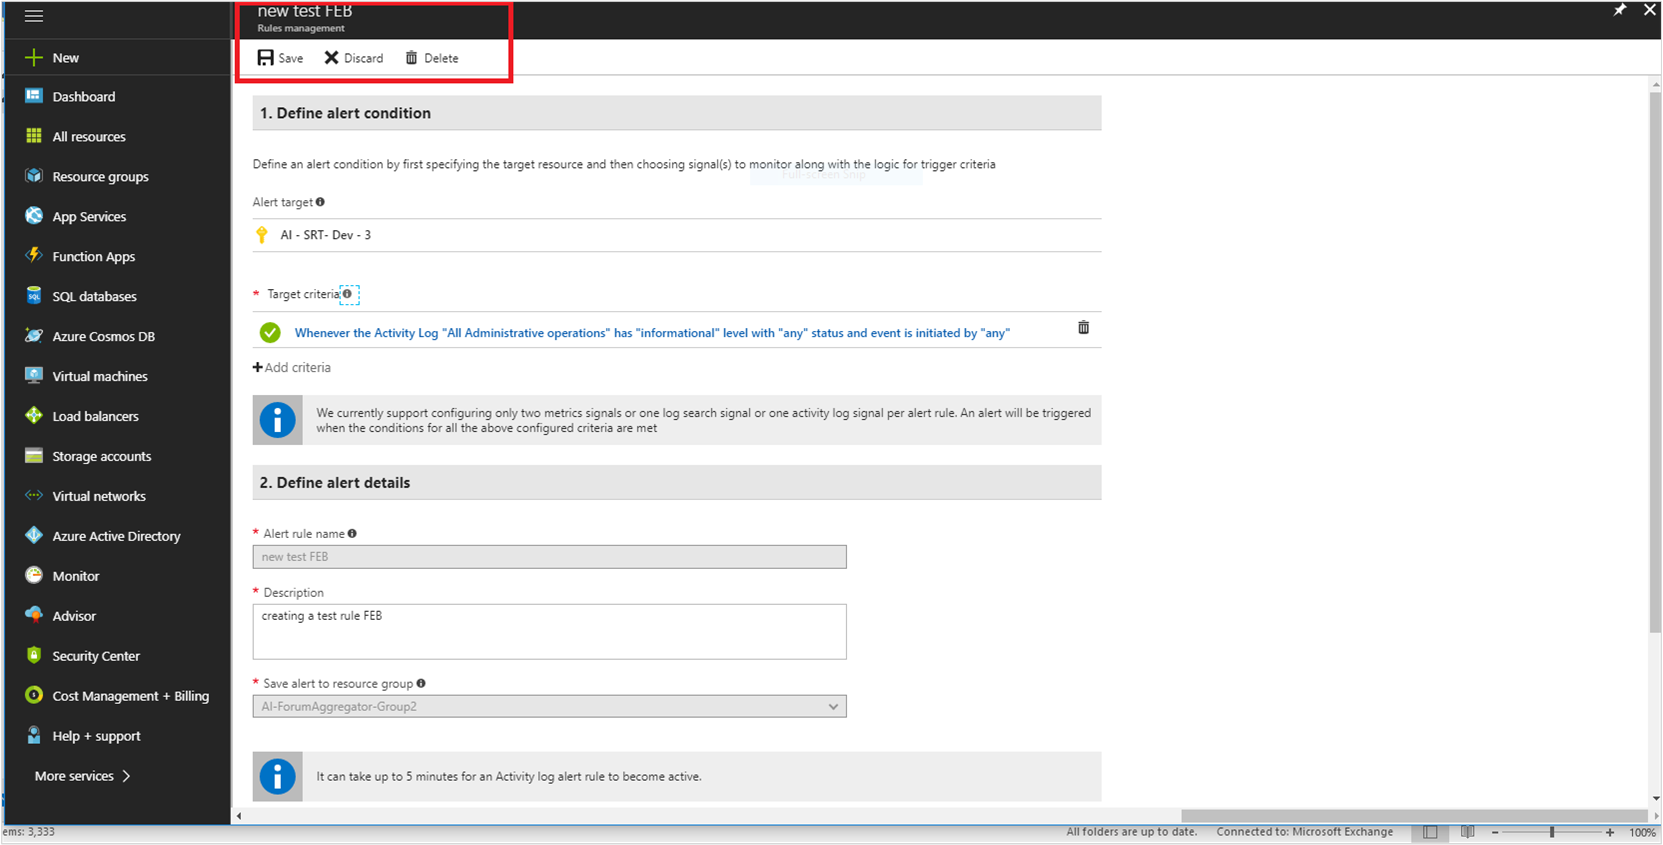
- Under Define alert details, provide the following details:
- Alert rule name: The name for the new alert rule.
- Description: The description for the new alert rule.
- Save alert to resource group: Select the resource group where you want to save this new rule.
- Then, under Action group, select the action group you wish to attach to this new alert rule from the drop-down option. Build a new action group and assign it to the new rule, or create a new action group and attach it to the new rule. Select + New group to establish a new group.
- After this, click Yes for the Enable rule upon creation option to enable the rules after they’ve been created.
- Select Create alert rule as well. Then, a confirmation message shows in the upper-right corner of the window once the new alert rule for the activity log is generated.
- However, a rule can be enabled, disabled, edited, or deleted.
- Lastly, exploring or filtering occurrences via the Azure portal’s activity log provides a simple comparison for understanding situations on which alert rules may be constructed. You may filter or discover the required event on the Azure Monitor – Activity log screen, and then use the Add activity log alert button to generate an alert. Then repeat steps 4 through 7 as directed earlier.
View and manage in the Azure portal
- Firstly, In the Azure portal, select Monitor > Alerts. Select Manage alert rules in the upper-left corner of the window.

- After that, The list of available rules appears.
- Then, Search for the activity log rule to modify.
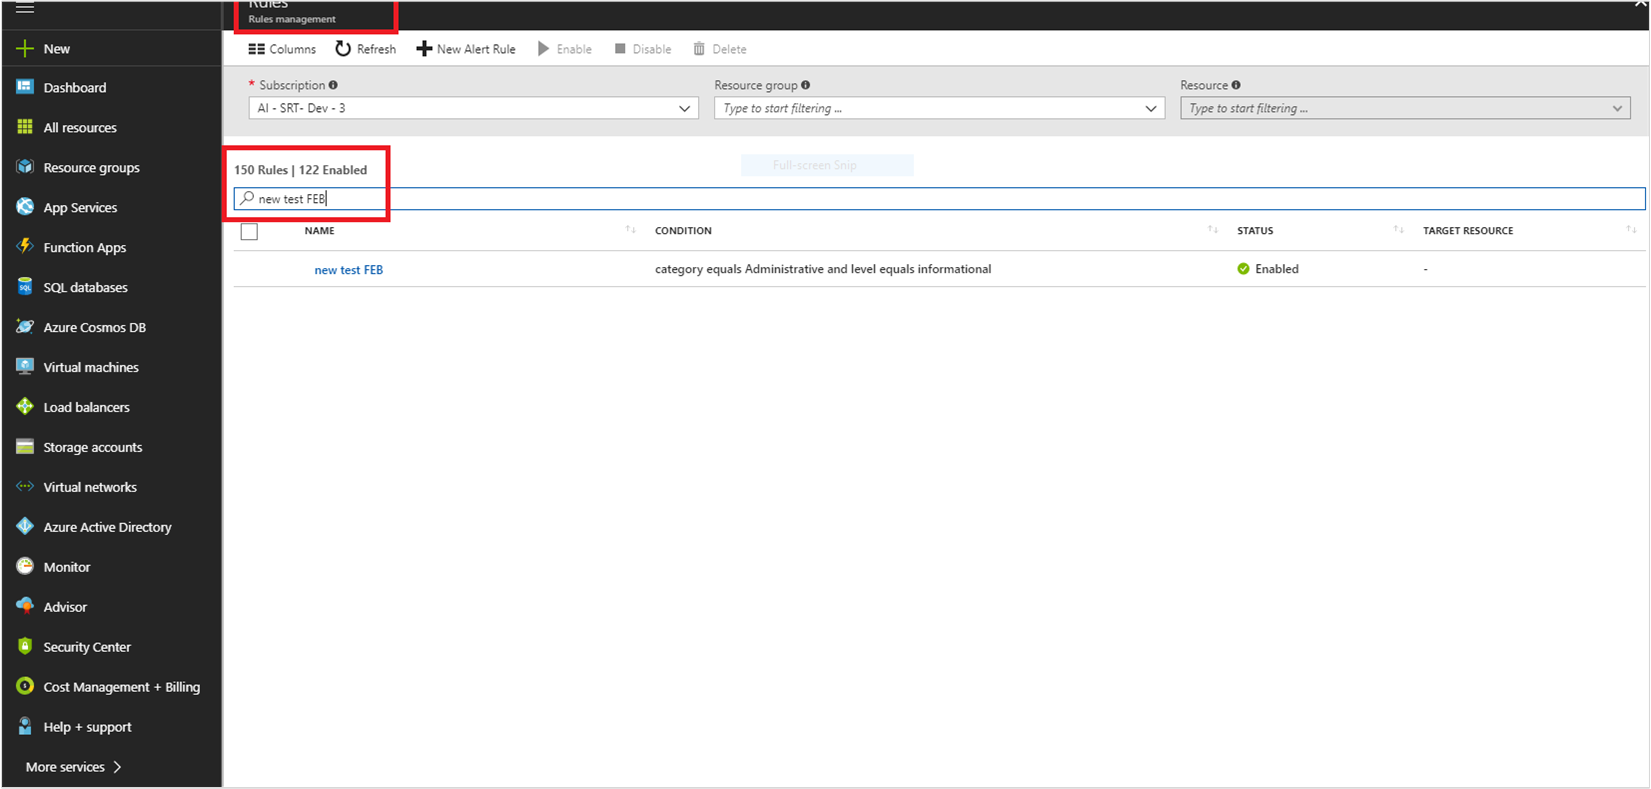
- Furthermore, You can use the available filters, Subscription, Resource group, Resource, Signal type, or Status, to find the activity rule that you want to edit. NoteYou can edit only Description, Target criteria, and Action groups.
- Also, Select the rule, and double-click to edit the rule options. Make the required changes, and then select Save.
- Lastly, You can enable, disable, or delete a rule. Select the appropriate option at the top of the window after you select the rule as described in step 2.

Reference documentation – Create, view, and manage activity log alerts by using Azure Monitor